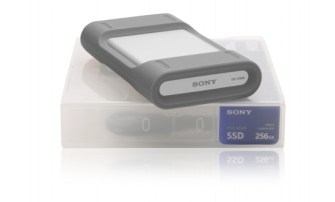
Hard drives are boring! But they are now a very important part of life in the world of TV production. I get through dozens and dozens of hard drives every year and as the drives I am using may hold footage that can never be replaced it’s important that they are as reliable as possible. For a while now I have been using a number of Sony hard drives and SSD’s. These drives are built for portable video applications and my drives have been all over the world from hot, humid Asia to the bitter cold of Arctic Norway. They have never let me down. Each drive comes in a nice case that resembles a video cassette case so that you can stack them neatly on a shelf. No more tatty, crumpling cardboard boxes. In addition the outer case protects the drive in transit, plus each case contains a USB3 lead and a firewire 800 cable, so you don’t need to search around for the cables.
The drives themselves are built in to a tough but very lightweight enclosure with soft rubber bumpers at each end. There are little notches and bumps in the bumpers that interlock if you stack the drives one on top of another, say on the desk of your edit suite. Not only do the rubber bumpers protect the drives from knocks and bumps, but they also incorporate flaps that cover the USB3 and Firewire 800 sockets. The drives meet the MIL-STD-810G standard and when the connector covers are closed are dust proof to IP5X and splash proof to IP4X. The HDD is built to withstand being dropped from 2m and the SSD from 2.3m. I have to say that my 256GB SSD has been dropped a few times now and is still going strong.
Sony are so confident of the quality of their drives that they offer a 3 year warranty and after almost a year on the market, I have been told that so far not one single drive has had to be replaced!
USB3 is backwards compatible with USB2, so if you don’t have USB3 you can just treat the drive as a USB2 drive. If you are a Mac user with an older Mac then you are well catered for with a pair of Firewire 800 ports on the rear of each drive.
The 256GB SSD is extremely fast and this drive has become my go-to drive for on the road use as I can easily edit 4K material stored on this drive and it appears to be really tough. I often ship my SSD along with my hold baggage when I’m flying, it’s been bashed about on snow scooters and used to edit from while bouncing down dirt track roads. I use the 500GB and 1TB Hard drives for general purpose storage and HD editing.
Fed up with carrying large or bulky grey cards that get bent and creased or get dirty and fade? Why not try one of the great Lastolite pop up grey cards? I have the 30cm 18% grey pop-up grey card and it works really well. When folded it’s only about 12cm across so takes no space at all. It comes in a handy zip up case. This is so much easier to carry and transport than traditional ridged cards. The back of the target is 90% white. Both the grey and white targets appear to be very accurate and the matte surface of the grey card helps eliminate hot spots and reflections. There is a cross hair style focussing target in the center of each side if you need to check focus. They come in different sizes, if you want a larger one there are also 50cm and 75cm versions plus there is even an underwater version. Do note that they come in both 18% and 12% shades of grey. Really handy if shooting with SLog or for setting white balance. If you are working with a video camera you want the 18% grey version, but you may need the 12% version if calibrating a light meter etc. Simple, low cost item that works really well. Recommended!
My old Metabones MK1 adapter is not suitable for full frame lenses on the new Sony A7s. So in anticipation of the arrival of my A7s I ordered a cheap CommLite full frame autofocus ready adapter on ebay. This adapter (CN-EF-NEX) was only $90 USD so I thought I would give it a try, much cheaper than the metabones.
To be honest I wasn’t expecting much, but now I have the adapter in my hands I am pleasantly surprised. It appears well made and very solid. It even carries a CE mark. It works just fine on my NEX5N and FS700. On the NEX5N I have working autofocus. If the lens has image stabilisation this works too. I have tried a wide variety of Sigma and Tamron Canon EF lenses with it and they all work. Even my new Tamron 16-300mm works with this adapter, this lens doesn’t work with a number of other adapter.
Autofocus is a little slow, especially if the light is bad. Having not used the MK3 Metabones I don’t know how this compares but certainly this adapter works and is quite useable. It’s said to be compatible with full frame lenses on the A7, but as yet I have not been able to test this. The little mounting post is easily and quickly removable, but a real boon on the NEX5N with bigger lenses. For the price, you can’t go far wrong, really quite impressed considering how little it cost.
I was lucky enough to get to spend some time with a pre-production Sony PXW-X180 here in Singapore. I put it through it’s paces shooting around the botanical gardens, China town and Clarke Quay.
For a 1/3″ camcorder it produces a remarkably good image. Really low noise, very clean images, much better than anything I have seen from any other 1/3″ camcorder. The 25x zoom is impressive, the variable ND filter is very clever and it might seem trivial but the rear viewfinder was very nice. It’s a very high resolution OLED, much, much better than the LCOS EVF’s found on many other models.
The zoom lens has proper manual calibrated controls with end stops, much like a PMW-200. The ability to use a multitude of codecs is fantastic and perhaps better still is the fact that you can use SDXC cards for XDACM or XAVC at up to 50Mb/s, so even XDCAM HD422 can be recorded on this low cost media. This will be great for news or other situations where you need to hand off your media at the end of the shoot.
A more in depth review will follow soon, but for now here’s the video. Un-graded, un touched, straight from the camera footage. Looks very nice if you ask me.
So we all like to dress our cameras up with all kinds of accessories. One of the most common being a Matte Box. So, what’s a matte box for? Well the obvious thing is to hold filters for creating an artistic look, for colour correction or light level reduction. But the other very important role is to block unwanted light. I’ll take a brief look at filters later in the article.
We all know that if you shoot into the sun or a bright light source you might get a lens flare in the shot. You know, those sometimes pretty rings of light that can look cool on a good day or ruin a shot on another. But the other thing you can get is lens flare. So whats the difference between “a lens flare” and “lens flare”.
Well, lens flare is when light bounces around inside the lens between the glass elements in an uncontrolled way, some of this unfocussed light making it’s way to the sensor where it spills and bleeds into darker parts of the image reducing contrast and raising the black level. Whenever you reduce the contrast in an image it will appear softer, so to get the sharpest and highest resolution images, we really want to keep as much unwanted light out of the lens as possible. In addition some cameras can suffer from other image artefacts when off-axis light finds it’s way to the edges of the sensor. So anything we can do to stop this happening is obviously a good thing.
Higher end cameras will often have an electronic flare adjustment that pulls down the cameras black level when the overall scene light level gets high. The idea is that this helps compensate for the almost inevitable flare that will occur in the lens when a lot of light enters the lens. This flare setting is normally adjusted on a lens by lens basis as different lenses will flare by different amounts. As lenses get older, very often vapour from the oils and materials used in the construction of the lens will coat the internal glass surfaces with a very fine haze that increases flare. This can make an older lens more prone to flare and is one reason why getting an older but expensive lenses professionally cleaned is often worth the expense. The other thing you can do is to make be sure to use a good matte box or lens shade to prevent excess light from entering the lens.
A flexible donut or “nun’s Knikers” on the rear of the Matte Box keeps out light from the rear of the Matte Box.
Don’t use a matte box that is excessively large. You want a Matte Box big enough to fit your lenses and hold the size of filters you need. It also needs to be wide enough to allow you to use the aspect ratios you want to shoot in, but no larger. If it’s too big, the shade/hood will be less effective. Make use of an adjustable top flag and side flags to keep out as much light as possible. Looking through the cameras viewfinder bring the flags in close to the lens until they start to creep into the edges of your shot, then back them off just a little bit.
A quick release catch on the Alphatron Matte Box allows you to quickly and easily change the donut or nun’s knickers.
Also make sure your rear donut or other light seal is doing it’s job and keeping out the light. A flexible bellows or “nun’s knickers” can be used to allow you to move the matte box forwards so that the lens sits deeper in the nice dark recess of the matte box. Light entering the Matte box from the rear will cause reflections off the back of any filters used, especially any ND filters or glimmer glass filters and this can easily spoil a shot.
A Matte Box can be attached to the lens directly via a clamp ring that clamps around the end of the lens or more commonly attached to rods or bars connected to the bottom of the camera. If you only ever use one lens then a lens clamp might work well for you, but if you swap and change lenses regularly then a rod or rail mount is often easier as a flexible donut will fit a multitude of lenses. The donut on the Alphatron Matte Box will fit a wide range of lenses and the neoprene insert can easily be exchanged or replaced simply by unscrewing the two halves of the donut holder. The neoprene is sandwiched between the two halves and just drops out once released.
Eyebrows on the Alphatron Matte box keeping the sun out of the lens.
Some Matte Boxes like the Alphatron one shown here have small extra “eyebrows”. These are like mini flags that can be adjusted to provide extra shade for the lens. In the picture you can see how the shadow from the top eyebrow is keeping stray and unwanted light from falling on the lens. This will help minimise flare and preserve contrast in the images. It’s a small thing but it can make a big difference. Eyebrows and flags also keep light out of the matte box itself and help prevent reflections between any filters that you might use and the lens itself.
The Alphatron Matte Box can be fitted with a quick release swing away adapter to make lens changes quick and easy.
If you’re using prime lenses then you will probably need to change lenses regularly. A great time saver is the use of a swing-away adapter. The Alphatron Matte Box that I use has an optional quick release swing away mount option. By twisting a single lever the Matte Box opens up and swings away from the lens. This gives you easy access to the lens for cleaning or for a quick lens change without having to remove the Matte Box. When shooting out on location this is a big deal as there’s never anywhere clean to put your Matte Box when you want to do a lens swap.
The Alphatron Matte Box has one fixed filter tray and one rotating tray.
Matte boxes can have both fixed and rotating filter trays or a combination of the two. Fixed trays are fine for ND filters and most diffusion filters. For graduated filters a rotating tray is preferable and for polarising filters a rotating tray is essential. The Alphatron Matte Box here has one fixed tray and one rotating tray. So I can use the fixed tray for any ND filters and then the rotating tray for grads or polarisers. I very nice feature of the Alphatron is a little recess in the very front of the sun shade and a little locking tab that allows you to put a safety glass in place in front of any filters to protect you filters and lens. This is very handy especially if your shooting something that could possibly splash on your expensive filters and damage the coatings.
So what filters should you get for your nice new Matte Box? First of all do be prepared to spend a little bit of money to get good quality filters. Filters can be plastic, resin or glass. Optical grade plastics and resins can make very good filters, but they tend to be prone to collecting dust through static electricity and they scratch easily. In addition if left in a hot car they can distort and warp. But, plastic and resin filters are light weight and normally a lot cheaper than the glass equivalent. Better quality filters will have anti-reflective coatings. A good quick test of the quality of any filter is to use a long focal length lens or zoomed-in zoom lens to check for distortions or focus issues introduced by the filter. You might not notice this at wide angles or zoomed out. So do check at longer focal lengths.
Good brands include Tiffen, Formatt and Schneider. These won’t be the cheapest on the market, but the quality is consistently good. Filters come in different sizes, the most common is the 4×4 or 4″ by 4″. For longer focal lengths these are fine, but if you want to shoot at wider angles you may find that 4×4’s are not wide enough. The next size up is the 4″x 5″ but the next commonly used size is the 4″ x 5.65″ which is close to the old 4:3 TV aspect ratio. The extra width really helps when shooting wider shots in 16:9.
My most commonly used filters are ND filters. These help manage light when it’s too bright allowing you to use a smaller aperture to gain a shallower depth of field. If your using a CMOS camera you should use IR ND filters that cut not only the visible light but also infra red light that most CMOS cameras are sensitive to.
Next is a polarising filter. A circular polariser is great for reducing or controlling reflections from windows, cars etc, it’s also good for enhancing the contrast in clouds and the sky making the sky a richer, deeper blue. When using a polariser it needs to go in a rotating tray so you can turn it when composing your shot to alter the polarising effect.
Graduated ND filters are also useful to help deal with excessively bright sky. The top of the filter is a ND filter or coloured filter and the bottom is normally clear. By sliding the filter up and down within the matte box you can alter level where the brightness reduction takes place. A tobacco or orange coloured graduated filter can be used to create or enhance a sunset type look. Just watch for the graduation crossing through foreground objects in the scene which can give the game away and look odd.
I’ve been using various shoulder mounts for my F5 over the last year. They have all worked well for me. But at CabSat in Dubai I was lent a Vocas shoulder mount and handles to use with one of the F55’s I was using on the Sony booth.
Now, I’ve come across Vocas many, many times before, they are not new players in this arena and thier products have always looked to be well thought out and well made, but when I put the F55 rig on my shoulder and my hands wrapped around the beautifully carved wooden handles I just fell in love with it. When you use a camera day-in, day-out, how it feels in your hands or on your shoulder is really important and it’s amazing how a great shoulder rig can make using a camera a much more enjoyable experience. A bad rig will make using the camera a miserable chore.
Another view of my Vocas F5 rig.
So what is it about the Vocas rig I like so much? First of all it’s a fully modular system so you can buy just the bits you want or need. Many of the parts will work with other systems. Initially I just got the shoulder mount and hand grips, but after using these for a short while I realised I also wanted to replace the existing top plate and somewhat uncomfortable carry handle that I had been using with the Vocas one, so I added the top cheese plate and carry handle to my rig this week.
One of the delightful to hold Vocas wooden hand grips.
The thing that got my attention when I borrowed the rig back in March was the comfort of the handles. The carved wooden hand grips were developed in association with Cam-A-Lot, one of the larger high end cinematography rental houses in Europe. So they know their stuff and know what camera operators want. The design is simple but beautifully executed, a carefully shaped handgrip with an Arri style rosette. The top of the grip has a notch/extension that your thumb wraps around making your grip really secure, this won’t slip out of your hands by mistake. You don’t have to hang on to these handles, your grip is secure even with very light pressure. Your fingers wrap around smooth grooves in the front of the grip and it’s hard to explain, but it just “feels right” and wood is much nicer to hold than plastic or rubber (Vocas also make leather hand grips).
The hand grips are then attached to some extension arms and these arms then attach to the base plate. Again the design of the arms is really simple, but sometimes simple is really effective and these arms are really really light, yet very, very stiff, the quality and finish of the alloy used is excellent. You can join any Vocas arm to any other Vocas arm to create different angles and lengths and there is a range of different arms of various lengths and offsets to choose from. I’ve ended up with one short straight arm and one longer offset arm. Using these two arms I can configure the rig several ways.
A single Vocas hand grip on a short arm used to create an ENG style rig.
Using just the short arm I can place the right hand grip up alongside the lens for a very secure and very comfortable single handed ENG style shooting rig. There is no need for the strap that you have on the hand grip of an ENG lens. The wooden grips are so easy to grasp and so secure that you just don’t need that extra strap around the back of your hand. I could use the longer offset arm, mounted on the right side and offset to the left to place the hand grip under the lens for an alternative single handed rig.
Two handed configuration with two Vocas grips and arms.
By using the short arm on the right, angled down and the longer offset arm on the right angled down I can create a two handed rig. One thing I did find is that if you mount the single arm sections that I have on the rosettes on the shoulder mount the handles are quite close to your body. If you prefer your hand grips a little further away from your body you have a couple of options. Either double up on the arms joining two together to make a longer articulated arm, or do as I did and add the 15mm rail bracket that has a rosette at each end to mount the handles from the rods (Vocas also do a 19mm system). The rail bracket has a very neat quick release catch, so it’s a breeze to fit.
Underside of the Vocas PMW-F55 base plate.
But what about the shoulder mount that all this is hanging from? The one I have is the Vocas standard PMW-F5 and F55 base plate. Now, this doesn’t look anything special, but looks can be deceiving. This very comfortable base plate weighs only 600g. That’s quite a lot lighter than my previous base plates and lighter than the Sony equivalent. It’s a VCT-14 compatible plate so snaps in and out of the very common Sony quick release plate quickly and easily. If you don’t want VCT-14 compatibility the silver part with the VCT wedge in the picture above can be replaced with a flat plate for mounting directly on to tripods or other mounting systems.
The base plate can be slid forwards and backwards relative to the camera body to help you achieve perfect balance. The mounting screws run in a slot with deep shoulders that make the plate very ridged and secure. The comfortable soft shoulder pad can also be moved forwards and backwards within the base plate giving you further flexibility. On the sides of the base plate are a pair of Arri style rosettes and at both the front and rear there are holes for the usual 15mm rods.
Moving on to the top of the camera….. The comfort of the carry handle is so important, especially when the camera is rigged up with weighty accessories and heavy batteries. The last thing you want is blisters on your hands from a bad handle. So after experiencing the comfort of the hand grips I decided to add the Vocas top cheese plate and handle.
The Vocas handle and top cheese plate for the F5 and F55.
The handle has a very nice wooden grip insert which makes the camera very comfortable to carry. You also get a pair of posts to take a standard Sony shoulder strap. Oh Joy! Sony take note: please include provision for a shoulder strap on all your cameras, they are very useful! The top cheese plate is well… a cheese plate with lots of mounting holes for all your accessories. It’s very slightly raised from the top of the camera body to avoid inhibiting any cooling of the camera. The handle takes a mounting bush for the F5/F55 viewfinder that can be placed either at the front of the handle or on the rear. This is handy for film style shooting from behind the camera rather than to the side. You can also use a pair of 15mm rods attached to the handle that run above your lens if you need to mount a Matte Box from above or add extra items like follow focus motors. Integrated into the handle is a pair of cold shoes for accessories such as a camera light. If you have a very heavy lens, like perhaps the new Canon 17-120mm or a Cabrio then the handle can be mounted facing forwards to get better balance.
Vocas side cheese plate that protects the viewfinder connector.
The last part of the kit is the optional side cheese plate. This serves two purposes. The main one for me is to protect the rather vulnerable viewfinder connector that sticks straight out from the side of the camera body. With a list price of just 95 Euros, this is a really wise investment (if you don’t use a cheese plate etc why not get one of my plastic viewfinder connector protectors that I sell on ebay). The other purpose is to provide yet more 1/4″ threaded mounting points on the side of the camera. I think it also looks cool! A small observation is that the rather flimsy connector still protrudes beyond the cheese plate by about 15mm, so bash it into a door frame walking through the door way and you could still damage the end of the connector. So I’m going to add a 1/4″ bolt to one of the threaded holes in front of the connector. This will stick out a bit and further protect the connector from damage.
So while a shoulder rig might not be the most interesting part of your camera kit, it is one of the most important. It’s what connects you to your camera, or what connects your camera to your tripod. If it isn’t comfortable, your camera will feel awkward. A bad rig might compromise your shots or shooting style, so getting the right rig is important and I can highly recommend Vocas as a supplier of shoulder rigs and associated support equipment. If you get the opportunity, do try the wooden hand grips. They are a bit more expensive than most plastic or rubber based hand grips, but they are just so nice to hold. Using this rig is a delight, I love my PMW-F5 and this rig makes it very easy and comfortable to use.
FYI. The Matte Box is one of the new Alphatron Matte Boxes. A review of which will be on-line very soon. It’s nice! The follow focus is an Alphatron ProPull, a great little compact follow focus with adjustable end stops for fast focus pulls. The lens is a Samyang Cine Prime. Based on a DSLR lens but with pitch gears and smooth aperture adjustment. Great image quality and T1.5.
I’m a big fan of TV Logics monitors. I’ve been using a TV Logic 056W as my primary on camera monitor for some time and it’s been a good solid and reliable workhorse. One of the great things about it is it’s weight, it’s extremely light, which makes it very simple to mount on the camera.
TV Logic have now released a new monitor, very similar to the 056W. The new monitor is just a shade smaller at 5.5″ but now features a full 8 bit 1920 x 1080 resolution panel. At first I was sceptical that I would see any benefit from this high resolution on such a small screen, but I have been pleasantly surprised, I can see noticeably more detail in my images thanks to the screens higher resolution. This makes focus checking easier, especially when shooting in 4K.
TV Logics VFM-058W showing waveform display.
The 058W’s feature set is very similar to the 056W. Inputs are 3G HDSDI and HDMI. There is also an HDMI out, very handy for feeding another monitor if you only have a single HDMI or SDI out on the camera. There are the usual Waveform and Vectorscope displays for exposure control along side luma zone (a kind of false colour) and over range error checking . There is coloured peaking (focus assist) to help with critical focus as well as an always handy zoom mode that allows you to zoom in to the picture for focus checking. There are various underscan/overscan viewing modes along with all the usual aspect ratio markers and safe area overlays.
DSLR shooters are also taken care of thanks to the monitors ability to take the output from a DSLR and scale the image so that it fills the screen.
One feature I really like is the way the monitors 3 assignable function buttons work. Instead of having to go into the menus to assign your desired functions to the buttons, all you have to do is press and hold the button. After a couple of seconds a drop down menu appears with all the available options, then you simply scroll to the function you want with the scroll wheel and press the wheel to select. It’s fast and simple to change the assigned function as your needs change.
As well as providing a sharp and clear image, the monitors colours are also nice and accurate. You can even use TV-Logics calibration utility and a measuring probe to full calibrate the display and save the calibration settings as a LUT in the monitor. I’d really like to investigate the monitors LUT capabilities as this could prove very useful when shooting with Log.
There is a built in speaker for audio monitoring as well as a 3.5mm headphone jack. If you want you can monitor your audio levels via on screen audio meters.
The 058W is not quite as light as the 056W as it has a tough looking magnesium alloy housing, but it’s still nice and lightweight. It also lacks the analog input that the 056W has, although to be honest I’ve never used that feature on my 056W. The higher resolution screen is very nice, the new button layout (all along the top of the monitor) is a big improvement over the 056W and overall this monitor feels a little more robust (although my 056W has been all over the world with anything breaking). With 14″ threads on all 4 sides, mounting is easy, so the VFM-058W will now replace my 056W as my on camera monitor.
I decided to review both of these cameras together. Why? Well because many of the people I have met recently have been looking at both of these cameras as possible options. The price of both of these cameras is very similar, yet both cameras are actually quite different. On the one hand the Z100 offers 4K and a 20x zoom lens while the PMW-300 offers broadcast quality HD in a sort of shoulder mount design. Which to choose?
Sony PMW-300
To start with both cameras are well built. They both feel very solid and well put together. I didn’t notice any creaks or flexing of either camera body. They both feel like professional pieces of kit that will withstand the bumps and knocks that they will almost certainly get. They are finished with a nice matt black finish. The Z100 appears to have a primarily plastic shell while the PMW-300 has a magnesium alloy shell. One small criticism here is that this has a slightly rough finish and is prone to marking from finger nails etc. But the marks can simply be wiped off. Of the two the PMW-300 feels just a little more substantial. Compared to the Sony PMW-200 I feel that both of these cameras feel more substantial and better built.
Sony PXW-Z100 4K/HD Camcorder.
The PXW-Z100 design is very conventional. A handheld camera with a flip out LCD on the top of the handle and a second small drumstick style view finder on the rear of the handle.
The PMW-300 is rather different. It’s a little larger than most handycam’s, a little heavier too at almost 4kg (9lbs) and instead of a flip out LCD display features a large colour monocular viewfinder. The viewfinder is on an articulated arm that slides fore and aft on a sliding rail. The rail can be adjusted left right by about 30mm to give a small degree of left/right adjustment.
The hard to get at release for the left/right viewfinder adjustment.
However I found it really fiddly and tricky to get at the release leaver for the left right adjustment. The viewfinder can easily be detached for travel or storage. The plug for the viewfinder goes into a recess in the cameras body and is then covered by a plastic plate that stops it pulling out.
Broken plastic cover for the viewfinder connector socket.
I used the camera for a dealer event. By the end of the day at the dealer event the little plastic cover had been broken off. It’s attached to the camera via a thumb screw and a very thin piece of plastic. I suspect a lot of these will get broken. It doesn’t really affect the operation of the camera, but without the cover there is nothing to prevent the viewfinder plug from being pulled out.
The other major design feature of the PMW-300 is that the lens in interchangeable. There are two kit lenses to choose from plus adapters that will allow the use of conventional 1/2″ and 2/3″ ENG style zoom lenses. More on the lenses in a bit.
THE VIEWFINDERS:
Te PXW-Z100 LCD screen.
The flip out viewfinder on the PXW-Z100 is sharp and clear. It’s a 3.5″ 852 x 480 pixel screen and the colour and contrast appears pretty accurate. In common with most cameras like this however it struggles in bright sunlight. On the back of the camera there is a small 0.45″ 852 x 480 pixel EVF. Now although both of the screens are supposed to be the same resolution, I felt that I could see more detail on the bigger flip out LCD. In addition if I blinked my eyes when looking at the EVF, I would see a rainbow colour effect. This is because the EVF display is shown one colour after the other, rather than all three RGB colours together. I also found that when I got the center of the EVF in focus using the diopter adjustment, the left side of the screen was out of focus. I don’t know whether this is a fault on the demo sample I had or whether they are all like this. To assist with focusing the camera has a coloured peaking system and via a button on the hand grip (Focus Mag) the ability to zoom into the image to check focus without effecting the recordings. The peaking also works in the Focus Mag mode, so you can both zoom in and have peaking at the same time. This is just as well as when shooting in 4K, focus is super critical.
The PMW-300 flipped up.
The viewfinder on the PMW-300 is a delight! It is a little bulky and this does tend to make the camera slightly lop-sided from a weight and balance point of view, but with it’s large 3.5″ high resolution 960 x 540 screen behind a monocular eyepiece it is sharp, accurate and very nice to use. It’s very similar to the viewfinder available for the F5 and F55 cameras. The monocular itself flips up to allow the LCD to be viewed easily from behind or above the camera and mirror assembly flip up so that you can view the LCD from the side. In addition you can remove the lens and mirror assemblies if you choose. There is a mirror switch on the finder so you can reverse the LCD image when using the mirror or have a normal image without the mirror. As well as the mirror switch there are controls for the brightness contrast and peaking as well as switches to turn the zebra and display overlays on and off. Like the Z100 there is a Focus Mag button on the hand grip that enlarges the viewfinder image to help with focus, but on the PMW-300 the peaking is disabled when Focus Mag is engaged which is a shame.
THE LENSES.
The Z100 has a 20x zoom lens and the PMW-300 is available with a choice of two lenses, a 14x and a 16x. Both lenses being very similar, the 16x having a little more telephoto reach (available early 2014).
The 20x zoom lens on the PXW-Z100
On the Z100 lens there are three rings, one each for focus, zoom and iris. All of these are of the electronic round and round, uncalibrated servo variety. I’m not a fan of these and this camera reminded me of why. The focus and iris control is a little sluggish so snap focus changes are almost impossible. When using the ring to change the aperture you have to go slowly to make sure you don’t overshoot. The zoom ring seemed pretty responsive and I found I could use the zoom ring to re-frame shots more accurately than the zoom rocker. The zoom rocker has quite a large dead band area where you push the rocker and nothing happens. Then you suddenly find the point when the zoom starts to move and if you’re not careful the zoom will start quite suddenly. It is possible to do slow creeping zooms, but finding the “bite” point where the zoom starts to move is tricky. Press the rocker further and you can have quite a quick zoom.
The PXW-Z100 fully wide and zoomed all the way in.
The big plus point of the lens though is the zoom range. Having been shooting with large sensor cameras and restricted zoom ranges for a few months it really was quite a revelation to get back to a camera with a big zoom range. I think I had forgotten how nice it is to be able to get a wide shot and a very long shot without changing lenses. In addition the lens is optically stabilised and this really helps with long shots on wobbly tripods or when using the camera hand held.
One thing I did note that was a little disappointing is that the aperture ramps as you zoom. If you start wide open at f1.6 as you zoom in the aperture slowly decreases to f3.2 when fully zoomed in. You can see this one stop exposure change in your shots. If you start at f3.2 or smaller then this does not happen, it only if you have the lens wide open.
The 14x lens on the PMW-300
The PMW-300’s lens is just like the lens on the PMW-200 and the EX1R before that. Except on the 300 the lens in removable, just like the EX3. There are two different lenses available. The one I tested was a 14x zoom and the other coming in early 2014 is a very similar 16x zoom with a slightly longer telephoto end. Again we have three rings, one for focus zoom and iris. Unlike the Z100 though these are all calibrated and have end stops. The focus ring has two distinct modes. Slide it forward and it’s a round and round servo controlled focus system. But in the forward mode the lens can be set to either manual or auto focus. Slide the ring back and it locks in to the calibrated focus scale and it is a responsive, accurate and snappy focus ring, just like a much more expensive broadcast lens. The zoom ring appears to act directly on the mechanics of the zoom lens and as a result in manual mode is beautifully fast making crash zooms really easy. In servo mode the zoom rocker has only the smallest of dead areas so finding the bite point and starting a slow zoom is easy. You can do a slow creeping zoom or a fast zoom and the control is easy. The iris ring is also fast, accurate and repeatable. For the money these are great lenses.
The PMW-300’s zoom range.
The lenses on both cameras exhibited similar amounts of chromatic aberration. This isn’t particularly bad, but it is there none the less. One issue when trying to make a lens sharper or higher resolution, then CA becomes harder to control. The Z100 lens is a good example of this. Remarkably sharp, but with some CA, especially out at the edges of the frame.
Image Quality.
Lets start by saying that the laws of physics and optics will almost always mean that a small sensor with small pixels will be less sensitive than a larger sensor with larger pixels. The PXW-Z100 is at quite a disadvantage here. For a start it has a single fairly small 1/2.3″ sensor (that’s smaller than 1/2″ but a little bigger than 1/3″). Packed in to this area are 8 million active pixels. That’s a lot of pixels in a small space, so they are very small. To help make up for the small pixel size Sony have used a back illuminated sensor. Back illuminated sensors have fewer obstructions in front of the pixels so are more efficient than conventional sensors, but this advantage only goes a small way towards making up for the very small pixel size.
On the other hand the PMW-300 has three 1/2″ sensors. Sony’s EX and now PMW range of half inch cameras have always performed well in low light thanks to the larger than average sensors used, most handycams use 1/3″ sensors. The PMW-300 is no exception, not only does it have the same 1/2″ sensors as the PMW-200, EX1 and EX3, but it also has a new and improved noise reduction system. As a result the PMW-300 tends to show a little less noise than it’s predecessors. Even with +9db of gain added the pictures are still pretty good.
So just what is the PXW-Z100 like in low light? First of all let’s look at what it’s like in good light. Below I’ve included two frame grabs. One from the PXW-Z100 and one from the PMW-300. The shots were done within a few minutes of each other in good daylight. The Z100 was set to HD. Both cameras were at 0db gain. Click on the images to see them larger or at the original resolution.
So what do I see in these images? Well first of all there is a saturation difference between the two camera. The PMW-300 looks richer because it has more colour saturation. This is easy to adjust with either camera via the paint or picture profile adjustments. The next is the difference in dynamic range. The PMW-300 has better dynamic range than the Z100. Look at the highlight on the back of the blue car, the top of the street lamp on the left and the widows of the distant houses. The PMW-300 is holding these highlights much better than the Z100. Also look at the deep shadow across the grass, both cameras are handling this similarly, so the PMW-300 has better dynamic range. This isn’t really a big surprise as the bigger the pixels the better the dynamic range and the 300 has significantly bigger pixels.
Colours: The Z100 produces some very pleasing and natural looking colours straight out of the box. The PMW-300 has that slight yellow/green look that most Sony cameras have. This can be corrected or altered with a few matrix tweaks in a picture profile if you don’t like it, but as it has this typical Sony look it will match quite closely with most other Sony broadcast cameras.
Both cameras show low noise levels at 0db. The z100 is marginally noisier than the PMW-300, you can see a little more noise in the sky in the Z100 shot but it’s not in my opinion a significant difference. Sony claim 60db for the PMW-300 but don’t give a noise figure for the Z100. The Z100’s noise is a little blotch when the camera is set to HD, I suspect the blotchy nature is a side effect of the cameras built in noise reduction. But, again, I don’t have an issue with the noise levels of either camera at 0db. The Z100 is using quite a bit of noise reduction at all gain levels. As a result there can be a little bit of a difference in noise levels from shot to shot.
Noise comparison between PMW-300 and PXW-Z100 at 0db.
So while the noise is not bad, just refer back to the settings noted in the full size frame grabs. The PMW-300 is at f8 with 1/16th(4 stops) of ND and the Z100 is f6.8 with 1/4 (2 stops) of ND. Even allowing for the Z100 possibly being fractionally over exposed compared to the PMW-300, that’s a not insignificant 2 stop sensitivity difference between the cameras. This difference becomes even more apparent when the light starts to fall off. I rate the PMW-300 at approx 340 ISO and the PXW-Z100 at about 75 ISO.
So I did some further tests to evaluate the low light performance of both cameras. The first test you can see below. This was shot in my living room using a ceiling light fixture with 3 x 40w household light bulbs. I would suggest this is a fairly typical light level for a lot of living rooms at night and the type of situation that might be encountered when shooting an observational or fly on the wall type documentary.
PXW-Z100 at 0db, f1.6 in a typical living room.PMW-300 at 0db, f1.9 in the same room as above.
As you can see the difference is quite striking. Just to be sure of my results I repeated the test using a chart as you can see below, both cameras at 0db and wide open.
PXW-Z100 at 0db, low light test.PMW-300 at 0db with same lighting as above.
So the Z100 is obviously around 2 stops less sensitive than the PMW-300. Can we make up for this lack of sensitivity by adding some gain? Take a look at the results below, the Z100 with +9db and +18db of gain:
PXW-Z100 with +9db gain.PXW-Z100 with +18db gain.
This test confirms the slightly over two stop sensitivity difference between the PMW-300 and PXW-Z100. You can see that at +18db the Z100 is marginally more sensitive than the PMW-300 at 0db. 18db is the equivalent to 3 stops. AT +12db the Z100 is less sensitive than the PMW-300 and 12db is two stops.
The key thing here is to note that in a low light situation where the PMW-300 is just about producing an acceptable image at 0db, your going to need 12 to 18db of gain to get the same brightness image out of the Z100. Looking closely at the noise levels from the Z100, I would be reasonably comfortable using +9db gain if I had to, but +12db from the Z100 is too noisy for me and 18db is getting pretty grim. In addition there is some loss of contrast at the higher gain settings.
Low light is where the PMW-200 and EX1 etc have always been good performers and the PMW-300 continues this. I also decided to take a look at how well the 300’s new noise reduction circuits work, so here are frame grabs from the PMW-300 at +9db and +18db.
PMW-300 at +9db.PMW-300 at +18db.
The noise reduction on the 300 is quite effective at +9db and if I had to, I wouldn’t be too uncomfortable using +9db of gain (I never want to use gain, but sometimes you just have to). Above about 12db however the noise reduction is less effective and also starts to reduce the contrast in the image quite noticeably.
So, the PXW-Z100 struggles a bit in low light compared to a camera with a larger sensor and fewer pixels. But then the Z100 is a 4K camera and can produce a much higher resolution image. Just how good is this 4K image as in many cases the Z100 will be used alongside cameras like the PMW-F5 or F55, both of which are capable of stunning 4K.
Well I think it does very well considering the small size sensor. The 4K images have nice contrast and plenty of detail. The deep depth of field that the small sensor provides really helps when you have street scenes like the ones below which were shot in Austin, Texas. Sometime’s you don’t want a shallow depth of field and for the kinds of applications I can see this camera being used for, I think a deeper DoF will be good.
6th Street, Austin Texas. HXR-Z100 frame grab. Click on the image to enlarge.
Both cameras have the ability to customise the way the pictures look. On the PMW-300 you have 6 picture profile memories that you can use to save 6 different camera setups. There are adjustments for the matrix, detail, white balance and gamma settings. As well as standard gammas including Rec-709 (STD 5) you have the same 4 Hypergammas as used by the PMW-200, 400, 500, 700 and also used in the F5 and F55. The Hypergammas extend the cameras dynamic range and provide a very pleasing highlight roll off that is closer to film and less video like (Hypergammas should be exposed a little lower than standard gammas for best results). The PMW-300 appears to have a very respectable 11.5 stops of dynamic range.
The Z100 only has a single set of paint settings. Most are very similar to the 300, but instead of Hypergammas the Z100 has two gamma curves called Cinematone 1 and Cinematone 2. It’s important to note that unlike the Cinegammas found in the EX series cameras or the Hypergammas in the PMW’s the Cinematone gammas do not extend the dynamic range. The Z100 appears to have around 10 stops of dynamic range when using the standard gamma and knee settings.
PXW-Z100 gamma choices.
The Cinematone gamma curves both tend to pull down the black and shadow areas of the picture increasing contrast. There is almost no change to the highlight handling. Personally I would not use these curves. I would rather shoot with the standard 709 gamma curve and then adjust my black levels in post production where I have more control. Having said that if you do want a contrasty look straight from the camera then the Cinematone gammas may prove useful.
Recording Codecs and Media.
The PMW-300’s SxS slots and output connections.
The PMW-300 like every other PMW camcorder is based around Sony’s SxS solid state recording media. This very robust professional media has been around for over 6 years now and is widely accepted in the pro video world. The cards are expensive when compared to consumer media, but they are very fast and very reliable. I’ve been using them for 6 years and never had any issues. The camera has two SxS slots and it will automatically switch from one card to the other as the cards fill up without any interruption to the recordings.
The 300 currently comes with Sony’s XDCAM HD codec as standard. Next year there will be a firmware update that will add the new XAVC codec to the camera. As it stands right now the 300 has two distinct modes. FAT mode and UDF mode. In FAT mode the camera records in standard definition DV, HDV and 35Mb/s 1920 x 1080 4:2:0 XDCAM. The XDCAM footage is wrapped in the .mp4 wrapper. The key benefit of FAT mode is the ability to use cheap SD cards via an equally low cost SxS to SD card adapter. The BBC use SD cards via adapters for some TV news applications. For those on a tight budget the SD cards are certainly an option, or they can be used as a backup for those times when perhaps you run out of the more expensive SxS cards. Just remember that SD cards are mass produced consumer products. In addition there is a lot of sub-standard fake media out there, so do be careful where you buy your media.
An SxS card and XQD card side by side.
To get the very best from the PMW-300 you want to use UDF mode. In UDF mode you cannot use SD cards, only SxS cards or via an adapter XQD cards (more about those in a bit). In UDF mode the camera can record XDCAM HD422. This is wrapped in the broadcast industry standard MXF wrapper, is 4:2:2 and has a bit rate of up to 50Mb/s so offers better image quality than the FAT modes and fully complies with most TV broadcast standards. One limitation however of the Mpeg 2 encoding used by XDCAM is that the maximum frame rate that can be recorded at 1920 x 1080 is 30fps. So if you want to shoot at 50p or 60p with the 300 you have to drop the resolution of the internal recordings to 720p.
At the moment (December 2014) it is unclear exactly what frame rates or modes will be available when the XAVC codec gets added to the PMW-300. I would hope that one of the things that will be added is the ability to shoot at 1920 x 1080 at 50p and 60p, but at the moment Sony are being quite tight lipped as to what will come.
The PXW-Z100’s card slots.
The PXW-Z100 records on to XQD cards. XQD is a new high end, very fast consumer flash media. At the moment only Sony and Nikon use them and you will only them in the Nikon D4 camera as well as the Z100, plus via adapters in most other PMW cameras. Cards are available from Sony and Lexar and to add to the confusion they come in different speed ratings with 3 different classes of card from Sony, N, H and S.
The entry level “N” series cards have a maximum write speed of 80MB/s (640Mb/s). The H series cards have a maximum write speed of 125MB/s (1Gb/s) while the faster (and more expensive) “S” series cards have a significantly maximum write speed of 180MB/s (1.4Gb/s). There are both USB3 and Thunderbolt card readers for the cards so read speeds are also very fast. To record all of the various modes that the PXW-Z100 is capable of you need the more expensive “S” series cards. If your only going to shoot in HD then you will be OK with the cheaper “N” series. In December 2014 amazon were selling a 32GB “S” series XQD card for £220 GBP ($350 USD). That’s about half the price of a similar SxS card.
The playback and menu buttons on the handle of the Z100
The Z100 comes with Sony’s XAVC codec. This is a 10 bit, 4:2:2 “I” frame only codec. In the future there will be a firmware update to add the more compact 4:2:0, long GOP XAVC-S codec. A further update will also add the ability to record AVCHD on to an SD card into the currently un-used SD card slot next to the two XQD slots.
XAVC is a great codec. It offers very high quality 10 bit recording at different resolutions and different frame rates. Unlike Mpeg 2 it is not restricted to 30fps and HD. It is the same codec as used in the PMW-F5 and F55 cinema cameras. It is almost certainly going to become standard on most Sony pro camcorders in the future. For post production it is already supported in FCP-X, Adobe Premiere, Avid, Edius, Resolve and of course Sony Vegas.
One thing to be aware of though is the data rates. These are higher than XDCAM. In HD the data rate, depending on frame rate is around 100Mb/s, that double the amount of data compared to XDCAM HD422 and almost 3 times as much data as XDCAM EX. So a 32GB XQD card will only last a around 30 minutes (depending on frame rate 24/25/30fps, 15 mins at 50/60p). If you want to shoot in 4K things get even worse, a 32GB card lasting between 12 and 14 minutes at 24/25/30fps and a mere 6 to 8 minutes at 50/50p. For most people a 32GB card will not be big enough and your going to need a couple of 64GB cards as a minimum. Once the XAVC-S codec becomes available as an option you will be back to similar data rates and storage requirements to XDCAM HD, but without the image quality benefits that the full XAVC codec brings.
The Z100 has two slots for the XQD cards and as one card fills up the camera will automatically switch to the next card without any interruption to the recording. As XAVC can shoot at full HD when you enter into the cameras S&Q mode you can choose any frame rate up to 60fps and the recording will be in full HD. The PMW-300’s S&Q mode is only full HD up to 30fps, above 30fps it is 720p.
Ergonomics:
The right side of the PXW-Z100.
The PXW-Z100 is pretty conventional in it’s layout. It’s comfortable to hold and the record button and Image Mag buttons are easy to access while shooting. In addition at the front of the hand grip there is a one push button to quickly set the auto iris, very useful when shooting run and gun. It has 6 assignable buttons on the top of the left side of the main body. Out of the factory 3 of these buttons are set to quickly turn on and off the zebras, peaking and thumbnail viewer for playback.
Focus Mag button on the handgrip of the PXW-Z100.
There are conventional 3 position switches for gain and white balance controls. The gain levels can be set in the cameras menus and the preset white balance can be selected between indoor and outdoor in the cameras single set of paint settings. Incidentally the menu look and structure in the Z100 is very similar to that of the PMW-F5/F55 and F65 cameras. Once you have made any changes to the cameras settings you can save an “all file” to an SD card in the utility SD card slot.
The right side of the PMW-300.
The PMW-300 is an interesting design. It isn’t a full size shoulder camera where the center of the camera sits over the top of your shoulder. Neither is it like most hand held handycam cameras. It’s designed to be used on your shoulder, but it isn’t a full shoulder camera. At the rear of the camera there is an extending shoulder pad that sits on your shoulder. As well as extending the pad has an additional flip out pad.
The release catch for the shoulder pad on the underside of the PMW-300 camera.
This is just as well because the release catch for the extending shoulder pad is on the underside of the camera. If you attach a tripod plate to the bottom of the camera you can no longer release the catch to extend or retract the shoulder pad. Not the cleverest bit of design! When I used the camera, I extended the shoulder pad before attaching my tripod plate and then used the flip out section when needed. Depending on how you adjust the viewfinder you’ll probably find that most of the time you don’t need the flip out part of the shoulder pad.
The PMW-300 tends to sit well back on your shoulder.
When using the 300 on your shoulder most of the weight is still carried through your arms. It’s not a heavy camera, so it’s not hard to hold for long periods. The big benefit of having it on your shoulder is stability. With your eye up against the eyepiece, you right hand though the hand grip and left hand on the lens it can be very stable. Shoulder hight is also better for interviews, I don’t like looking up at people from cameras held at chest hight. The 300 is still light enough to be used handycam style if you wish, although with the hand grip being quite well forward on the camera it’s not quite as easy to use as a handycam where the hand grip tends to be close to the cameras center of gravity.
The menu and playback controls on the handle of the PMW-300.
Like the EX and PMW-200 the 300 has Sony’s direct menu system where you can use the arrow keys on the handle to directly navigate around commonly used functions like gain, exposure offset, white balance and shutter speed, as displayed in the viewfinder, without having to enter into the cameras main menus. There are also 7 assignable buttons on the left side of the camera that can be used to control various functions. Don’t forget that peaking and zebra controls are on the viewfinder with this camera so there is an abundance of buttons for you to use.
Connectivity:
The output, remote and timecode connectors on the PMW-300.
Both cameras have HDSDI and HDMI. Both cameras two XLR connectors with phantom power for external audio sources and both have timecode in/out connectors (nice to see this on the Z100). They can both be connected to a computer via USB2 to off load media and they also have USB host connectors for connecting WiFi adapters and other similar accesories. In addition the PMW-300 has i-Link (firewire), genlock and an 8 pin remote control port for lens control (same as EX1/PMW-200) plus an 8 pin remote port for connection to an RMB type remote control panel.
One note about the pxw-z100. The HDSDI is HD only. The HDMI can do both SD and HD, but currently the HDMI support is only at HDMI 1.4, so there are some limitations over the frame rates that can be passed over the HDMI at 4K. There will be a firmware update in the future to bring the HDMI up to the 2.0 specifications that will allow 4K at up to 60fps. In addition the camera cannot output both 4K HDMI and HD HDSDI at the same time. You can have 4K over HDMI on it’s own or 4K down converted to HD over HDSDI and HDMI together.
Power and Batteries.
The PXW-Z100 is a 7.2V camera and uses the very common Sony NPF style batteries. An NPF970 will run the camera for a little over 2 hours. This is a lot less than many of Sonys 7.2V cameras. The XAVC codec and 4K image processing require more power and the Z100 consumes around 15W. More power means more heat and there as a fan inside the camera to aid cooling. The vent is at the rear of the camera and there are intakes at the bottom of the camera. The fan is barely audible.
The PMW-300 is a 12V camera and like most of the PMW range it requires Sony’s BP-U type batteries. A BP-U60 battery will run the camera for a little under 2 hours. Many of the third party batteries designed for the EX1, EX3 and PMW-200 will not work with this camera. I did find that the DSM U84 worked OK and this ran the camera for 2.5 hours. Once the XAVC codec gets activated it is possible that the power consumption may increase a little. One improvement over the PMW-200 is the placement of the external DC socket on the rear of the camera rather than inside the battery compartment.
Conclusions:
I like both of these cameras and would be pleased to own either. But of the two cameras, I think the PMW-300 is the better all round camera. I really like the 300, I think that Sony have really got this one right (with perhaps the exception of the release catch for the shoulder pad). The picture quality is once again best in class and rivals many much more expensive and larger cameras. It’s going to be a good all round camera that will find a home on corporate shoots, news and documentary shoots as well as in low budget studios. The new viewfinder is really delightful and is a big part of what makes this camera so good.
The PXW-Z100 is a bit of a mixed bag. There is nothing wrong with it as a camera, it is what it is… a small 4K camcorder. It does produce a pleasing image with good colours and the zoom range is impressive. But.. and it’s a big “but”, the fact that it is 4K and only has a small sensor hurts this cameras sensitivity quite significantly compared to a camera like the PMW-300. This isn’t a design fault, that’s just the laws of physics and optics at work. In addition the current limitation of XAVC only (XAVC-S will come later) means that your going to need two to three as much media for HD and six to ten times as much media for 4K compared to a 50Mb/s XDCAM camera. Even though XQD cards are cheaper than SxS that’s still a considerable investment in media that’s needed. If you’re coming from cameras with AVCHD and SD cards the media cost are probably quite frightening. If you are considering this camera you might want to hold off until the updates for AVCHD and XAVC-S become available. Having said that, if you need 4K in a small camera this is almost certainly the best there is at the moment (not that there is a great deal of choice). It will be a good run and gun companion camera to an F55 or F5 shooting 4K, provided you have enough light.
Over the years I’ve used many different follow focus units. Some better than others, but the majority of them a similar size. I recently got one of the new compact Alphatron Pro-Pull follow focusses to play with. The first and most obvious thing about the Pro-Pull is it’s size. It is very compact. At first I thought this might be an issue as the smaller knob requires more effort to turn than a more conventional larger knob, but in reality it’s not a problem. If you need more torque you can use either a whip or slot in hand grip.
MiniPull on an F5 working with a Samyang/Rokinon Cine lens.
The Mini-Pull has some really cool features. For a start you can reverse the focus direction by swapping the gear drive from one side of the unit to the other. But the one I really like is the adjustable, locking end stops. This makes it really easy to pull focus from one distance to another. You simply set the stops at your near and far focus positions and then turn the focus wheel between the two stops. If you then need to focus beyond the end stops you simply flip up the latching stop pin and you can focus beyond the end stops. Want to return back to the end stops then simply flip the stop pin back down again. Very clever, very simple and very effective.
The focus marking ring is magnetic so if you need to change or replace this it pulls off easily, yet is very secure when in place. The MiniPull is attached using a simple bracket that attaches to a single 15mm rail. This makes it very easy to adjust the MiniPulls position if your changing lenses and going between different sized lenses. This bracket also makes the MiniPull very compact, which for me as a very frequent traveller is a real bonus.
I used the MiniPull extensively on my recent shoot for the short film “Inviolate” to easily execute a large number of focus pulls. I rate it very highly if you need a compact and easy to use follow focus. It’s supplied with everything you need to get going including a nice flexible lens gear ring and the screw driver needed to attach it. Also included as well as the 0.8 pitch gear drive is a drive wheel with a rubber edge that can be used with lenses without a pitch gear.
Sony are bringing four new cameras to the market from their pro, consumer and semi-pro department. These cameras straddle the market and will find a place in the hands of both home shooters and professionals.
New Sony HDR-AS30 ActionCam in the new lightweight housing.
Starting with the smallest, this one will look very familiar to many of you. It’s a new version of the Gopro like ActionCam. The new model is the HDR-AS30. Not hugely different from the previous model it offers HD recording at up to 120 fps in 720p and 60p at 1920×1080 and WiFi connection for remote control and monitoring. The great news for us here in Europe and other PAL regions is that the new model now includes 25 and 50fps frame rates. Add in electronic image stabilisation as well as the very sensitive EXMOR-R sensor and this really is a great alternative to the GoPro. As well as the improved frame rates the AS30 now comes with a much lighter housing. The original AS10/AS15 housing was built for deep water diving and as a result was quite bulky and heavy.
The new menu buttons on the ActionCam housing.
The new housing is very similar to the old but of thinner plastic so it’s much lighter and less bulky. However the slim housing is only suitable for use in shallow water or to withstand the occasional dunking that it would get on say a surfboard or windsurfer. Another new feature is that the housing now incorporates buttons that allow you to change the camera settings without having to remove it from the housing.
Sony are well aware that what really matters with these mini cams is mounting flexibility. So along with the camera Sony are extending the range mounts, brackets and adapters available. They even have a clever device that turns the camera into a small handheld camcorder with flip out screen. Another add-on coming soon is a wireless wrist strap monitor and remote. Oh, and one more thing. Just in case you forget where you took your pictures the camera now has a GPS receiver built in that tags your videos with the shooting location.
Sony MV1 Music Video camera with stereo microphones.
Next up is a new type of camcorder for Sony…. or is it an audio recorder with a built in camera? When I was first shown the HDR-MV1 I really didn’t know what to make of it. It is referred to as the Music Video Camera by Sony. The concept is for a camera that can shoot good video in low light along with excellent quality stereo audio for bands and musicians to shoot simple YouTube videos etc. The camera is certainly very capable of doing exactly that, but there is also a lot more that this camera can be used for. Not much bigger than an electric shaver and sporting a pair of stereo microphones with 120 degree separation this camera is so easy to use for capturing stunning quality sound with reasonable HD pictures. It is one of those gadgets that will find it’s way into many camera crews kit bags. I’ve been playing with one and it’s great. For example, when shooting some steam trains I was able to just place the MV1 on a bridge parapet or beside the track to capture wonderful stereo sound of the trains puffing past. OK, I’ll have to sync the sound up with the main video in post, but as the camera shoots pictures too that’s pretty straight forward. To have done this conventionally would have required a good stereo mic, a stand, cables or radio links etc. Costing less than most decent stereo microphones it’s so simple and convenient that I’ll be looking to get one as soon as they are released. Click here to download a sample audio clip from the MV1. mv1-audio-sample
Finally we have two new 4K camcorders. The Sony FDR-AX1 and PXW-Z100. Starting with the AX1 (on which the Z100 is based), this is a compact handheld camcorder that has a Sony G series 20x zoom lens with a single 8.3 Megapixel back illuminated EXMOR-R 1/1.23″ sensor (that’s just a little smaller than 1/2″). The sensor allows for 4K shooting at up to 60fps. Interestingly for a consumer camera this one uses a variation of Sony’s new XAVC codec from the pro line of cameras to record the 4K footage. XAVC-S records 4K at 150Mb/s and HD at around 50Mb/s (compared to 220+ and 100+ Mb/s at 25fps for regular XAVC). This is a Long GoP version of the XAVC codec and is limited QFHD or (UHDTV) at 3840 x 2160 along with 8 bit 4:2:0 encoding . As this involves some quite high bit rates so the camera used XQD cards for recording. There are 2 slots for the XQD cards. Another first for a consumer camcorder is a pair of XLR audio connectors, clearly this camera is aimed at the high end of the consumer market. The camera has an HDMI output that will output 8 bit 4:2:0 4K for connection to a consumer 4K TV.
Sony PXW-Z100 4K camcorder
Taking the AX1 up a notch is the Z100. Many of the specs are the same, but the recording codec on the Z100 is the same XAVC I frame codec as used on Sony’s F5 and F55 cameras. This allows the Z100 to record the full 4K 17:9 4096 x 2160 sensor output at 10 bit 4:2:2. The down side to this is the data rates are now much higher at 232Mb/s for HD and up to 600Mb/s for 4K (at 60fps). This is a lot of data to manage and I can’t help but think that for many the QFHD and long GoP codec of the AX1 might be a better option (rumour is that there will be a firmware update for the Z100 that will allow it to recording using XAVC-S later in the year). In a later firmware update there will also be the option to record AVCHD to an SD card alongside the XAVC recordings. Other outputs include composite AV outputs on phono jacks as well as timecode out (also phono).
Both the AX1 and Z100 use Sony’s NP-F type batteries, so no expensive batteries need here!
As well as HDMI the Z100 has a 3G HDSDI output which can output a HD 60fps signal or a downscaled HD image when shooting in 4K.
Top view of the Sony Z100 4K camcorder.
The Z100 (and AX1 I believe) use the same paint and scene file settings as the PMW-F5 and F55 so it should be quite straightforward to transfer picture settings between the various cameras.
So just how will a small sensor 4K camera perform? Well the pixels will be very small so the camera won’t be as sensitive or have the dynamic range of the many large sensor 4K cameras on the market right now. As this is an EXMOR-R sensor it will be good for it’s size, but don’t expect it to be a great performer in low light. Other issues will be resolution and diffraction. When you have very small pixels and high resolution you run into an optical effect where the light passing through a small aperture gets bent and de-focussed. This limits the cameras useable aperture range. I think your going to be limited to keeping the iris more open than f8 to get the best results from this camera. Fortunately both cameras have a 4 position ND filter system that will help keep the aperture within the best range.
This website uses cookies to improve your experience. We'll assume you're ok with this, but you can opt-out if you wish. Read More
Necessary cookies help make a website usable by enabling basic functions like page navigation and access to secure areas of the website. The website cannot function properly without these cookies.
Name
Domain
Purpose
Expiry
Type
wpl_user_preference
www.xdcam-user.com
WP GDPR Cookie Consent Preferences
1 year
HTTP
YSC
youtube.com
YouTube session cookie.
54 years
HTTP
Marketing cookies are used to track visitors across websites. The intention is to display ads that are relevant and engaging for the individual user and thereby more valuable for publishers and third party advertisers.
Name
Domain
Purpose
Expiry
Type
VISITOR_INFO1_LIVE
youtube.com
YouTube cookie.
6 months
HTTP
Analytics cookies help website owners to understand how visitors interact with websites by collecting and reporting information anonymously.
Name
Domain
Purpose
Expiry
Type
__utma
xdcam-user.com
Google Analytics long-term user and session tracking identifier.
2 years
HTTP
__utmc
xdcam-user.com
Legacy Google Analytics short-term technical cookie used along with __utmb to determine new users sessions.
54 years
HTTP
__utmz
xdcam-user.com
Google Analytics campaign and traffic source tracking cookie.
6 months
HTTP
__utmt
xdcam-user.com
Google Analytics technical cookie used to throttle request rate.
Session
HTTP
__utmb
xdcam-user.com
Google Analytics short-term functional cookie used to determine new users and sessions.
Session
HTTP
Preference cookies enable a website to remember information that changes the way the website behaves or looks, like your preferred language or the region that you are in.
Name
Domain
Purpose
Expiry
Type
__cf_bm
onesignal.com
Generic CloudFlare functional cookie.
Session
HTTP
NID
translate-pa.googleapis.com
Google unique id for preferences.
6 months
HTTP
Unclassified cookies are cookies that we are in the process of classifying, together with the providers of individual cookies.
Name
Domain
Purpose
Expiry
Type
_ir
api.pinterest.com
---
Session
---
Cookies are small text files that can be used by websites to make a user's experience more efficient. The law states that we can store cookies on your device if they are strictly necessary for the operation of this site. For all other types of cookies we need your permission. This site uses different types of cookies. Some cookies are placed by third party services that appear on our pages.