Tag Archives: Proresraw

How Good Is The Raw From An FX9 Compared To The F55?

This is a very good question that came up in one of the F5/F55/FX9 facebook groups that I follow. The answers are also mostly relevant to users of the FX6, FX3 and the A7SIII.

There were two parts to it: Is the FX9’s raw out as good as the raw from the F5/F55 and then – do I really need raw.
 
In terms of image quality I don’t think there is any appreciable difference, going between the raw from an FX9 and the raw from an F5/F55 is a sideways step.

The F5/F55 with either Sony Raw or X-OCN offer great 16 bit linear raw in a Sony MXF package. The files are reasonably compact, especially if you are using the R7 and X-OCN. There are some compatibility issues however and you can’t use the Sony Raw/X-OCN in FCP-X and the implementation in Premier Pro is poor.

The 16 bit out from the FX9/XDCA-FX9 gets converted to 12 bit log raw by the Atomos recorders, currently the only recording options – but in reality you would be extremely hard pushed to really see any difference between 16 bit linear raw and 12 bit log raw from this level of camera.
 
Recording the 12 bit log raw as ProRes Raw means that you are tied to just FCP-X, Premiere Pro (poor implementation again) and Scratch. The quality of the images that can be stored in the 2 different raw formats is little different, 16 bit linear has more code values but distributed very inefficiently. 12 bit log raw has significantly fewer code values but the distribution is far more efficient.  AXS media is very expensive, SSD’s are cheap. AXS card readers are expensive, SSD adapters are cheap. So there are cost implications.

Personally I feel the reduced noise levels from the FX9 makes footage from the FX9 more malleable than footage from the F5/F55 and if you are shooting in FF6K there is more detail in the recordings, even though they are downsampled to 4K raw. But the FF6K will have more rolling shutter compared to an F55/F5.

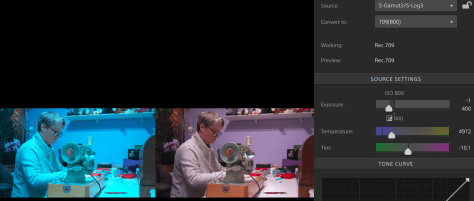
Working with Sony Raw/X-OCN in Resolve is delightfully easy, especially if you use ACES and it’s a proper grading package. If you want to work with ProResRaw in Resolve you will need to use Apple Compressor or FCP-X to create a demosaiced log file, which even if you use ProRes444 or XQ not the same as working from the original raw file. For me that’s the biggest let down. If I could take ProResRaw direct into Resolve I’d be very happy. But it is still perfectly possible to get great footage from ProResRaw by transcoding if you need to.

As to whether you need raw, only you can answer that fr yourself. There are many factors to consider.  What’s your workflow, how are you delivering the content. Will the small benefit from shooting raw actually be visible to your clients?
 
Are you capturing great content – in which case raw may give you a little more, or are you capturing less than ideal material – in which case raw isn’t going to be a get out of jail card. Raw of any flavour works best when it’s properly exposed and captured well.

I would suggest anyone trying to figure out whether they need raw or not to start by to grading the XAVC-I from the FX9 and see how far you can push that,  then compare it to the raw. I think may be surprised by how little difference there is, XAVC-I S-Log3 is highly gradable and if you can’t get the look you want from the XAVC-I raw isn’t going to be significantly different. It’s not that there is anything wrong with raw, not at all. But it does get rather over sold as a miracle format that will transform what you can do. It won’t perform those miracles, but if everything else has been done to the highest possible standards then raw does offer the very best that you can get from these cameras.
 
As a middle ground also consider non raw ProRes. Again the difference between that and XAVC-I is small, but it may be that whoever is doing the post production finds it easier to work with. And the best bit is there are no compatibility issues, it works everywhere.

But really my best recommendation is to test each workflow for yourself and draw your own conclusions. I think you will find the differences between each much smaller than you might assume. So then you will need to decide which works for you based on cost/effort/end result.
 
Sometimes best isn’t always best! Especially if you can get to where you need to be more easily as an easy workflow gives you more time to spend on making it look the way you want rather than fussing with conversions or poor grading software.

ProResRaw Update For Shogun 7 and FX6

132778118_3883714468314721_5996857821174714787_o-600x400 ProResRaw Update For Shogun 7 and FX6Atomos have release a firmware update for the Shogun 7 to correctly implement raw recording from the FX6 at up to 60fps.

AtomOS 10.43 is a free update for the Shogun 7 that enables up to DCI 4Kp60 full-frame ProRes RAW recording from Sony’s FX6 camera!
 
Now available: Apple ProRes RAW recording support for Sony’s new FX6 professional camera with full-frame image sensor; which natively outputs RAW over SDI. This is all made possible with the Atomos Shogun 7 AtomOS 10.43 update which now allows users to record pristine ProRes RAW images at up to DCI 4Kp60. The resulting images have amazing detail and a high degree of latitude to utilize in post-production – optimal for HDR finishing or to give greater flexibility in SDR (Rec.709).
 
If you are a Shogun 7 user you can update your firmware here: https://bit.ly/2VTDUCz
For more information on this powerful combination head to: https://bit.ly/38u2QGX

Raw Isn’t Magic. With the right tools Log does it too.

Raw can be a brilliant tool, I use it a lot. High quality raw is my preferred way of shooting. But it isn’t magic, it’s just a different type of recording codec.
 
All too often – and I’m as guilty as anyone – people talk about raw as “raw sensor data” a term that implies that raw really is something very different to a normal recording. In reality it’s really not that different. When shooting raw all that happens is that the video frames from the sensor are recorded before they are converted to a colour image. A raw frame is still a picture, it’s just that it’s a bitmap image made up of brightness values, each pixel represented by a single brightness code value rather than a colour image where each location in the image is represented by 3 values one for each of Red, Green and Blue or Luma, Cb and Cr.

As that raw frame is still nothing more than a normal bitmap all the cameras settings such as white balance, ISO etc are in fact baked in to the recording. Each pixel only has one single value and that value will have been determined by the way the camera is setup. Nothing you do in post production can change what was actually recorded. Most CMOS sensors are daylight balanced, so unless the camera adjusts the white balance prior to recording – which is what Sony normally do – your raw recording will be daylight balanced.

Modern cameras when shooting log or raw also record metadata that describes how the camera was set when the image was captured. 

So the recorded raw file already has a particular white balance and ISO. I know lots of people will be disappointed to hear this or simply refuse to believe this but that’s the truth about a raw bitmap image with a single code value for each pixel and that value is determined by the camera settings.

This can be adjusted later in post production, but the adjustment range is not unlimited and it is not the same as making an adjustment in the camera. Plus there can be consequences to the image quality if you make large adjustments. 

Log can be also adjusted extensively in post too. For decades feature films shot on film were scanned using 10 bit Cineon log (which is the log gamma curve S-Log3 is based on) and 10 bit log used for post production until 12 bit and then 16 bit linear intermediates came along like OpenEXR. So this should tell you that actually log can be graded very well and very extensively.

But then many people will tell you that you can’t grade log as well as raw. Often they will give photographers as an example where there is a huge difference between what you can do with a raw photo and a normal image. But we also have to remember this is typically comparing what you can do with a highly compressed 8 bit jpeg file and an often uncompressed 12 or 14 bit raw file. It’s not a fair comparison, of course you would expect the 14 bit file to be better.

The other argument often given is that it’s very hard to change the white balance of log in post, it doesn’t look right or it falls apart. Often these issues are nothing to do with the log recording but more to do with the tools being used.

When you work with raw in your editing or grading software you will almost always be using a dedicated raw tool or raw plugin designed for the flavour of raw you are using. As a result everything you do to the file is optimised for the exact flavour of raw you are dealing with. It shouldn’t come as a surprise to find that to get the best from log you should be using tools specifically designed for the type of log you are using. In the example below you can see how Sony’s Catalyst Browse can perfectly correctly change the white balance and exposure of S-log material with simple sliders just as effectively as most raw formats.
 
Screenshot-2020-11-27-at-17.14.07 Raw Isn't Magic. With the right tools Log does it too.
On the left is the original S-Log3 clip with the wrong white balance (3200K) and on the left is the corrected image. The only corrections made are via the Temperature slider and exposure slider.
 
Applying the normal linear or power law (709 is power law) corrections found in most edit software to Log won’t have the desired effect and basic edit software rarely has proper log controls. You need to use a proper grading package like Resolve and it’s dedicated log controls. Better still some form of colour managed workflow like ACES where your specific type of log is precisely converted on the fly to a special digital intermediate and the corrections are made to the intermediate file. There is no transcoding, you just tell ACES what the footage was was shot on and magic happens under the hood. Once you have done that you can change the white balance or ISO of log material in exactly the same way as raw. There is very, very little difference.
 
Screenshot-2020-11-27-at-17.29.27 Raw Isn't Magic. With the right tools Log does it too.
The same S-Log3 clip as in the above example, this time in DaVinci Resolve using ACES. The only corrections being made are via the Temp slider for the white balance change and the Log-Offset wheel which in ACES provides a precise exposure adjustment.
 
When people say you can’t push log, more often than not it isn’t a matter of can’t, it’s a case of can – but you need to use the right tools.
 
After-correction-450x253 Raw Isn't Magic. With the right tools Log does it too.
This is what log shot with completely the wrong white balance and slightly over exposed looks like after using nothing but the WB and ISO sliders in Catalyst Browse. I don’t believe raw would have looked any different.
 
Less compression or a greater bit depth are where the biggest differences between a log or raw recording come from, not so much from whether the data is log or raw.  Don’t forget raw is often recorded using log, which kind of makes the “you can’t grade log” argument a bit daft.
 
Camera manufactures and raw recorder manufacturers are perfectly happy to allow everyone to believe raw is magic and worse still, let people believe that ANY type of raw must be better than all other types of recordings. Read though any camera forum and you will see plenty of examples of “it’s raw so it must be better” or “I need raw because log isn’t as good” without any comprehension of what raw is and how in reality it’s the way the raw is compressed and the bit depth that really matters.

If we take ProRes Raw as an example: For a 4K 24/25fps file the bit rate is around 900Mb/s. For a conventional ProRes HQ file the bit rate is around 800Mb/s. So the file size difference between the two is not at all big.
 
But the ProRes Raw file only has to store around 1/3 as many data points as the component ProResHQ file. As a result, even though the ProRes Raw file often has a higher bit depth, which in itself usually means better a better quality recording, it is also much, much less compressed and as a result will have fewer artefacts. 

It’s the reduced compression and deeper bit depth possible with raw that can lead to higher quality recordings and as a result may bring some grading advantages compared to a normal ProRes or other compressed file. The best bit is there is no significant file size penalty. So you have the same amount of data, but you data should be of higher quality. So given that you won’t need more storage, which should you use? The higher bit depth less compressed file or the more compressed file?

But, not all raw files are the same. Some cameras feature highly compressed 10 bit raw, which frankly won’t be any better than most other 10 bit recordings as you are having to do all the complex math to create a colour image starting with just 10 bit. Most cameras do this internally at at least 12 bit. I believe raw needs to be at least 12 bit to be worth having.

If you could record uncompressed 12 bit RGB or 12 bit component log from these cameras that would likely be just as good and just as flexible as any raw recordings. But the files would be huge. It’s not that raw is magic, it’s just that raw is generally much less compressed and  depending on the camera may also have a greater bit depth. That’s where the benefits come from.

ProResRaw Now In Adobe Creative Cloud Mac Versions!

Hooray! Finally ProRes Raw is supported in both the Mac and Windows versions of Adobe Creative Cloud. I’ve been waiting a long time for this. While the FCP workflow is solid and works, I’m still not the biggest fan of FCP-X. I’ve been a Premiere user for decades although recently I have switched almost 100% to DaVinci Resolve. What I would really like to see is ProRes Raw in Resolve, but I’m guessing that while Black Magic continue to push Black Magic Raw that will perhaps not come. You will need to update your apps to the latest versions to gain the ProRes Raw functionality.

ProResRaw for Windows Released (beta)

Some time ago Atomos indicated that you would be able to use ProResRaw in Adobe Premiere. Well – now you can, on a Windows machine at least.

Apple have just released a beta version of ProResRaw for Windows that is designed to work with Adobe’s creative suite applications including Premiere, After Effects, Premiere Pro and Premiere Rush.

I haven’t been able to try it yet as I’m mainly Mac based. But if you want to give it a go you can download the beta from Apple by clicking here.

Edit: It appears that as well as this plugin you may need to be running the latest beta versions of the Adobe applications. Please don’t ask me where to get the beta applications as I have no idea.