My all time favourite tripod has to be my Miller Compass head on my Miller Solo Legs. This has proven to be an excellent all round tripod that is both light weight and extremely portable.
But for my recent Venice shoot I needed something a little bit more substantial so I decided to give the new Miller CX18 head on a set of Miller Sprinter II two stage carbon fibre legs.
Miller CX16 Tripod with a Sony Venice.
The CX18 head is not radically different to any other tripod head. But it is a great, silky smooth tripod head. It uses the same type of fluid damping mechanism as my Compass head with 5+0 steps of silky smooth pan and tilt damping selected by click stop rings on the head. One thing that does differentiate the CX range from previous Miller heads is the range of the counterbalance system. My Compass head only has 4 counterbalance settings for a range of payloads from 2Kg to 9kg (4lbs to 20lbs). The new CX18 head has 16 levels of counterbalance and covers a payload range from 0 to 16kg (35lbs). So it can handle a greater payload range with finer more precise steps.
Miller CX18 head showing the 16 step counter balance control, 8 steps on the big ring plus a +1 step control switch.
The counterbalance steps are selected via a main counterbalance selector ring which as 8 steps and the a secondary control adds an extra half step, giving a total of 16 steps. So even when swapping lenses on the camera between primes and zooms it would only take seconds to find the right counterbalance level.
The camera plate on the CX18 is a side mount plate, so you just angle it into the recess on the top of the tripod and it snaps down into place. No need to have to line up a sliding plate. This makes it much faster to release and reattach the camera if you are in a hurry.
Talking of being in a hurry. The Sprinter II legs feature lower leg release catches that are operated by levers that are attached to the lower leg clamp by a rod. This means that you don’t have to bend down to the bottom of the tripod leg to release the catch. Instead the large release catches for both stages of the tripod legs starts off up by the tripod bowl making them easy to grab and release when you are in a hurry. This is a really nice feature for new shooters.
The Sprinter II tripod. Note how the leg lock catches are never lower than the top of the first stage.
The 100mm bowl sprinter legs are very stable with very minimal twist or flex at the bowl even when extended to a good height. the mid level spreader makes them really easy to use on uneven ground.
So if you are looking for a tripod with a pretty decent payload that doesn’t weigh a ton but remains nice and stable do take a close look at the CX18 head and Sprinter II legs. Miller’s tripod heads really are some of the smoothest tripod heads out there. My Solo is 5 years old now and just as smooth as it was the day it arrived.
The CX18 worked well with the Venice camera, although to be honest a fully loaded Venice is a pretty big lump to put on this size of tripod. However the CX18 took it in it’s stride and helped me get some silky smooth pans and tilts in some pretty windy conditions.
The main lenses I used for my recent Sony Venice shoot in Arizona were the Sigma Full Frame High Speed primes in PL mount.
These are really really nice lenses!
Sigma Full Frame fast prime lens set.
As they cover a full frame sensor such as the one in Sony’s Venice high end digital cinematography camera these are pretty future proof lenses. They are all fast lenses with most of them opening up to T1.5. At T1.5 you have a 20, 24, 35, 50 and 85mm lenses and at T2.0 you can go as wide as 14mm and as long as 135mm.
They are of all metal construction, the build quality is absolutely first class. As soon as you pick one up it just exudes quality. They are not light weight lenses, coming in at between 1kg and 1.3kg in PL mount form, but that weight gives you the confidence that these are lenses that will last. Lenses that will stand up to daily professional use on a film or documentary shoot. They are dust and moisture sealed, which is probably just as well as on this shoot there was a lot of blowing sand and dust. Our on set photographer was having problems with sand and grit in his lenses by the end of the shoot, but the Sigmas just shrugged it off.
The focus and aperture markings are very clear and easy to read they even glow in the dark! The focus ring rotates through a full 180 degrees and both the focus and aperture rings have standard 0.8 pitch teeth for follow focus controls etc. The gear rings are all the same distance from the mount so there is no need to move the follow focus when changing lenses.
Sigma 85mm Full Frame High Speed prime.
The lenses are available with PL, E mount or EF mounts. The set I had were fitted with PL. The mounts are not user interchangeable, but you can have the mount swapped by Sigma if you do find that you need to change it for some reason.
I shot several scenes with the 20mm lens using the Venice’s full frame 6K x 4K mode. Examining these images in post production reveals that the 20mm is really sharp right out into the corners. I also shot with the lenses wide open in some pretty dark places and even wide open they stay tack sharp. Take a look at the image below, it’s really sharp. If you click on the image you can enlarge it to view it at close to the original 6K resolution.
Frame grab from Venice. Horseshoe bend, Page Arizona. Sigma 20mm FF prime. Click on the image to enlarge.
Shooting night scenes with the 135mm wide open also gave beautiful results. When shooting with a shallow DoF all the lenses have a very pleasing bokeh. This is perhaps in part thanks to the use in all of the lenses of a 9 blade, rounded diaphragm aperture system.
When changing focus mid shot breathing is minimal and the focus ring is silky smooth. A really nice touch is the use of a damper at the focus stops so there is no noise if you hit the end stops.
Frame Grab from Venice, 2500 ISO, Sigma 24mm. Click on the image to expand.
During the shoot I used the 20,24,35,50,85 and 135mm lenses and they all performed really well. Looking at the footage in the grading suite it looks sharp and there are no nasty distortions. I did notice a touch of barrel distortion with the 24mm but this is to be expected with a wide lens on a full frame sensor. All the lenses matched really well, the colour remaining constant throughout the whole range. The look from the lenses was very neutral. Lens flare was extremely well controlled and I didn’t notice my blacks becoming washed out in high contrast situations. When shooting into the sun or at a direct light source any flare that I did see was normally quite pleasing.
The shot below was obtained shooting towards the sun when it was very low in the sky, yet the lens behaved flawlessly retaining deep blacks and a very high contrast image.
Frame grab from Venice with Sigma 135mm FF lens shooting into the sun in a very high contrast scenario. Click on the image to enlarge.
These lenses helped me capture some truly beautiful images with the Venice camera. I’ve long been a fan of Sigmas more recent lens designs. I have several of the Sigma Art Lenses and these have always performed exceptionally well. These prime lenses take things one step further putting world class optics into housings designed for manual control and the rigours of professional film and video productions. They are very competitively priced, especially when you consider that these are full frame lenses. I really hope to be able to use them again on future shoots. They really are top notch lenses and the images I captured with them look gorgeous.
I have been working with Sony’s colour science guru Pablo at the Digital Motion Picture Center at Pinewood, looking at the outer limits of what Sony’s Venice camera can do. A large part of the reason for this is that Pablo is developing some really nice LUT’s for use on dailies or even as a grade starting point (Pablo tells me the LUT’s are finished but he is waiting for approvals and feedback from Japan).
As part of this process we have shot test footage with the Venice camera for ourselves and also looked long and hard at test shots done by other cinematographers. Last week we were able to preview a beta version of the cameras dual ISO modes. This beta firmware allowed us to shoot tests at both 500 ISO and 2500 ISO and the results of both are equally impressive.
I can’t share any of the test footage shot at 2500 ISO at this stage. The firmware is still in it’s early stages and the final version may well perform a little differently (probably better). But I can share some of the footage shot at 500 ISO.
Please remember what we were exploring was the extreme ends of the exposure range. So our little test set was set up with some challenges for the camera rather than trying to make a pretty picture.
We have deep, deep shadows on the right behind the couch and we also have strong highlights coming off the guitar, the film can on the shelves and from the practical lamp in the background. The reds of the cushion on the couch look very different with most Rec-709 cameras as the colors are outside the Rec-709 gamut.
Another aspect of the test was to check the exposure rating. For this I used my Sekonic lightmeter to measure both the incident light and the light reflected by the Kodak grey card. My light meter gave me T4 at 1/48th for 500 ISO and this turned out to be pretty much spot on with what the scopes told us. So straight away we were able to establish that the 500 ISO exposure rating appears to be correct. We also found that when we stopped down by 2.3 stops we got the correct exposure at 2500 ISO, so that too appears to be correctly rated.
Once the base exposure was established we shot at 2 stops over and 2 stops under, so from T2 down to T8 using a Sony 35mm PL prime. We used the XOCN-ST codec as we felt this will be the most widely used codec. When looking at the files do remember that the 16 bit XOCN-ST files are smaller than 10 bit ProResHQ. So these are files that are very easy to manage. There is the option to go up in quality to Sony’s linear raw codec or down to X-OCN LT. XOCN-ST sits in the middle and offers a nice balance between file size and image quality, it being very hard to find any visual difference between this and the larger raw files.
The files I’m providing here are single X-OCN frames. They have not been adjusted in any way, they are just as shot (including being perhaps a touch out of focus). You can view them using the latest version of Sony’s raw viewer software or the latest version of DaVinci Resolve. For the best quality preview, at this time I recommend using Sony’s Raw Viewer to view the clips.
Normally when I travel up to arctic Norway for my annual Northern Lights expeditions I take a large sensor video camera. Last year it was the Sony FS5, which performed very well and gave me some great results. But this year I decided to down size and instead of taking a bulky camera I chose to take a pre-production sample of Sony’s diminutive new PXW-Z90 camcorder.
In Norway with the PXW-Z90.
On the outside the Z90 looks almost exactly the same as the older PXW-X70 camcorder. I’ve shot several videos with the X70 and it’s a great little camcorder that produces a very good image considering it’s small size. Being a new model I expected the Z90 to offer some small improvements over the X70, but what I didn’t expect was the very big improvements that the Z90 brings.
The Z90 is the first camcorder from Sony to incorporate a new design of sensor. It’s a 1″ type sensor, so like the X70, bigger than you used to find on small handycams, but not as big as the super 35mm sensor found in the FS5, FS7 etc. This is a nice size for this type of camera as it makes it possible to obtain a shallow depth of field by using the cameras built in ND filters (yes- it really does have ND filters built in) and a large aperture. Or if you need a deeper depth of field for easier focussing or run and gun then you can use a smaller aperture by switching out the ND filters. The maximum aperture of the zoom lens is f2.8 but it does stop down to f4 towards the telephoto end.
Sony’s new stacked CMOS EMOR RS sensor
This new sensor uses a new construction method that allows it to have several layers of electronics immediately below the imager pixels. The “stacked” sensor can as a result incorporate more image processing and a large memory area right under the pixels. This means that the sensor can be read out much more quickly than is normal for this type of camera and as a result rolling shutter is hugely reduced (I didn’t notice any in any of my footage).
As well as a reduction in rolling shutter compared to other similar sensors, the ability to do more on chip image processing appears to bring other advantages as the noise levels from this camera are very low indeed.
Frame grab from a night time snow scooter ride. Shot at +15dB gain the noise is still very minor. (click on the image to view a larger version.
The low noise levels mean that this camera performs surprisingly well in low light. Adding in +6dB was not a problem if needed. Even with +15dB of gin the images hold together very well. Clearly the camera is doing a fair bit of electronic noise reduction at higher gain levels and there is a slight increase in image smear as a result. Plus in certain circumstances the noise levels do rise, especially if you have large dark areas amongst in an otherwise brighter scene. In my sample footage during the night time snow scooter ride, which was shot at +15dB gain, you don’t see and noise over the snow, but you can see some grainy noise over the dark jacket of the snow scooter driver (see the frame grab above). The fact that you can push the camera up to +15dB and in most cases get a pretty good image is very nice.
Frame grab form a PXW-Z90 – Hybrid Log Gamma. Click on the image to see a larger version.
On top of good sensitivity you also have great dynamic range, more than the X70 and enough to make direct HDR shooting and log shooting possible with this tiny hand held camcorder. It doesn’t quite have the dynamic range of an FS5 or FS7, but there is still plenty of range to help deal with challenging lighting situations.
As well as bringing a nice improvement in image quality over the X70 (which is pretty good already) the new sensor brings a vastly improved autofocus system. There are 273 focus detection points which are combined with faster readout, faster on sensor processing and the same AF processing technology as used in the flagship Sony A9 stills camera. This brings a really remarkable autofocus system to this camera. The AF system is a newly developed hybrid system that combines phase detection AF with new algorithms created specifically for video rather than stills photography. At last this is an autofocus system that really works for a video camera. It is intelligent and responsive. There is no hunting for focus, it just seems to get on with the job.
Adjusting the AF response on the PXW-Z90.
Just about every aspect of the autofocus system can be customised in the camera menu. You can choose between using focus zones, the full image width or selectable focus spot areas. The cameras LCD screen is a touch screen so you tap the screen where you want to focus.
You can also tailor the AF’s response speed, you can adjust the size of the tracking range, using a wide range for occasions when you want the AF to follow an object through the shot, or use a narrow range to restrict the focus depth range.
The PXW-Z90’s variable AF drive speed.
You can customise how quickly the AF will move from one object to another, from staying locked on to a faster more responsive setting.
In addition it has that wonderful Sony face detection system that allows you to choose one face out of a crowd of people using the thumb stick on the hand grip or the touch screen. Once selected the camera will stay locked to that face.
Working with the PXW-X90 in Norway.
While I was up in Norway it was between -24c and -30c. In those temperatures you really don’t want to take your mittens off for more than a minute or so. Being able to rely on the cameras autofocus allowed me to keep my fingers warm. Not one shot out of all my rushes from the trip has incorrect focus. That is truly remarkable and made shooting with this camera a real pleasure. I’m not saying that you should always use autofocus. When possible I love to be able to pick and choose how I focus. But in many situations or for less experienced shooters this autofocus system will be a game changer.
For my test shoot in Norway I mostly used Picture Profile number 10 which gives an instant HDR workflow thanks to the use of Hybrid Log Gamma. Using HLG you can shoot as you would do with any other conventional camera. Then take the footage and play it back in HDR on an HDR TV without any grading or other post production work. I also shot at a couple of locations using S-Log2 to test how that worked (I was shooting in UHD and the camera is 8 bit in UHD. For 8 bit I prefer S-Log2 over S-Log3). The Z90 has 10 picture profiles that allow you to tailor how the image looks, including a crunchy DSLR type look. Some filmic looks using Sony’s cinegammas as well as profiles for shooting S-Log2, S-Log3 and Hybrid Log Gamma (HLG).
Dog sledding in the arctic (frame grab). Shot in HDR using HLG on the PXW-Z90.
The Z90 has Sony’s XAVC-L codec. This high quality codec offers 10 bit 4:2:2 broadcast quality recordings in HD and 8 bit 4:2:0 recordings in UHD (3840 x 2160). The camera records to SDXC cards, so media costs are very low. There are two card slots and you can record to each slot singly, record to one card after the other or dual record on to both cards at the same time for redundancy and an instant back. You can even use each of the cameras two record buttons to control the records on each card independently should you wish.
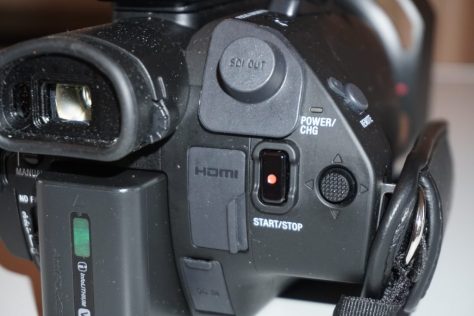
The PXW-X90 is very small, so carrying it around on the snow scooters was easy.The rear of the hand grip of the PXW-Z90.
The Z90 is a small camcorder and like all small camcorders this doesn’t leave much room for large buttons and switches. The menu system and many of the cameras functions can be controlled via the touch screen LCD or the small joystick/thumb stick on the hand grip. Iris, shutter speed and gain each have a dedicated access button that selects the function.
The Full Auto switch and ND filter control on the PXW-Z90.
Then you use the thumb stick to select the value you want, or you can set each item to Auto. In addition there is a switch to put the camera into full auto on the rear of the camera. Just below the full auto switch is the control switch for the ND filters.
The Sony PXW-Z90 compact 4K camcorder.
The lens is a Zeiss 12x optical zoom with built in optical image stabilisation. It is controlled by a single ring around the barrel of the lens which can be switched between focus control or zoom control. In addition there is the usual zoom rocker on the handgrip as well as a small zoom switch on the top handle. In addition to the optical stabilisation the camera also has Sony’s electronic “super steadyshot” stabilisation that can be used in addition to the optical stabilisation. Another very handy function is “Clear Image Zoom”. This is a form of electronic zoom function that makes use of a database of textures and object types. When using clear image zoom the camera uses this database to apply just the right amount of image processing during the electronic zoom process. In most cases you can’t see any degradation of the image when using clear image zoom. I left it on for all of the Norway shoot as it turns the 12x zoom into a very handy 18x zoom.
The wide end of the PXW-X90’s zoom range.The long end of the PXW-X90’s zoom lens.
After doing so much shooting on large sensor cameras with restricted zoom ranges getting back to a small camera with a big zoom range was fun. For future Norway trips I am very tempted to switch to a camera like the Z90.
The right side of the PXW-Z90.
The Z90 body is almost exactly the same as the X70. The cameras top handle has 2x XLR connectors with the audio controls for the two channels on the opposite side of the handle.
The audio controls of the PXW-Z90.
If you want to make the camera more compact the handle can be removed, but when you do this you will no longer have any XLR connectors. Instead you will have an MI shoe on the top of the camera body that can be used to connect a Sony UWP-D radio mic or a n XLR adapter. There is also a stereo microphone built into the main body of the camera, so even with the hand grip removed there are plenty of audio options.
The PXW-Z90’s flip out LCD screen.
The flip out LCD panel acts as the cameras main viewfinder. Opening and closing the LCD screen turns the camera on and off. It starts up and shuts down very quickly. The resolution of the LCD is similar to most other modern camera LCD’s. It’s adequate for this type of camera, but it isn’t the highest resolution screen in the world. To check focus you have a button on the top of the hand grip to activate the image magnification function and the camera has a coloured peaking system to help pick out what is, and what is not in focus. I suspect that with this particular camera, many users will take advantage of the cameras excellent auto focus system and there is a lot of feedback to the user of how this is working including coloured boxes that indicate exactly what the camera is focussing on.
The rear of the Sony PXW-Z90.
As well as the side LCD panel there is also a small OLED electronic viewfinder on the rear of the camera. This is very useful for use in very bright sunlight, but it is rather small.
The cameras gain, shutter and iris functions each have a dedicated button on the side of the camera. One push of the appropriate button enables that function to be controlled by a small dial wheel just under the front of the lens.
Iris, gain and shutter speed controls on the side of the PXW-Z90.
Press the shutter button and the wheel controls the shutter. Press the gain button and the wheel controls the gain. Overall this system works well, but I would still prefer a separate gain switch and a shutter speed up/down switch. On the rear of the hand grip there is a small joystick that sits under your thumb. You can use this thumb-stick to set many of the cameras settings and to navigate through the cameras menu system. In addition you can use the LCD touchscreen to navigate through the menu as well as select your autofocus points etc.
The PXW-Z90 is a small camera that packs a very big punch. It’s never going to give the fine degree of image control that you get with most large sensor cameras and it won’t quite deliver the same image quality either (although it’s really, really close). If you need a small, discrete camera, perhaps you travel a lot, or you just need a “B” camera, then the Z90 offers a possible solution. I haven’t even touched on all the streaming, ftp and wifi capabilities of this camera. The auto focus system is a delight to use and it’s the best AF system I’ve ever come across on a video camera. The new sensor in the Z90 is clearly a fairly large step forwards from the sensor in the previous similar model the X70, it has more dynamic range, a lot less rolling shutter (not that it’s a big problem on the X70) and the final images look better as a result. I might just have to add one to my camera collection.
If you would like to join me on one of my adventures to arctic Norway please see take a look at this page. I’ve been running these trips for 11 years and EVERY tour has seen the Northern Lights. This year was no exception and we got to see some really great Auroras and had a great time dog sledding, ice fishing and exploring the Finnmarksvidda.
2018 was yet another great year for my Aurora tours. This picture taken on January 20th.
So here it finally is. Sony’s latest digital cinema camera and finally it has a name rather than a number and it’s called Venice.
Sony Venice Digital Cinema Camera.
I was lucky enough to be involved with Venice during the filming of the UK promo film, so I have had a little bit of a chance to play with one, seen it in action in the hands of an experienced DP (Ed Wild B.S.C.) and I have copies of the footage from it (I did the BTS film). So I have a pretty good idea of what we are dealing with…… and it’s good, it’s very, very good.
On-set with Sony’s Venice.
For a long time I have been saying that what we need is better pixels, not more pixels and that’s precisely what Sony have delivered in Venice. The newly developed sensor is a full frame sensor, 36mm x 24mm with 6K’s worth of horizontal pixels. This means that if you use the camera as a super 35mm camera you have 4K (and for the demo films the pre production cameras used only worked at 4K, the equivalent of 35mm 4 perf. 6K will come a little later). Venice will be able to do a huge range of resolutions and aspect ratios including Anamorphic.
Why only 6K? Well it’s down to pixel size. Bigger pixels can capture more light and they can also store more electrons before they overload. This means you get a bigger dynamic range than would typically be possible with smaller pixels. The extra light capturing capability can be used in one of 2 ways, to increase sensitivity or to decrease noise. It appears that the engineers behind Venice went for the latter, lower noise.
There’s a Sony Venice digital cinema camera buried under there somewhere.
A lot of research was done for this camera. Engineers from Japan met with many ASC and BSC cinematographers. They talked to post houses and colourists to find out what was really needed. I know that Claudio Miranda A.S.C. played an important part in the development process, he also shot the US demo film. The end result is a pretty sensitive camera (500 ISO) with very low noise and over 15 stops of dynamic range. Yes – that’s right over 15 stops without resorting to double exposures or any other tricks!!
Left side of the Sony Venice cinema camera.
While the sensor isn’t a global shutter sensor it does have an extremely fast readout rate. This extra fast readout means that jello and other rolling shutter artefacts are minimised to the point where it behaves much more like a global shutter sensor. Generally speaking, the extra memory circuits needed to get a global shutter either add noise, reduce sensitivity or reduce dynamic range. So it’s not a huge surprise to see the fast read out approach. There was quite a bit of filming done with a rather lovely Lamborghini Uraco, both hand held inside the car and mounted on the front of the car. Looking at the rushes there is no sign of any noticeable rolling shutter artefacts, even the trees flashing past in the background are still nice and vertical.
Viewfinder overlays are now outside of the visible image area.
A lot of the car shooting took place at dusk and an interesting thing that came out of the UK demo reel shoot was how well it performed in low light. The 500 ISO rating is deceptive, because the camera produces so little noise you can rate the camera at a higher ISO and still get good results. Most current cinema cameras don’t produce the best results unless you rate them lower than their base ISO’s. Venice is different, the base ISO is very low noise and very high dynamic range. There appears to be little need to rate it lower for even less noise, although you could if you wish. I asked Ed Wild about this and he was really pleased with Venice’s ISO rating commenting that he often had to rate cameras from other manufacturers lower than the base ISO while he felt Venice at 500 ISO worked really well and that he would even consider rating it higher if needed.
Having a low base ISO means there is less need to use large amounts of ND on outdoor shoots. But talking of ND filters one of the great features of Venice is an 8 stage, behind the lens glass ND filter system. This allows you to choose just the right amount of ND for the light levels you have with no loss of quality. During the pre-shoot test and prep day at Pinewood each stage of the ND was carefully tested for colour shifts and accuracy, no problems were found.
Sony Venice has 2 internal ND filter wheels giving 8 ND levels.
The lens mount on a Venice camera can be changed. It’s not a quick release mount as on the F55 or F5 cameras. It’s normally a PL mount. But the PL mount can be removed and the camera changed to a Sony E-Mount. 6 bolts remove the PL mount and a locking E mount similar to the one on the FS7 II is on the cameras body. This opens up the possibility of using a huge range of lenses, practically anything in fact as it’s easy to adapt from E-Mount to other mounts such as Canon EF for example. For the UK demo reel XTAL Anamorphics from MovieTec were used. Ultra Primes were used for the US promo film.
VENICE A Truly Modular Camera.
Not only can the lens mount be changed but the entire front part of the camera can be changed by removing just 4 screws. Venice is built as a modular camera and the front part of the camera that contains the sensor and ND filters is a removable module (no need for lab conditions or clean rooms to remove the module). This means that in the future Sony could release new sensor options for Venice. Maybe a higher resolution sensor, a monochrome sensor or a high speed sensor. Removing the front sensor module from the camera allows easy access to the cameras internal near silent fan so that it can be cleaned or replaced should that become necessary. All of the cameras electronics are in sealed compartments for dust and moisture protection and rubber seals are installed around any openings such as the SxS card access door. In addition if you do use the AXS-R7 recorder to record Raw/X-OCN this too is weather sealed.
There are 2 SXS card slots on the camera body.
Venice records to SxS cards and with the AXS-R7 attached to AXS cards. You can record XAVC, ProRes HD, ProRes Proxy, as well as Raw/X-OCN. The XAVC recording option allows you to record direct to compact but high quality ready to go files or to record lower resolution proxy files. X-OCN gives a 16 bit linear workflow with raw type performance but without massive files. There is very little difference between X-OCN and Sony 16 bit linear raw and different versions of X-OCN work at different bit rates so you can pick and choose the right balance of image quality against file size for each project.
Plenty of output options on the Sony Venice camera including 4 x HDSDI/4K SDI and an additional dedicated monitor output.
For Venice Sony have developed new colour science that is designed to emulate film. Looking at the rushes from the camera it really looked nice without any grading. The images contain lots of lush colours. You could see amazing subtle tonal information in the leaves and trees in the shots. Skin tone highlights roll of in a particularly pleasing way.
One of the biggest criticisms of the PMW-F55 and F5 cameras when they were launched was that they were too complex to drive. The F55 menu system is very large containing many, many pages of settings and adjustments. This is a cinema camera without a lot of the fancy modes that cameras like the F5 or F55 have so the menus are simpler straight away. A lot of time was spent trialling different menu structures to determine the easiest and friendliest structure. At the press event during the hands on session most people found it quite easy to navigate around the menus. But really the way the side panel and the quick menu is set up means you won’t need to dive into the main menu very often.
Sony Venice right side.
The camera body is a bit bigger than an F55/F5 and a lot smaller and lighter than an F65. On the right side of the camera there is the main LCD display, which is very similar to the one on the F55/F5 with 6 hot keys around it and a rotary menu dial. This is actually quite similar to the F55’s new Quick Menu system and easy to master. All the key functions and setup options are just a couple of button presses away. This is the main display and where most of the cameras settings can be changed. It’s on the right side so the AC or DIT can get at it and see it easily. Pressing the user button turns 5 of the 6 buttons around the LCD into user assignable buttons (the 6th button is used to set the assignable functions).
The right side main LCD display and option buttons.
On the left side of the camera there is a small information display that shows the frame rate, shutter speed, ND, ISO and white balance.
The left side information display.
The white balance of the camera can be dialled in manually unlike the F55 you are no longer tied to 3 presets. You can now dial in the white balance you want down to 1 kelvin increments. Once you have set your white balance you can include your new custom setting in the preset list for quick recall at any time.
The camera can run off either 12V or 24V and it has an internal 24V inverter so that when using a 12V power source such as a V-Mount battery you still get 24V out of the industry standard 24V lemo connectors.
The Sony Venice PL mount is secured to the cameras body with 6 bolts. When removed there is a locking E-Mount.
Venice is a modular camera system with various upgrade options. The base camera comes as a 4K super 35mm camera. the 6K option, anamorphic options (6K full frame and 4K 35mm) and other options will be available as option licences. These licences can be purchased as weekly, monthly or permanent options depending on your needs.
What about the picture? I spent a couple of days looking at footage from this camera both in my own grading suite and at Sony’s Pinewood facility during the production of the BTS film. I also saw it projected at the press day and it looks good. One problem today is that there are so many very good and very capable cameras that it’s tough to really pinpoint things that make one stand out as better than another. What I have found to be very pleasing from Venice is the skin tones. Sony have introduced new colour science and colour management for Venice and I think it looks really good. Even before grading, just looking at the clips on a monitor with S-Log3 gamma the pictures have a wonderful rich look. It’s worth noting that the cameras used for both the US and EU launch films were hand made pre-production units and the engineers are still learning how to fully exploit the new sensors in these cameras. So we can only expect them to get better between now and when they become available to buy.
Will I be getting one? Probably not. This is a wonderful camera and I would love to own one, but Venice will be more expensive than the F55 and probably not the best investment for me at least. However I fully intend to get my grubby fingers on one as soon as possible to learn all of it’s in’s and out’s as I hope to use a Venice for some short films I have planned. This is a serious Alexa or Red alternative It has image quality to rival or better almost any other digital cinema camera, but that does come at a price, although it’s no more expensive than any other comparable camera.
The estimated price for the base camera is expected to be around €37,000. Full frame and anamorphic options will be payable options, with the full-frame option costing a approx €4,000 and the anamorphic costing a approx €6,000. it should be available from around February 2018.
Sony have just released a rather exciting looking new type of mini-cam, the RX0.
I have not played with one yet, so I can only base my comments on the specs, but the specs are both impressive and exciting.
Most gopro type cameras use tiny sensors packed with pixels. This presents a problem as they tend not to be very light sensitive. However those small sensors when combined with an ultra wide angle lens eliminates the need to focus as the depth of field is vast. But for many applications that’s not what you always want. Sometimes you don’t want an ultra wide fisheye view of the world, sometimes you want to get in a bit closer. Sometimes you want a bit of selective focus. In addition it’s hard to be creative when you have no focus or depth of field control. Talking of control most mini-cams have very, very little in the way of manual control as they don’t have adjustable apertures and as a result rely entirely on variable gain and shutter speeds to control the exposure.
Enter the RX0. The RX0 shares a lot of features with the well regarded RX series of compact stills cameras. It has a 1.0″ type sensor, huge compared to most other minicams. It has 24mm f4 lens so it’s less wide and has a shallower DoF. It can shoot in 4K, it can even record using S-Log2 to capture a greater dynamic range so it may turn out to be a great mini-cam for HDR productions (although how big that dynamic range is is not clear at this time). I wish I had some of these for the HDR shoots I did at the beginning of the year.
It’s a camera you can control manually and it even has a special high speed shutter mode for all but eliminating rolling shutter artefacts.
Want to shoot slow-mo? No problem, the maximum frame rate is 960fps (although I suspect that the image quality drops at the higher frame rates).
It’s still very small and very compact, it’s also waterproof and has a high degree of shock proofing.
I can see myself using this as a time lapse camera or in a VR rig. So many applications for a camera like this. Can’t wait to get my hands on one.
My PMW-F5 with Fujinon MK18-55mm zoom fitted with Duclos FZ mount.
Prepping my camera today for a shoot tomorrow. I’ll be shooting with the Fujinon MK18-55mm and MK50-135mm lenses fitted with Duclos FZ mount adapters. I’ve been using the MK18-55mm on my FS7 and FS5 for some time and I have to say I really love this lens. It produces beautiful images with silky smooth bokeh, it’s parfocal and it covers a very hand range of focal lengths. I’ve been wanting to use this lens on my F5 for some time and now at last I can. These lenses work great on the F5 and F55. They are very light compared to most PL lenses and this really helps with the cameras balance, especially if shooting handheld. They are also very cost effective.
Fujinon MK18-55mm with Duclos FZ adapter on PMW-F5.
The light lens weight means I need less weight on my jib than I would have with most similar PL zoom lenses. Also being nice and fast at T2.9 I know I can get great shallow DoF. Tomorrow I’m going to be shooting 2 amazing artists that create incredibly detailed things out of large lumps of iron and steel. I’ll be shooting examples of some of the finest works of metallic art along with all the key parts of the process of creating them. There will be beauty, iron, steel, heat, flames and sparks. I’ll try to post pictures from the shoot over the weekend and once the video is done it will be online for all to enjoy.
Having done a fair bit of shooting with the new and very nice Fujinon MK 18-55mm E-Mount lens I decided to take a much closer look at the Fujinon Cabrio XK6x20 20 to 120mm T3.5 lens with the servo hand grip.
The Fujinon XK6X20 20 to 120mm lens on my PMW-F5. The lens was loaned to me by Fujinon at my request as I wanted to test it for myself.
The price of this lens is very competitive and it can now be found as low as £11K/$16K. Lets not try to pretend that good quality PL mount zooms are cheap, but this is a great price for what is very high quality glass. The 20 to 120mm zoom range is nice and of course it’s truly parfocal there is a back focus adjuster along with macro function.
The XK6X20 viewed from the top.
Like the other similar ENG style PL zooms this lens is quite heavy. The front element of the lens is huge and I’m sure a lot of the weight comes from this big lump of glass. One of the nice things about this lenses baby brother the MK 18-55, is that the 18-55 is really very light, which is great on the smaller cameras like the FS5 or FS7.
The XK6X20 and it huge front element on the left and the smaller and lighter MK18-55 on the right.
The 20-120mm Cabrio exudes quality. The build quality of the lens is wonderful, the witness marks are crisp and well engraved, the servo zoom is silky smooth. The large servo module acts as a handgrip just like traditional ENG lenses and it really comfortable to hold and use this way. But if you don’t need it it can be easily removed leaving the bare bones lens body and saving a little bit of weight. There are the usual 0.8 mod pitch gears on each of the focus zoom and iris rings. Focus ring travel is huge at about 200 degrees and due to the physical size of the lens this is as much as I’d ever want. Even towards infinity there is still a nice range of travel so focussing accurately on distant objects is easy.
But what about the image quality, how does the lens perform in real world situations?
To find out I used it for a shoot in Norway. The shoot was for TV manufacturer Philips. We wanted to obtain some high quality 4K HDR footage to show off the capabilities of a new 4K OLED Ambilight TV. Unfortunately the weather conditions on the shoot were pretty grim most of the time and this made it all the more challenging. But I’m pleased to say that both lenses performed very well despite snow, ice and cold.
You can see the size difference here – XK6X20 on the left and MK18-55 on the right.
One of the great things about having both the high end Cabrio 20-120mm and the budget friendly 18-55mm for the shoot was that the overall look of the images from the FS5 and F5 was the same. Often mixing lenses from different manufacturers results in different looking images giving the colourist more work to do in post. Fujinon now have a range of lenses to suit most budgets from the high end Cabrio 19-90mm T2.9 down through the Cabrio 20-120 T3.5 to the MK 18-55 T2.9.
So what do the images from these lenses look like? I’m afraid I can’t show any of the footage from the Philips shoot yet, I should be able to show it later in the year. Below are a couple of frame grabs to give you an idea of the kind of images you can get. We didn’t shoot the same shots with the F5/XK6x20 and FS5/MK18-55 at the same time, I was the only cinematographer. So I don’t have a side by side comparison from the shoot, but the different scenes shot with each lens/camera combo match really well.
Sami woman feeding reindeer shot with the XK6X20 in Norway. Click on the image for a hi res version.Wide of Sami woman feeding reindeer shot with the XK6X20 in Norway. Click on the image for a hi res version.Annika Summerson filmed in Tromso with the Fujinon XK6X20.Boats in the harbour on a cold but bright morning (the only one we had).Icicles on the window. Shot with the Fujinon XK6X20 with my PMW-F5.
TESTING BOTH LENSES:
In order to better directly compare the two lenses I shot some test shots. The XK6x20 on my F5 and the MK18-55 on my FS7. Both cameras were set to the same settings and hypergamma 3 with the cinema matrix used. The images you will see below have not been touched, this is how they looked straight from the camera. If you click on the picture you should get a link to the full frame 4K image, but do remember this are Jpegs.
Testing the Fujinon MK18-55 and XK6X20 with my PMW-F5 and PXW-FS7.
I tried to get the same shots with both combinations but you will see some small variations. I apologise for that. To give as fair a comparison as possible I did most of the shots at 20mm and 55mm, but then in addition shot at 18mm on the MK18-55 and 120mm on the XK6X20 so you can see the additional range each lens offers.
First test was of a neighbours Cherry tree in blossom.
The FS7 with XF 18-55mm at 55mm. Click on the image for the full size 4K frame.PMW-F5 with XK20X6 at approx 55mm (sorry about the different framing). Click on the image for the size 4K full frame.The FS7 with XF 18-55mm at approx 20mm. Click on the image for the full size 4K frame.PMW-F5 with XK20X6 at 20mm. Click on the image for the size 4K full frame.PMW-F5 with the Cabrio XK6X20 at 120mm showing the extra reach of the 20-120mm zoom.
The next test was a simple setup shot of a couple of beer bottles on a table with strong sunlight from above and behind to create deep contrast. I wanted to see if either lens showed signs of loosing shadow detail due to the very large, very bright table top introducing flare into the shadows.
PXW-FS7 with XF18-55mm at approx 20mm, high contrast scene.PMW-F5 with XK20X6 at 20mm. High Contrast scene. Click on the image for the size 4K full frame.PXW-FS7 with XF18-55mm at 55mm, high contrast scene.PMW-F5 with XK20X6 at approx 55mm. High contrast scene. Click on the image for the size 4K full frame.The FS7 with the XF18-55 at 18mm showing the extra “width” that 18mm gives over 20mm.
My conclusion with the above shots is that there is remarkably little difference between these two lenses. Both perform extremely well. I think the XK6X20 might be marginally sharper at the wide end than the 18-55mm, either that or the slightly better viewfinder of the F5 is allowing me to focus more precisely. In addition I think the bokeh of the more expensive Cabrio is marginally smoother than the 18-55, but again it’s a tiny difference (not as big as the difference in white balance of the two cameras).
Finally a shot of my ugly mug just so you can take a look at some skin tones.
PXW-FS7 with Fujinon XF 18-55 at approx 30mm. Click on the image for full size 4K frame.PMW-F5 with Fujinon Cabrio XK6X20 at approx 30mm. Click on the image for the full size frame.
Again very little difference between these lenses which is a good thing. Both perform very well, both produce pleasing images. Sure the XK6X20 20-120mm is more than twice the price of the MK18-55 but then it does offer twice the zoom range and it’s very hard to make fast parfocal lenses with big zoom ranges for large sensors. There will be a companion MK50-135mm lens coming later in the year, so with both the MK lenses you will be able to get the full range of the XK6X20 and a bit more, provided you don’t mind swapping lenses. It’s a tough choice if you have an E-mount Sony camera, which to get? For E-Mount I think the pair of MK lenses will be the way to go. If you have a PL mount camera the XK6X20 has to be a very serious contender. It’s a great all-round cinema zoom lens and a realistic price. Whichever way you do go you won’t be disappointed, these are proper cinema lenses.
Fujinon have a long history of producing excellent lenses. When I used to shoot motorsports, windsurfing and TV news I used to use Fujinon lenses on my 2/3″ Betacam, Digibeta and DVCAM camcorders. I still have a Fujinon remote zoom demand sitting in the cupboard. Today Fujinon still produce high quality lenses for broadcast cameras.
But Fujinon don’t just make lenses for broadcast cameras, they also make PL mount lenses for use with super 35mm cameras. Perhaps their best known cinema lenses are their “Cabrio” zoom lenses. When it was introduced the 19-90mm T2.9mm Cabrio was ground breaking as it offered a silky smooth zoom servo with an ENG style handgrip on a compact zoom lens.
The Fujinon Cabrio 19-90mm cinema zoom. A lens I’ve always enjoyed using and would love to own.
The 19-90 Cabrio was the workhorse servo zoom that many F5/F55, Red and Arri users had been wanting for a long time. I’ve used the Cabrio’s and they are great lenses, I’d love to own one, but my budget just won’t stretch that far. The 19-90 costs around $40K but it is a beautiful lens.
Aware of the demand for a similar lens at a lower cost, last year Fujinon introduced a more affordable 20-120mm T3.5 lens. However even though much cheaper, at £13.5K/$16K it is still quite an expensive lens, especially when you consider that a camera like the Sony FS7 only costs £6k/$8K.
The Fujinon XK20-120 cinema zoom. A servo unit can be added to turn it into a servo zoom.
That brings us to today. Fujinon have developed a pair of new lenses specifically for E-Mount cameras. An 18-55 and a 55-135. The 55-135 isn’t ready just yet but the wider one, the MK18-55 is, and I’ve been lucky enough to have been loaned one to test.
The new Fujinon MK18-55 E-Mount zoom lens.
As you can see the lens looks very similar to the more expensive XK20-120, but it’s actually a bit smaller and a lot lighter. The lens is an 18-55mm T2.9 (f2.8) Parfocal zoom. Parfocal means that the focus does not shift as you zoom as happens with most DSLR lenses. It’s E-Mount only, so you can’t use it on a Canon camera, but you can put it straight on to a FS5, FS7, even an A7S/A7R (The lens is designed for s35/APS-C so you need to use crop sensor mode or clear image zoom on a full frame sensor). No adapters needed! It’s a manual lens, no autofocus and there isn’t a zoom servo. But what you do get is beautiful image quality!
The MK18-55 T2.9 on my FS7
The short back focus distance of E-Mount compared to PL or EF makes it easier to produce an affordable high quality zoom lens, that’s why this lens is E-Mount only. To ensure that the lens remains parfocal on different cameras it has a backfocus adjustment ring. This ring also functions as a macro focus ring by pressing a small button. This allows you to focus on objects around 1ft/38cm from the lens. When not using macro the minimum focus distance is 0.85m/2ft9″.
The MK18-55’s macro function allows you to get very close to the subject. Click on the image for the full resolution frame grab.Frame grab from the MK18-55mm Fujinon lens. Click on the image for the full resolution frame grab.
The iris is a 9 blade iris with curved blades that produces a pleasing bokeh both inside and outside of focus.
Near and Far bokeh is pleasing thanks to a 9 blade iris. Click on the image for the full resolution frame grab.
To keep the weight down a lot of the lens exterior is made from plastic. It is quite a long (in length) lens. If it was all metal it would make a light camera like the FS7 front heavy, so while perhaps it doesn’t have the tactile feel of a $40K Cabrio it also doesn’t have the weight, the 19-90 is almost 6lb/2.7kg, the MK18-80 is just 34.6ox/980g. However it does feel well made. The focus, zoom and iris rings all feel very smooth and have just the right amount of rotation resistance and damping.
The focus ring has around 180 degrees of travel and the focus markings (in both metric and imperial) are clear and easy to read. Each ring also has a 0.8mm pitch gear ring.
The MK18-55 with the supplied lens hood.
In use I found the lens a pleasure to use. I can perform nice smooth manual zooms with ease. It is easy to focus with just the right amount of focus travel, not too much not too little. Focus breathing is very well controlled and quite minimal. It’s certainly one of the best lenses I’ve used at this price point. It feels and behaves like a proper cinema lens.
So what about the image quality? This lens does not disappoint. The images are sharp from edge to edge, corner to corner throughout the zoom range, even when wide open at T2.9. Contrast is good and even when shooting into the sun, flare is minimal. A square lens hood is provided with the lens that works well, but of course you can also use it with a matte box if you wish.
To me the images from this lens look closer to the ones I get from prime lenses than a zoom. I can see this lens being used instead of a set of primes for many productions and it certainly works out very cost effective compared to a set of decent prime lenses.
The Fujinon MK18-55 at 55mm. Click on the image for the full resolution frame grab.The Fujinon MK18-55 at 18mm. Click on the image for the full resolution frame grab.
Chromatic aberration is well controlled and minimal and I didn’t notice any significant colour cast or tint. The lens is also remarkably free from geometric distortions (unlike the Sony 18-105 that is supplied as a kit lens with the FS5 that’s full of all kinds of distortions). There is a little, but it’s no worse than most other wide zoom lenses and nothing that I am concerned about.
Even shooting into the sun flare is minimal and shadows remain dark. Click on the image for the full resolution frame grab.
While T2.9 isn’t super fast it is at least a stop faster than most (all?) of the other budget cinema zooms on the market. Plus it’s absolutely useable at T2.9 unlike some other lenses that go a little soft or become prone to flare when wide open. I’d be perfectly happy to shoot at T2.9 all day.
Wide open at t2.9 the MK18-55 still produces a nice sharp image. Click on the image for the full resolution frame grab.
So, in case you haven’t noticed yet I really like this lens. It may not have the zoom range of the new Sony 18-110, but it’s a stop faster. It may not have the ability to be used on different mounts like the Canon 18-80 t4.4 but again it’s faster and has a real manual focus ring with hard stops and repeatable calibration. The new Zeiss 21-100 t2.9/t3.9 is interesting, but more expensive and not as wide nor as fast. You should be able to buy both the 18-55 and the 50-135 for less than the Zeiss.
So, if you are in the market for a proper digital cinema lens for your FS5 or FS7 do take a close look at the Fujinon MK18-55. I hope to get a chance to shoot some more interesting footage with this lens very soon and share it with you.
UPDATE: I should have anticipated this, I’ve been asked this many times today already. Given that the new Sony 18-110 f4 and the MK18-55mm are similar prices, which one would I choose?
I would probably choose the Fujinon, but my needs are not necessarily the same as others. Very often if I need a zoom lens I need a very big zoom range. For my storm chasing I use a Tamron 16-300mm dslr lens, I need a BIG zoom range. It’s a compromise, I know I can get better image quality with primes or a shorter zoom, but I often need to go from super wide to super long and the Tamron 19x 16-300mm zoom fits the bill. For run and gun handheld work I actually quite like the cheaper Sony 18-105mm. Sure the focus is a bit wonky and it has a lot of different geometric distortions, but it’s really small, very light and the autofocus works OK. It does the job I need of it.
Currently I own various prime lenses. I also have the Sigma 18-35mm f1.8 which I rate highly. For a drama or documentary shoot with my FS7 right now I would probably pack my 18-35mm Sigma, 20mm Sigma, my 14, 35, 55 and 85mm Samyangs plus the 16-300mm Tamron. I could see the Fujinon 18-55mm replacing ALL of the lenses below the 85mm Samyang, except perhaps the 14mm. So instead of carrying 4 lenses, I only need to take one and achieve the same kind of image quality (the Samyangs are T1.4, but normally I stop them down to T2 -T2.8 as they are a bit soft wide open). I will have less breathing, plus I can zoom during the shot. In addition I’m getting near prime lens quality without the need to keep swapping lenses when I need a different focal length.
The Fujinon is light and compact a big bonus when travelling. Once the MK50-135mm becomes available the pair would cover the majority of drama or short film focal lengths. Just 2 light and compact lenses. For me the Sony at f4 just isn’t quite fast enough for film style productions – great for run and gun and general purpose shoots but it’s not really the lens I want.
The only question that remains is what should I get for my F5 with it’s PL/FZ mount? If only the MK18-55mm would fit the F5. Have to save my pennies for the Fujinon XK6x20 20-120mm.
I was recently sent a new rain cover by Camrade for my FS7 (there is also one for the FS7 II). I’ve used Camrade “wet suits” as they call them for years. They are great covers made from a low noise fabric. That means that if you need to fiddle with the cover while shooting it makes very little noise. The fabric is high quality, soft and supple but also completely waterproof.
Camrade “wet suit” rain cover for the PXW-FS7
The FS7 cover set covers the whole camera and lens and also has a separate cover for the viewfinder that can be used either with the extension tube attached or thanks to a large clear panel that allows you to clearly see the LCD screen it can be used without the extension tube. There is also a cover for the arm and handgrip.
The Camrade FS7 rain cover kit includes a cover for the viewfinder.The Camrade cover can be used with or without the viewfinder extension tube.
The main camera body cover has clear panels that allow you to see all the major controls and switches on both sides. In addition the clear panels can be opened and rolled up and secured open by velcro if you want easy access to the camera while it’s not raining.
Clear panels can be rolled up and secured for easy access to the camera on the Camrade rain cover.
Along the top of the cover there is a long velcro opening that allows the mount for the viewfinder to exit the cover as well as an elasticated opening for a shot gun mic. There are further openings for the front MI shoe as well as the cameras top handle.
The Camrade FS7 rain cover has an elasticated sleeve for a shotgun mic there plus opening for the front shoe of the FS7.
Overall the cover is quite large and the fit is quite baggy on a bare bones FS7. But this does mean that you can attach radio mic receivers or timecode sync boxes etc to the camera and keep them protected from the elements under the cover. The bagginess also allows you to grip the top handle through the rain cover, so even when carrying the camera from location to location it remains protected from the elements.
The length of the cover means that there is space at the back for the XDCA extension unit and/or an external battery system. There’s even a little flap at the back that allows you to see the top of the battery to check the batter status. This is great with my PAG-Link batteries (love my PAG-Links).
There are access panels and flaps just where you need them on the Camrade FS7 rain cover.
If you are using a long lens then you can add an included extension section to the front of the cover that will protect most lenses. Underneath the main cover there is a zip that allows you to almost completely close the rain cover so that when using the camera on your shoulder it doesn’t flap about.
Cameras like the FS7 are expensive. While the FS7 does have a degree of built in protection against a splash of water it really isn’t designed to survive a heavy rain shower. The Camrade covers are not expensive and much better than wrapping the camera in a bin bag. When not in use the cover slips into a nice soft pouch that you can keep in your camera bag until the next time you need it.
Manage your privacy
To provide the best experiences, we use technologies like cookies to store and/or access device information. Consenting to these technologies will allow us to process data such as browsing behavior or unique IDs on this site. Not consenting or withdrawing consent, may adversely affect certain features and functions.
Functional
Always active
The technical storage or access is strictly necessary for the legitimate purpose of enabling the use of a specific service explicitly requested by the subscriber or user, or for the sole purpose of carrying out the transmission of a communication over an electronic communications network.
Preferences
The technical storage or access is necessary for the legitimate purpose of storing preferences that are not requested by the subscriber or user.
Statistics
The technical storage or access that is used exclusively for statistical purposes.The technical storage or access that is used exclusively for anonymous statistical purposes. Without a subpoena, voluntary compliance on the part of your Internet Service Provider, or additional records from a third party, information stored or retrieved for this purpose alone cannot usually be used to identify you.
Marketing
The technical storage or access is required to create user profiles to send advertising, or to track the user on a website or across several websites for similar marketing purposes.


 Sony have just released a rather exciting looking new type of mini-cam, the RX0.


