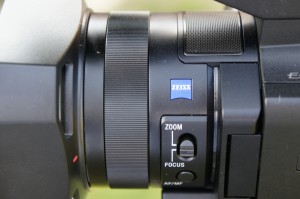
Tag Archives: camera

Do I need to worry about 8K?

This is a question that gets asked a lot. And if you are thinking about buying a new camera it has to be one the you need to think about. But in reality I don’t think 8K is a concern for most of us.

I recently had a conversation with a representative of a well known TV manufacturer. We discussed 8K and 8K TV’s. An interesting conclusion to the conversation was that this particular TV manufacturer wasn’t really expecting their to be a lot of 8K content anytime soon. The reason for selling 8K TV’s is the obvious one – In the consumers eyes. 8K is a bigger number than 4K, so it must mean that it is better. It’s any easy sell for the TV manufacturers, even though it’s arguable that most viewers will never be able to tell the difference between an 8K TV and a 4K one (lets face it most struggle to tell the difference between 4K and HD).

Instead of expecting 8K content this particular TV manufacturer will be focussing on high quality internal upscaling of 4K content to deliver an enhanced viewing experience.

It’s also been shown time and time again that contrast and Dynamic Range trump resolution for most viewers. This was one of the key reasons why it took a very long time for electronic film production to really get to the point where it could match film. A big part of the increase in DR for video cameras came from the move from the traditional 2/3″ video sensor to much bigger super 35mm sensors with bigger pixels. Big pixels are one of the keys to good dynamic range and the laws of physics that govern this are not likely to change any time soon.

This is part of the reason why Arri have stuck with the same sensor for so long. They know that reducing the pixel size to fit more into the same space will make it hard to maintain the excellent DR their cameras are known for. This is in part why Arri have chosen to increase the sensor size by combining sensors. It’s at least in part why Red and Sony have chosen to increase the size of their sensors beyond super 35mm as they increase resolution. The pixels on the Venice sensor are around the same size as most 4K s35 cameras. 6K was chosen as the maximum resolution because that allows this same pixel size to be used, no DR compromise, but it necessitates a full frame sensor and the use of high quality full frame lenses.

So, if we want 8K with great DR it forces us to use ever bigger sensors. Yes, you will get a super shallow DoF and this may be seen as an advantage for some productions. But what’s the point of a move to higher and higher resolutions if more and more of the image is out of focus due to a very shallow DoF? Getting good, pin sharp focus with ever bigger sensors is going to be a challenge unless we also dramatically increase light levels. This goes against the modern trend for lower illumination levels. Only last week I was shooting a short film with a Venice and it was a struggle to balance the amount of the subject that was in focus with light levels, especially at longer focal lengths. I don’t like shots of people where one eye is in focus but the other clearly not, it looks odd, which eye should you choose as the in-focus eye?

And what about real world textures? How many of the things that we shoot really contain details and textures beyond 4K? And do we really want to see every pore, wrinkle and blemish on our actors faces or sets? too much resolution on a big screen creates a form of hyper reality. We start to see things we would never ever normally see as the image and the textures become magnified and expanded. this might be great for a science documentary but is distracting for a romantic drama.

If resolution really, really was king then every town would have an IMAX theater and we would all be shooting IMAX. 

Before 8K becomes normal and mainstream I believe HDR will be the next step. Consumers can see the benefits of HDR much more readily than 8K. Right now 4K is not really the norm, HD is. There is a large amount of 4K acquisition, but it’s not mainstream. The amount of HDR content being produced is still small. So first we need to see 4K become normal. When we get to the point that whenever a client rings the automatic assumption is that it’s a 4K shoot, so we won’t even bother to ask, that’s when we can consider 4K to be normal, but that’s not the case for most of us just yet. Following on from that the next step (IMHO) will be where for every project the final output will be 4K HDR. I see that as being at least a couple of years away yet.

After all that, then we might see a push for more 8K. At some point in the not too distant future 8K TV’s will be no more expensive than 4K ones. But I also believe that in-TV upscaling will be normal and possibly the preferred mode due to bandwidth restrictions. less compressed 4K upscaled to 8K may well look just as good if not better than an 8K signal that needs more compression.

8K may not become “normal” for a very long time. We have been able to easily shoot 4K for 6 years or more, but it’s only just becoming normal and Arri still have a tremendous following that choose to shoot at less than 4K for artistic reasons. The majority of Cinemas with their big screens are still only 2K, but audiences rarely complain of a lack of resolution. More and more content is being viewed on small phone or tablet screens where 4K is often wasted. It’s a story of diminishing returns, HD to 4K is a much bigger visual step than 4K to 8K and we still have to factor in how we maintain great DR.

So for the next few years at least, for the majority of us, I don’t believe 8K is actually desirable. many struggle with 4K workflows and the extra data and processing power needed compared to HD. An 8K frame is 4 times the size of a 4K frame. Some will argue that shooting in 8K has many benefits. This can be true if you main goal is resolution but in reality it’s only really very post production intensive projects where extensive re-framing, re-touching etc is needed that will benefit from shooting in 8K right now. It’s hard to get accurate numbers, but the majority of Hollywood movies still use a 2K digital intermediate and only around 20% of cinemas can actually project at more than 2K.

So in conclusion, in my humble opinion at least. 8K is more about the sales pitch than actual practical use and application. So people will use it – just because they can and it sounds impressive. But for most of us right now it simply isn’t necessary and it may well be a step too far.

How to get the best White Balance (Push Auto WB).

Getting a good white balance is critical to getting a great image, especially if you are not going to be color correcting or grading your footage. When shooting traditionally ie – not with log or raw – A common way to set the cameras white balance is to use the one push auto white balance combined with a white target. You point the camera at the white target, then press the WB button (normally found at the front of the camera just under the lens).
The white target needs to occupy a good portion of the shot but it doesn’t have to completely fill the shot. It can be a pretty small area, 30% is normally enough. The key is to make sure that the white or middle grey target is obvious enough and at the right brightness that the camera uses the right part of the image for the white balance. For example, you could have a white card filling 50% of the screen, but there might be a large white car filling the rest of the shot. The camera could be confused by the car if the brightness of the car is closer to the brightness the camera wants than the white/grey card.
The way it normally works is that the camera looks for a uniformly bright part of the image with very little saturation (color) somewhere between 45 and 90IRE. The camera will then assume this area to be the white balance target. The camera then adjusts the gain of the red and blue channels so that the saturation in that part of the image becomes zero and as a result there is no color over the white or grey target.
 
If you fill the frame with your white/grey card then there can be no confusion. But that isn’t always possible or practical as the card needs to be in the scene and under the light you are balancing for rather than just directly in front of the lens. The larger your white or grey card is the more likely it is that you will get a successful and accurate white balance – provided it’s correctly exposed and in the right place.
 
The white target needs to be in reasonable focus as if it is out of focus this will create a blurred edge with color from any background objects blending into the blur. This could upset the white balance as the camera uses an average value for the whole of white area, so any color bleed at the edges due to defocussing may result in a small color offset.
 
You can use a white card or grey card (white paper at a push, but most paper is bleached slightly blue to make it look whiter to our eyes and this will offset the white balance). The best white balance is normally achieved by using a good quality photography grey card. As the grey card will be lower down in the brightness range, if there is any color, it will be more saturated. So when the camera offsets the R and B gain to eliminate the color it will be more accurate.
 
The shiny white plastic cards often sold as white balance cards are often not good choices for white balance. They are too bright and shiny. Any reflections off a glossy white card will seriously degrade the cameras ability to perform an accurate white balance as the highlights will be in the cameras knee or roll-off and as a result have much reduced saturation and also reduced R and B gain, making it harder for the camera to get a good white balance. In addition the plastics used tend to yellow with age, so if you do use a plastic white balance card make sure it isn’t past it’s best.
Don’t try to white balance off clouds or white cars, they tend to introduce offsets into the white balance.
 
Don’t read too much into the Kelvin reading the camera might give. These values are only a guide, different lenses and many other factors will introduce inaccuracies. It is not at all unusual to have two identical cameras give two different Kelvin values even though both are perfectly white balance matched. If you are not sure that your white balance is correct, repeat the process. If you keep getting the same kelvin number it’s likely you are doing it correctly.

The Dangers Of Hidden Moisture.

Electronics and water are two things that just don’t match. We all know this and we all know that dropping a camera into a river or the sea probably isn’t going to do it a great deal of good. But one of the very real risks with any piece of electronics is hidden moisture, moisture you can’t see.

Most modern high definition or 4K pro video cameras have fans and cooling systems designed to keep them operating for long periods. But these cooling systems mean that the camera will be drawing in air from the outside world into the cameras interior. Normally this is perfectly fine, but if you are operating in rain or a very wet environment such as high humidity, spray, mist, fog etc it will mean a lot of moisture circulating through the camera and this can be a cause of problems.

If the camera is warm relative to the ambient temperature then generally humid air will simply pass through the camera (or other electronics) without issue. But if the camera is colder than the airs dewpoint then some of the moisture in the air will condense on the cameras parts and turn into water droplets.

A typical dangerous scenario is having the camera in a nice cool air conditioned car or building and then taking the camera out of the car/building to shoot on a warm day.  As the warm air hits the slightly colder camera parts moisture will form, both on the outside and the inside of the cameras body.

Moisture on the outside of the camera is normally obvious. It also tends to dry off quite quickly, but moisture inside the camera can’t be seen, you have no way of knowing whether it’s there or not. If you only use the camera for a short period the moisture won’t dry out and once the fans shut down the cameras interior is no longer ventilated and the moisture stays trapped inside.

Another damaging scenario is a camera that’s been splashed with water, maybe you got caught in an unexpected rain shower. Water will find it’s way into the smallest of holes and gaps through capillary action. A teeny, tiny droplet of water inside the camera will stay there once it gets inside. Get the camera wet a couple of times and that moisture can start to build up and it really doesn’t take a lot to do some serious damage. Many of the components in modern cameras are the size of pin heads. Rain water, sea water etc contain chemicals that can react with the materials used in a cameras construction, especially if electricity is passing through the components or the water and before you know it the camera stops working due to corrosion from water ingress.

Storing you delicate electronics inside a nice waterproof flight case such as a Pelicase (or any other similar brand) might seem like a good idea as these cases are waterproof. But a case that won’t let water in also won’t let water and moisture out. Put a camera that is damp inside a wateproof case and it will stay damp. It will never dry out.  All that moisture is gong to slowly start eating away at the metals used in a lightweight camera body and some of the delicate electronic components. Over time this gets worse and worse until eventually the camera stops working.

So What Should You Do?

Try to avoid getting the camera wet. Always use a rain cover if you are using a camera in the rain, near the sea or in misty, foggy weather. Just because you can’t see water flowing off your camera it doesn’t mean it’s safe. Try to avoid taking a cold camera from inside an air conditioned office or car into a warmer environment. If you need to do this a lot consider putting the camera in a waterproof bag ( a bin bag will do) before taking the camera into the warmer environment. Then allow the camera to warm up in the bag before you start to use it. If driving around in a car from location to location consider using less air conditioning so the car isn’t so cold inside.

Don’t store or put away a damp camera. Always, always throughly dry out any camera before putting it away. Consider warming it up and drying it with a hairdryer on a gentle/low heat setting (never let the camera get too hot to handle). Blow warm dry air gently into any vents to ensure the warm air circulates inside to remove any internal moisture. Leave the camera overnight in a warm, dry place with any flaps or covers open to allow it to dry out throughly.

If you know you camera is wet then turn it off. Remove the battery and leave it to dry out in a warm place for 24 hours. If it got really wet consider taking it to a dealer or engineer to have it opened up to make sure it’s dry inside before adding any power.

If you store your kit in waterproof cases, leave the lids open to allow air to circulate and prevent moisture building up inside the cases. Use Silica Gel sachets inside the cases to absorb any unwanted moisture.

If you live or work in a warm humid part of the world it’s tough. When I go storm chasing going from inside the car to outside in the warm to shoot is not healthy for the camera. So at the end of each day take extra care to make sure the camera is dry. Not just any obvious moisture on the outside but dry on the inside. So this normally means warming it up a little (not hot, just warm). Again a hair drier is useful or leave the camera powered up for a couple of hours in an air conditioned room (good quality aircon should mean the air in the room is dry). I keep silica gel sachets in my camera bags to help absorb any surplus moisture. Silica gel sachets should be baked in an oven periodically to dry them out and refresh them.

Fogged Up Lens?

Another symptom of unwanted moisture is a fogged up lens. If the lens is fogged up then there will almost certainly be moisture elsewhere. In the case of a fogged up lens one thing that sometimes helps (other than a hairdryer) is to zoom in and out a lot if it’s a zoom or change the focus a lot. Moving the lens elements backwards and forwards inside the lens helps to circulate air inside the lens and can speed up the time it takes to dry out.

Sony Venice. Full Frame Digital Cinema Camera.

So here it finally is. Sony’s latest digital cinema camera and finally it has a name rather than a number and it’s called Venice.

Sony Venice Digital Cinema Camera.

I was lucky enough to be involved with Venice during the filming of the UK promo film, so I have had a little bit of a chance to play with one, seen it in action in the hands of an experienced DP (Ed Wild B.S.C.) and I have copies of the footage from it (I did the BTS film). So I have a pretty good idea of what we are dealing with…… and it’s good, it’s very, very good.

On-set with Sony’s Venice.

For a long time I have been saying that what we need is better pixels, not more pixels and that’s precisely what Sony have delivered in Venice. The newly developed sensor is a full frame sensor, 36mm x 24mm with 6K’s worth of horizontal pixels. This means that if you use the camera as a super 35mm camera you have 4K (and for the demo films the pre production cameras used only worked at 4K, the equivalent of 35mm 4 perf. 6K will come a little later). Venice will be able to do a huge range of resolutions and aspect ratios including Anamorphic.

Why only 6K? Well it’s down to pixel size. Bigger pixels can capture more light and they can also store more electrons before they overload. This means you get a bigger dynamic range than would typically be possible with smaller pixels. The extra light capturing capability can be used in one of 2 ways, to increase sensitivity or to decrease noise. It appears that the engineers behind Venice went for the latter, lower noise.

There’s a Sony Venice digital cinema camera buried under there somewhere.

A lot of research was done for this camera. Engineers from Japan met with many ASC and BSC cinematographers. They talked to post houses and colourists to find out what was really needed. I know that Claudio Miranda A.S.C. played an important part in the development process, he also shot the US demo film. The end result is a pretty sensitive camera (500 ISO) with very low noise and over 15 stops of dynamic range. Yes – that’s right over 15 stops without resorting to double exposures or any other tricks!!

Left side of the Sony Venice cinema camera.

While the sensor isn’t a global shutter sensor it does have an extremely fast readout rate. This extra fast readout means that jello and other rolling shutter artefacts are minimised to the point where it behaves much more like a global shutter sensor.  Generally speaking, the extra memory circuits needed to get a global shutter either add noise, reduce sensitivity or reduce dynamic range. So it’s not a huge surprise to see the fast read out approach. There was quite a bit of filming done with a rather lovely Lamborghini Uraco, both hand held inside the car and mounted on the front of the car. Looking at the rushes there is no sign of any noticeable rolling shutter artefacts, even the trees flashing past in the background are still nice and vertical.

Viewfinder overlays are now outside of the visible image area.

A lot of the car shooting took place at dusk and an interesting thing that came out of the UK demo reel shoot was how well it performed in low light. The 500 ISO rating is deceptive, because the camera produces so little noise you can rate the camera at a higher ISO and still get good results. Most current cinema cameras don’t produce the best results unless you rate them lower than their base ISO’s. Venice is different, the base ISO is very low noise and very high dynamic range. There appears to be little need to rate it lower for even less noise, although you could if you wish. I asked Ed Wild about this and he was really pleased with Venice’s ISO rating commenting that he often had to rate cameras from other manufacturers lower than the base ISO while he felt Venice at 500 ISO worked really well and that he would even consider rating it higher if needed.

Having a low base ISO means there is less need to use large amounts of ND on outdoor shoots. But talking of ND filters one of the great features of Venice is an 8 stage, behind the lens glass ND filter system. This allows you to choose just the right amount of ND for the light levels you have with no loss of quality. During the pre-shoot test and prep day at Pinewood each stage of the ND was carefully tested for colour shifts and accuracy, no problems were found.

Sony Venice has 2 internal ND filter wheels giving 8 ND levels.

The lens mount on a Venice camera can be changed. It’s not a quick release mount as on the F55 or F5 cameras. It’s normally a PL mount. But the PL mount can be removed and the camera changed to a Sony E-Mount. 6 bolts remove the PL mount and a locking E mount similar to the one on the FS7 II is on the cameras body. This opens up the possibility of using a huge range of lenses, practically anything in fact as it’s easy to adapt from E-Mount to other mounts such as Canon EF for example. For the UK demo reel XTAL Anamorphics from MovieTec were used. Ultra Primes were used for the US promo film.

VENICE A Truly Modular Camera.

Not only can the lens mount be changed but the entire front part of the camera can be changed by removing just 4 screws. Venice is built as a modular camera and the front part of the camera that contains the sensor and ND filters is a removable module (no need for lab conditions or clean rooms to remove the module). This means that in the future Sony could release new sensor options for Venice. Maybe a higher resolution sensor, a monochrome sensor or a high speed sensor. Removing the front sensor module from the camera allows easy access to the cameras internal near silent fan so that it can be cleaned or replaced should that become necessary. All of the cameras electronics are in sealed compartments for dust and moisture protection and rubber seals are installed around any openings such as the SxS card access door. In addition if you do use the AXS-R7 recorder to record Raw/X-OCN this too is weather sealed.

There are 2 SXS card slots on the camera body.

Venice records to SxS cards and with the AXS-R7 attached to AXS cards. You can record XAVC, ProRes HD, ProRes Proxy, as well as Raw/X-OCN. The XAVC recording option allows you to record direct to compact but high quality ready to go files or to record lower resolution proxy files.  X-OCN gives a 16 bit linear workflow with raw type performance but without massive files. There is very little difference between X-OCN and Sony 16 bit linear raw and different versions of X-OCN work at different bit rates so you can pick and choose the right balance of image quality against file size for each project.

Plenty of output options on the Sony Venice camera including 4 x HDSDI/4K SDI and an additional dedicated monitor output.

For Venice Sony have developed new colour science that is designed to emulate film. Looking at the rushes from the camera it really looked nice without any grading. The images contain lots of lush colours. You could see amazing subtle tonal information in the leaves and trees in the shots. Skin tone highlights roll of in a particularly pleasing way.

One of the biggest criticisms of the PMW-F55 and F5 cameras when they were launched was that they were too complex to drive. The F55 menu system is very large containing many, many pages of settings and adjustments. This is a cinema camera without a lot of the fancy modes that cameras like the F5 or F55 have so the menus are simpler straight away. A lot of time was spent trialling different menu structures to determine the easiest and friendliest structure. At the press event during the hands on session most people found it quite easy to navigate around the menus. But really the way the side panel and the quick menu is set up means you won’t need to dive into the main menu very often.

Sony Venice right side.

The camera body is a bit bigger than an F55/F5 and a lot smaller and lighter than an F65. On the right side of the camera there is the main LCD display, which is very similar to the one on the F55/F5 with 6 hot keys around it and a rotary menu dial. This is actually quite similar to the F55’s new Quick Menu system and easy to master.  All the key functions and setup options are just a couple of button presses away. This is the main display and where most of the cameras settings can be changed. It’s on the right side so the AC or DIT can get at it and see it easily. Pressing the user button turns 5 of the 6 buttons around the LCD into user assignable buttons (the 6th button is used to set the assignable functions).

The right side main LCD display and option buttons.

On the left side of the camera there is a small information display that shows the frame rate, shutter speed, ND, ISO and white balance.

The left side information display.

The white balance of the camera can be dialled in manually unlike the F55 you are no longer tied to 3 presets. You can now dial in the white balance you want down to 1 kelvin increments. Once you have set your white balance you can include your new custom setting in the preset list for quick recall at any time.

The camera can run off either 12V or 24V and it has an internal 24V inverter so that when using a 12V power source such as a V-Mount battery you still get 24V out of the industry standard 24V lemo connectors.

The Sony Venice PL mount is secured to the cameras body with 6 bolts. When removed there is a locking E-Mount.

Venice is a modular camera system with various upgrade options. The base camera comes as a 4K super 35mm camera. the 6K option, anamorphic options (6K full frame and 4K 35mm) and other options will be available as option licences. These licences can be purchased as weekly, monthly or permanent options depending on your needs.

What about the picture? I spent a couple of days looking at footage from this camera both in my own grading suite and at Sony’s Pinewood facility during the production of the BTS film. I also saw it projected at the press day and it looks good. One problem today is that there are so many very good and very capable cameras that it’s tough to really pinpoint things that make one stand out as better than another. What I have found to be very pleasing from Venice is the skin tones. Sony have introduced new colour science and colour management for Venice and I think it looks really good. Even before grading, just looking at the clips on a monitor with S-Log3 gamma the pictures have a wonderful rich look. It’s worth noting that the cameras used for both the US and EU launch films were hand made pre-production units and the engineers are still learning how to fully exploit the new sensors in these cameras. So we can only expect them to get better between now and when they become available to buy.

Will I be getting one? Probably not. This is a wonderful camera and I would love to own one, but Venice will be more expensive than the F55 and probably not the best investment for me at least. However I fully intend to get my grubby fingers on one as soon as possible to learn all of it’s in’s and out’s as I hope to use a Venice for some short films I have planned. This is a serious Alexa or Red alternative It has image quality to rival or better almost any other digital cinema camera, but that does come at a price, although it’s no more expensive than any other comparable camera.

The estimated price for the base camera is expected to be around €37,000. Full frame and anamorphic options will be payable options, with the full-frame option costing a approx €4,000 and the anamorphic costing a approx €6,000.  it should be available from around February 2018.

Sony RX0 – Is this the ultimate mini-cam (for now at least).

Sony have just released a rather exciting looking new type of mini-cam, the RX0.
I have not played with one yet, so I can only base my comments on the specs, but the specs are both impressive and exciting.

Most gopro type cameras use tiny sensors packed with pixels. This presents a problem as they tend not to be very light sensitive. However those small sensors when combined with an ultra wide angle lens eliminates the need to focus as the depth of field is vast. But for many applications that’s not what you always want. Sometimes you don’t want an ultra wide fisheye view of the world, sometimes you want to get in a bit closer. Sometimes you want a bit of selective focus. In addition it’s hard to be creative when you have no focus or depth of field control. Talking of control most mini-cams have very, very little in the way of manual control as they don’t have adjustable apertures and as a result rely entirely on variable gain and shutter speeds to control the exposure.

Enter the RX0. The RX0 shares a lot of features with the well regarded RX series of compact stills cameras. It has a 1.0″ type sensor, huge compared to most other minicams. It has 24mm f4 lens so it’s less wide and has a shallower DoF. It can shoot in 4K, it can even record using S-Log2 to capture a greater dynamic range so it may turn out to be a great mini-cam for HDR productions (although how big that dynamic range is is not clear at this time). I wish I had some of these for the HDR shoots I did at the beginning of the year.

It’s a camera you can control manually and it even has a special high speed shutter mode for all but eliminating rolling shutter artefacts.

Want to shoot slow-mo? No problem, the maximum frame rate is 960fps (although I suspect that the image quality drops at the higher frame rates).

It’s still very small and very compact, it’s also waterproof and has a high degree of shock proofing.

I can see myself using this as a time lapse camera or in a VR rig. So many applications for a camera like this. Can’t wait to get my hands on one.

Here’s the Sony product page: https://www.sony.co.uk/electronics/cyber-shot-compact-cameras/dsc-rx0#product_details_default

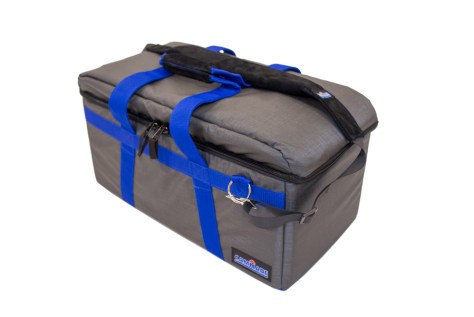
Camrade CB-HD camera bag.

I’ve been using Camrade bags for years. They are tough, protect my gear well without being heavy and clunky like pelicases and other hard shell cases. In addition they don’t scream “expensive equipment here”. They just look like large holdalls.  One of the best features is the use of dividers, pads and inserts that are attached with velcro that allow you to reconfigure the bags for different applications.

Camrade CB-HD equipment bag with reconfigurable velcro dividers and pads.

One thing I often do is carry my camera in a standard carry-on bag when I’m flying. Meanwhile my tripod goes in the camera bag in the hold. When I get to my destination the tripod comes out of the camera bag, I re-arrange the dividers and the camera then lives in the camera bag until I need to fly again. This is so easy to do with the Camrade bags. Although the bags look like soft bags they are extremely ridged. The sides, top and bottom have hard inserts in them that can withstand very large loads, they are strong enough for you to sit on them without collapsing. The bags have strong carry straps and come with a high quality, removable camera strap. There are mesh pockets on the outside as well as on the inside of the lid for those little accessories and bits and pieces that would otherwise get lost. Another bonus is a 90% white card for white balance and use as an exposure reference.

Here’s a video of the medium size Camrade CB-HD bag, designed to take the PXW-FS7 or other similar digital cinema cameras. It’s a bit taller than some of their other bags so perfect for cameras rigged up with base plates and matte boxes.


Notes on Timecode and Timecode Sync for cinematographers.

This is part 1 of two articles. In this article I will look at what timecode is and some common causes of timecode drift problems. In part 2 I will look at the correct way to synchronise timecode across multiple devices.

This is a subject that keeps cropping up from time to time. A lot of us camera operators don’t always understand the intricacies of timecode. If you live in a PAL/50Hz area and shoot at 25fps all the time you will have few problems. But start shooting at 24fps, 23.98 fps or start trying to sync different cameras or audio recorders and it can all get very complicated and very confusing very quickly.

So I’ve written these notes to try to help you out.

WHAT IS TIMECODE?

The timecode we normally encounter in the film and video world is simply a way to give every frame that we record a unique ID number based on the total number of frames recorded or the time of day.  It is a counter that counts whole frames. It can only count whole frames, it cannot count fractions of frames, as a result the highest accuracy is 1 frame. The timecode is normally displayed as Hour:Minute:Second:Frame in the following format

HH:MM:SS:FF

RECORD RUN AND FREE RUN

The two most common types of timecode used are “Record Run” and “Free Run”. Record run, as the name suggests only runs or counts up when the camera is recording. It is a cumulative frame count, which counts the total number of frames recorded. So if the first clip you record starts with the time code clock at 00:00:00:00 and runs for 10 seconds and 5 frames then the TC at the end of the clip will be 00:00:10:05. The first frame of the next clip you record will continue the count so will be 00:00:10:06 and so on. When you are not recording the timecode stops counting and does not increase.

With “Free Run” the timecode clock in the camera is always counting according to the frame rate the camera is set to. It is common to set the free run clock so that it matches the time of the day. Once you set the time in the timecode clock and enable “Free Run” the clock will start counting up whether you are recording or not.

HERE COMES A REALLY IMPORTANT BIT!

In “Free Run” once you have set the timecode clock it will always count the number of frames recorded and in some cases this will actually cause the clock to drift away from the actual time of day.

SOME OF THE PROBLEMS.

An old problem is that in the USA and other NTSC areas the frame rate is a really odd frame rate, it’s 29.97fps (this came about to prevent problems with the color signal when color TV was introduced). Timecode can only count actual whole frames, so there is no way to account for the missing 0.03 frames in every second. As a result timecode running at 29.97fps runs slightly slower than a real time clock.

If the frame rate was actually 30fps in 1 hour there would be 108,000 frames. But at 29.97fps after one real time hour you will have only recorded  107,892 frames, the frame counter TC, won’t reach one hour for another 3.6 seconds.

DROP FRAME TIMECODE.

To eliminate this 3.6 seconds per hour (relative to real time) timecode discrepancy in footage filmed at 29.97fps a special type of time code was developed called “Drop Frame Timecode“. Drop Frame Timecode (DF) works by: every minute, except each tenth minute, two timecode numbers are dropped from the timecode count. So there are some missing numbers in the timecode count but after exactly 1 real time hour the time code value will increment by 1 hour. No frames themselves are dropped, only numbers in the frame count.

WHEN TO USE DROP FRAME (DF) OR NON DROP FRAME (NDF).

Drop Frame Timecode is only ever used for material shot at  29.97fps, which includes 59.94i. (We will often incorrectly refer to this as 60i or 30fps – virtually all 30fps video these days is actually 29.97fps). If you are using “Rec Run” timecode you will almost never need to use Drop Frame as generally you will not by syncing with anything else.

If you are using 29.97fps  “Free Run” you should use Drop Frame (DF) when you want your timecode to stay in sync with a real time clock. An example would be shooting a long event or over several days where you want the timecode clock to match the time on your watch or the watch of an assistant that might be logging what you are shooting.

If you use 29.97fps Non Drop Frame  (NDF) your cameras timecode will drift relative to the actual time of day by a minute and a half each day. If you are timecode syncing multiple cameras or devices it is vital that they are all using the same type of timecode, mixing DF and NDF will cause all kinds of problems.

It’s worth noting that many lower cost portable audio recorders that record a “timecode” don’t actually record true timecode. Instead they record a timestamp based on a real time clock. So if you record on the portable recorder for lets say 2 hours and then try to sync the 1 hour point (01:00:00:00 Clock Time) with a camera recording 29.97fps NDF timecode using the 1 hour timecode number (01:00:00:00 NDF Timecode) they will be out of sync by 3.6 seconds. So this would be a situation where it would be preferable to use DF timecode in the camera as the cameras timecode will match the real time clock of the external recorder.

WHAT ABOUT 23.98fps?

Now you are entering a whole world of timecode pain!!

23.98fps is a bit of a oddball standard that came about from fitting 24fps films into the NTSC 29.97fps frame rate. It doesn’t have anything to do with pull up, it’s just that as NTSC TV runs at 29.97fps rather than true 30fps movies are sped up by 0.1% to fit in 29.97fps.

Now 23.98fps exists as a standalone format. In theory there is still a requirement for Drop Frame timecode as you can’t have 0.02 frames in a timecode frame count, each frame must have a whole number. Then after a given number of frames you go to the next second in the count. With 23.98fps we count 24 whole frames and the increment the timecode count by one second, so once again there is a discrepancy between real time and the timecode count of 3.6 seconds per hour. The time on a camera running at 23.98fps will run fast compared to a real time clock.  Unlike 29.97fps there is no Drop Frame (DF) standard for 23.98, it’s always treated as a 24fps count (TC counts 24 frames, then adds 1 to the second count), this is because there  is no nice way to adjust the count and make it fit real time as there is with 29.97fps. No matter how you do the math or how many frames you drop there would always be a fraction of a frame left over.

So 23.98fps does not have a DF mode. This means that after 1 hour of real time the timecode count on a camera shooting at 23.98 fps will be 00:01:03:14. If you set the camera to “Free Run” the timecode will inevitably drift relative to real time, again over the course of a day the camera will be fast by almost one and a half minutes compared to a real time clock or any other device using either drop frame timecode, 24fps or 25fps.

So, as I said earlier 23.98fps timecode can be painful to deal with.

24fps timecode does not have this problem as there are exactly 24 frames in every second, so a video camera shooting at 24fps should not see any significant timecode drift or loss of timecode sync compared to a real time clock.

It’s worth considering here the problem of shooting sync sound (where sound is recorded externally on a remote sound recorder). If your sound recorder does not have 23.98fps timecode the timecode  will drift relative to a camera shooting at 23.98fps. If your sound recorder only has a real time timecode clock you might need to consider shooting at 24fps instead of 23.98fps to help keep the audio and picture time codes in sync. Many older audio recorders designed for use alongside film cameras can only do 24fps timecode.

In part 2 I will look at the correct way to synchronise timecode across multiple devices.

CLICK HERE FOR PART 2


PXW-FS7 II. New camera that does NOT replace the FS7.

The new Sony PXW-FS7MKII. Can you spot the differences?

By the time you get to read this you may already know almost everything there is to know about the PXW-FS7 II as it has been leaked and rumoured all over the internet. But I’m under a Sony NDA, so have had to keep quiet until now.

And I’ve been told off for calling it a MKII,  the correct name is PXW-FS7 II. Sorry Mr Sony, but if you call it FS7 II, most people will think the “II” means MKII.

The FS7 camera is a mature product. By that I mean that  the early bugs have been resolved. The camera has proven itself to by reliable, cost effective (amazing bang for the buck really). To produce great images and 4K files that are not too big.  It can do slow-mo, 4K, 2K, HD and raw via an adapter and external recorder. As a result the FS7 is now one of the top choices for many broadcasters and production companies. It has become an industry standard.

The first and most important thing to understand about the FS7 II is that it does not replace the existing FS7. I would have preferred it if Sony had called this new camera the “FS7 Plus”. The “II” designation (which I take to mean MKII) implies a replacement model, replacing the MKI. This is not the case. The FS7 II is in fact a slightly upgraded version of the standard FS7 with a few hardware improvements. The upgrades make the MKII quite a lot more expensive (approx 10K Euros), but don’t worry. If you don’t need them, you can stick with the cheaper FS7 MK1 which remains a current model. In terms of image quality there is no real difference, the sensor and image processing in the cameras is the same.

So what are the changes?

A square rod supports the viewfinder on the PXW-FS7MKII

The most obvious perhaps is the use of a square rod to support the viewfinder. This eliminates the all too common FS7 problem of sagging viewfinders. As well as switching to a square rod each of the adjustments for the viewfinder mounting system now has a dedicated clamp. Before if you wanted to slide the viewfinder forwards or backwards you undid a clamp that not only freed off the sliding motion but also controlled the tilt of the screen. So it was impossible to have the fore-aft adjustment slack for quick adjustments without the viewfinder sagging and drooping.

Another view of the revised viewfinder mounting system on the PXW-FS7 MKII

With the MkII you can have a slack fore-aft adjuster without the VF drooping. Overall the changes to the VF mounting system are extremely welcome. The VF mount on the Mk1 is a bit of a disaster, but there are plenty of 3rd party solutions to this. So you can fix the problems on a MKI without having to replace the camera. In addition, if you really wanted you could buy the FS7 II parts as spare parts and fit them to a MKI.

The Lens Mount.

The new locking E-Mount on the PXW-FS7 MKII

The next obvious change is to the lens mount. The FS7 MK1 has a normal Sony E-Mount where you insert the lens and then twist it to lock it in to place. The FS7 II mount is still an E-Mount but now it has a locking collar like a PL or B4 mount. This means that you have to insert the lens at the correct angle and then you turn a locking ring to secure the lens. The lens does not rotate  and once locked in place cannot twist or turn and has no play or wobble. This is great for those that use a follow focus or heavier lenses. BUT the new locking system is fiddly and really needs 2 hands to operate. In practice you have to be really careful when you mount the lens. It’s vital that you align the white dot on the lens with the white dot on the mount before you twist the locking ring.

Make sure the dots are correctly aligned! PXW-FS7 MKII lens mount.
Make sure the dots are correctly aligned! PXW-FS7 II lens mount.

As you rotate the locking ring a small release catch drops into place to prevent the ring from coming undone. But if the lens isn’t correctly aligned when you insert it, the lens can rotate with the locking ring, the catch clicks into place, but the lens will just drop out of the mount. When inserted correctly this mount is great, but if you are not careful it is quite easy to think the lens is correctly attached when in fact it is not.

Variable ND Filter.

The PXW-FS7MKII has a variable ND filter.

Behind the lens mount is perhaps the most significant upgrade. The FS7 II does away with the rotating filter wheel and replaces it with the variable ND filter system from the FS5. I have to say I absolutely love the variable ND on the FS5. It is so flexible and versatile. You still have a 4 position filter wheel knob. At the clear position the ND filter system is removed from the optical path. Select the 1, 2 or 3 positions and the electronically controlled ND filter is moved into position in front of the sensor. You then have 3 preset levels of ND (the level of which can be set in the camera menu) or the ability to smoothly control the level of ND from a dial on the side of the camera. Furthermore you can let the camera take care of the ND filter level automatically. The real beauty of the variable ND s that it allows you to adjust your exposure without having to alter the aperture (which changes the depth of field) or shutter (which alters the flicker/cadence). It’s also a great way to control exposure when using Canon lenses as the large aperture steps on the Canon lenses can be seen in the shot.

New arm on the PXW-FS7 MKII
New arm on the PXW-FS7 II

Another physical change to the camera is the use of a new arm for the handgrip. The new arm has a simple wing-nut for length adjustment, much better than the two screws in the original arm. In addition you can now use the adjuster wing-nut to attach the arm to the camera body and this brings the hand grip very close to the body for hand held use. This is a simple but effective improvement, but again 3rd party handgrip arms are available for the base model FS7.

Improved viewfinder loupe attachment on the FS7 MKII.

The viewfinder loupe has seen some attention too. The standard FS7 loupe has two fiddly wire clips that have to be done up to secure the loupe to the viewfinder. The MK2 loupe has a fixed hook that slips over the top lug on the viewfinder so that you now only need to do up a single catch on the bottom of the loupe. It is easier and much less fiddly to fit the new loupe, but the optics and overall form and function of the loupe remain unchanged.

Folding sunshade on the PXW-FS7 MKII

As well as the loupe the FS7 II will be supplied with a clip on collapsable sunshade for the viewfinder. This is a welcome addition and hand held shooters will no doubt find it useful. When not in use the sunshade folds down flat and covers the LCD screen to protect it from damage.

The number of assignable buttons on the FS7 II is increased to 10. There are 4 new assignable button on the camera body where the iris controls are on the original FS7.  The Iris controls are now on the side of the camera just below the ND filter wheel along with the other ND filter controls. These buttons are textured to make them easier to find by touch and are a very welcome addition, provided you can remember which functions you have allocated to them. It’s still a long way from the wonderful side panel LCD of the PMW-F5/PMW-F55 with it’s 6 hotkeys and informative display of how the camera is configured.

Power indicator light just above the power switch on the PXW-FS7 MKII

Tucked under the side of the camera and just above the power switch there is now a small green power LED. The original FS7 has no power light so it can be hard to tell if it’s turned on or not. This little green light will let you know.

The last hardware change is to the card slots. The XQD card slots have been modified to make it easier to get hold of the cards when removing them. It’s a small change, but again most welcome as it can be quite fiddly to get the cards of an FS7.

REC-2020.

A further change with the FS7 II is the addition of Rec-2020 colorspace in custom mode. So now with the FS7 II as well as Rec-709 colorspace you can also shoot in Rec-2020. I’m really not sure how important this really is. If Sony were to also add Hybrid Log Gamma or PQ gamma for HDR then this would be quite useful. But standard gammas + Rec2020 color doesn’t really make a huge amount of sense. If you really want to capture a big range you will probably shoot S-Log2/3 and S-Gamut/S-Gamut3.

So – the big question – is it worth the extra?

Frankly, I don’t think so. Yes, the upgrades are nice, especially the variable ND filter and for some people it might be worth it just for that. But most of the other hardware changes can be achieved via 3rd party accessories for less than the price difference between the cameras.

With all the financial turmoil going on in many countries right now I think we can expect to see the cost of most cameras start to rise, including the original (but still current) FS7. This may narrow the price gap between the FS7 MKI and FS7 MK2 a little. But an extra 3000 Euros seems a high price to pay for a variable ND filter.

In some respects this is good news as it does mean that those that have already invested in an FS7 MKI won’t see that investment diminished, the MK1 is to remain a current model alongside the souped up MK2 version. Now you have a choice, the lower cost workhorse FS7 MK1 or the MK2 with it’s variable ND filter and revised lens mount.

PXW-FS7 firmware version 4.0 now available to download.

FS7-Firmware-V4Sony have released firmware update version 4.0 for the PXW-FS7. This new firmware brings some welcome updates to the FS7 including the ability to move the focus magnification area away from the center of the screen.  Other new features include true 24p (as well as 23.98fps).

1. Support for Flexible Spot in Focus setting.
2. Support for XAVC-I 4K 24.00P.
3. Display for Video Signal Monitor is improved.
4. Operability of S&Q setting by assignable button is improved.
5. Remove Basic Authentication from items saved in all file.
6. Auto knee stability is improved.
7. Overall stability and operability of the camera is improved.
The firmware can be downloaded from here: https://www.sony.co.uk/pro/support/software/SET_BPE-SS-1238

The Sony PXW-X70. Sometimes good things come in small packages!

The new Sony PXW-X70 XDCAM camcorder.

Initial Thoughts.

As the owner of a Sony AX100, which is a really great little 4K and HD camcorder I wasn’t really all that excited when I saw the first prototype of the X70 at Broadcast Asia back in June. You see in the past Sony have done this many times, taken a high end consumer camcorder, updated the firmware, added a handle and then sold it for a higher price as a pro camcorder.  In the past, there has in reality been little difference between the cheaper consumer model and the more expensive pro version.

The handgrip on the Sony PXW-X70

The PXW-X70 is different. This is much more than an AX100 with new firmware. For a start the body of the camera is quite different. The right hand side of the X70 is quite different to the AX100. It has a much fatter hand grip. This makes the camera much easier to hold comfortably for long periods. It also makes space for a full size HDSDI output and a full size HDMI output. But the differences don’t stop there.

On the top of the hand grip there is a large assignable button that is normally set to act as a control for the focus magnification function. This button falls immediately under your index finger when your shooting. In front of this is a new larger and easier to use zoom rocker and then in front of that is another assignable button, this one set as a one push auto iris button – very nice!

The back of the handgrip and the small joystick.

At the back of the handle there is a small joystick that ends up under your thumb (just where it needs to be). This joystick can be used to navigate through the cameras menu system. So, without taking your hand out of the hand grip you can check focus, zoom in and out, set your exposure and go through the menu system. If only it was this easy on all of Sony’s cameras! Ergonomically this camera is really good, especially when you consider how small it is.

The camera has a nice 12x stabilised, optical zoom lens, behind which sits a 1 inch 20 megapixel sensor. In video mode about 14 million pixels are used, so even in 4K (there will be a paid 4K upgrade option next year) there are more pixels than needed for full resolution. Rather than let this extra resolution go to waste you can activate Sony’s “clear image zoom” function that works seamlessly with the optical zoom to give you a 24x zoom range in HD.

Frame grab from PXW-X70. Click on the image to see the full size frame.

The clear image zoom really is remarkably transparent. If you look hard enough at the image, on a big screen, when it’s zoomed all the way in you can just about discern a very slight softness to the image, but frankly I don’t think this is any worse than the softness you might see from a compact optical 24x zoom. It certainly doesn’t look electronic and unless you have side by side, with and without test clips I don’t think you would know that the clear image zoom has been used.

If 24x is not enough there is also a further digital extender, controlled by a button on the right side of the lens that doubles the digital zoom. This you can see, the image is a little degraded at 48x, but it’s not terrible, might be handy for a breaking news story where you can’t get close to the subject.

The left side of the PXW-X70

As well as the optical stabiliser in the lens the camera also has a switchable electronic stabiliser. The active steadyshot is very effective at smoothing out even the shakiest of hands. But it does tend to hang on or grab hold of the image a bit. So when you do deliberately move the camera it tends to try to stabilise the scene until it can no longer correct for the cameras movement at which point the scene is suddenly released and starts to move. If your using a tripod you definitely want to just use the standard steadyshot and not the active mode.

Dual SD card slots on the PXw-X70

The pictures are recorded using either XAVC, AVCHD or standard definition DV to SD cards. For XAVC you must use SDXC cards, but these are cheap and readily available these days. There are two card slots and you can choose between relay record where the camera will switch from slot A to slot B once A is full, or you can make two simultaneous recordings on both cards at the same time. This gives an instant backup if you need it.

XAVC HD RECORDING:

The XAVC HD recordings are 10 bit 422 long GoP at 50Mb/s, 35Mb/s or 25Mb/s. The quality of the 50Mb/s recordings is amazing with no compression artefacts that I can see (there must be some, I just can’t see them). Even the 25Mb/s recordings look really good. You can shoot at up to 60fps in 60i mode and 50fps in 50i mode. In 60i mode you also have 24fps.

Frame grab form the PXW-X70, click on the image to see full size.

Considering this is a highly compact, single chip camera the images it produces are really very good. They don’t have that typical small sensor camera look. The pictures are remarkably noise free at 0db and largely free of artefacts. I tend to find that small handycams often suffer from what I would describe as “busy” pictures. Pictures where  perhaps there is a lot of added sharpening or where the pixels are read in special ways to make a sharp picture. This makes edges slightly flickery and gives the pictures a tell tale small sensor look. The X70 with it’s big sensor and abundance of pixels just doesn’t have this “busy” look.

Train sitting in station. Frame grab from PXW-X70

The pictures really look like they come from a pro camera. Occasionally very fine, high contrast details like white text on a black background can look a little busy, but this is very minor. Dynamic range is quite respectable, it’s not as good as a PMW-300, but not too bad for a compact handycam (I estimate about 10 to 11 stops of DR).

One thing I did find with this camera is that because there is so little noise and the codec is so good, you could quite comfortably shoot about a stop darker than you would normally and then just bring the image up a bit in post. Shooting a little darker helps the camera handle bright highlights and then in post you can just bring up the shadows and mid tones with a simple colour correction to give a nice exposure. I wish I had realised this when I shot the demo video. I would have exposed a little on the dark side and then tweaked the shots in post. There’s so little noise at 0db and so few artefacts that the image holds up to this really well. If your using auto exposure you can set an exposure offset to allow for this in the menu.

PXW-X70 without the top handle fitted.

The X70 is pretty sensitive and 9db of gain is quite useable, so shooting indoors in a typical home or at a wedding venue without extra lights should be no problem. Ramp it up to +33db and it see’s better in the dark than I do, but there is a fair bit of noise at +33db.

As well as being generally rather sensitive the PXW-X70 also has a nightshot mode that bypasses the cameras IR filter and includes a switchable infra-red light, so you can shoot in total darkness if you want.

To see what you are shooting there is a 3.5″ LCD panel. This panel is higher resolution than the one on the AX100 and gives a sharp and pretty accurate image. On the back of the camera there is a small OLED viewfinder. This little OLED is pretty good. It has great contrast and is pretty sharp for a small finder. It’s a great feature on bright sunny days when the LCD can become harder to see.

CRISP, SHARP IMAGES:

The HD images are crisp and sharp without any obvious sharpening, almost certainly a result of having a 4K ready sensor. The lack of obvious detail correction helps give the pictures a pleasing, more filmic look. The camera has picture profiles so if you want you can soften or sharpen the images if you choose. As well as detail and aperture controls there are also controls for gamma (standard, still, Cinematone1, Cinematone2, ITU709) and color. The color controls are similar to those on the FS700 where you can adjust the saturation as well as R, G, B, C, M, Y and K brightness. In addition there is a choice of 6 different preset color modes plus black and white.

PXW-X70 auto/manual switch.

The camera can be controlled either fully automatically or fully manual as well as various in between modes. There is a switch on the back of the camera to switch between auto and manual. In manual you can control the iris, shutter and gain by pressing one of three buttons along the bottom edge of the camera and the using a small wheel just below the lens to set what you have selected. In practice this actually works quite well. There is another button for white balance control on the side of the camera with the usual presets plus auto white balance. Just under the Manual/Auto switch there is a selector for the built in ND filters. I recently purchased a A7s DSLR type camera and I had forgotten what a fiddle it can be to use a camera that doesn’t have built in ND’s. So it’s really good to see proper ND filters on the PXW-X70 as they really help you manage your depth of field.

On the lens there is a single large control ring that can be used to focus the lens or to act as a manual zoom ring. The focus is responsive and although I don’t normally like round and round servo focus rings this one wasn’t too bad.

The zoom/focus ring on the PXW-X70.

There really is so much to this camera that it would take a small book to go through all the features. For example there’s the touch screen LCD that can be used for touch to focus or touch to expose where you just touch the part of the screen you want to expose or focus on. There’s a full set of exposure and focus aids including peaking, histogram, zebras etc.

On the top of the camera you have Sony’s new MI shoe (Multi-Interface) for connecting accessories like the supplied handle with XLR audio inputs. The supplied detachable handle is really well made and very secure when attached. One small note is that by default when you attach the handle to the MI-shoe the camera switches to XLR audio automatically by default. So if you don’t actually have a mic connected to the handle you won’t have any audio as the internal mic gets shut off. You have to go in to the audio section of the menu to enable the internal mic if you want to use the handle but want to use the built in mic.

If you want to do time-lapse or slow stuff down the camera has S&Q motion that goes from 1fps to 60fps at 1920×1080.

The camera has WiFi and NFC and allows remote control via Content Browser Mobile and simply touching an NFC enabled phone or tablet against the side of the camera will pair the camera with the phone or tablet. In the future following a firmware update you will be able to use the camera to stream your content live via U-stream.

Finally – build quality. It’s really well made. It feels nice and solid, it feels like it will really last. Don’t tell Sony, but I dropped the camera from waist hight while I was using it. It survived, no problem at all.

Sony's new baby XDCAM camcorder, the PXW-X70.
Sony’s new baby XDCAM camcorder, the PXW-X70.

In conclusion: This is a nice little camera. It’s very easy to operate. The picture quality is very good for such a compact camera, the only thing that lets it down just a bit is the highlight handling. But the camera is so clean that you can afford to expose a little lower to compensate for this. Since shooting the demo video I have been playing with the picture profiles to help with the highlight exposure and I found that bringing up the black gamma really helps as it lifts the mid range allowing you to expose slightly lower.

The large sensor, combined with the switchable built in ND filters gives you much greater control over the depth of field than normally possible with a compact handycam.

I think you have to remember that this is a small camera. It isn’t a PXW-X180 and it never will be, but if your budget is tight and you want an easy to use compact camera this could be the one for you. I think it would be a good fit as a “B” camera or for use in lower budget corporate productions. In addition the PXW-X70 would be a good camera to give to PA’s and producers or to hand off to inexperienced shooters for fly-on-the-wall productions.