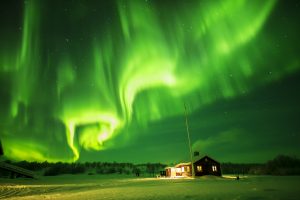
Captured on the first night at the cabins in 2018.
After having to skip a year my Northern Lights tours are back on again starting January 2022. These trips are made for those that appreciate the beauty of nature. The arctic is a spectacular place in so many ways. Especially in winter when the low arctic sun skims along the horizon providing golden hour light all day.
During the long nights when the sky is clear the Northern Lights come out to play. The cold air provides very clear viewing and most guests are blown away by the numbers of stars visible. It’s a photographers paradise.
For more information take a look at the tour page. If you are interested, send me a message.
It’s a common problem. You are shooting a performance or event where LED lighting has been used to create dramatic coloured lighting effects. The intense blue from many types of LED stage lights can easily overload the sensor and instead of looking like a nice lighting effect the blue light becomes an ugly splodge of intense blue that spoils the footage.
Well there is a tool hidden away in the paint settings of many recent Sony cameras that can help. It’s called “adaptive matrix”.
When adaptive matrix is enabled, when the camera sees intense blue light such as the light from a blue LED light, the matrix adapts to this and reduces the saturation of the blue colour channel in the problem areas of the image. This can greatly improve the way such lights and lighting look. But be aware that if trying to shoot objects with very bright blue colours, perhaps even a bright blue sky, if you have the adaptive matrix turned on it may desaturate them. Because of this the adaptive matrix is normally turned off by default.
If you want to turn it on, it’s normally found in the cameras paint and matrix settings and it’s simply a case of setting adaptive matrix to on. I recommend that when you don’t actually need it you turn it back off again.
Most of Sony’s broadcast quality cameras produced in the last 5 years have the adaptive matrix function, that includes the FS7, FX9, Z280, Z450, Z750 and many others.
I have just return from one of the most challenging shoots I have been involved in. The shoot took place over 5 days in and around Tromso in Norway. The aim was to gather footage to show off the capabilities of a new type of 4K TV from Phillips.
We shot the Northern Lights, we shot dog sledding , snow mobiles, shots of the city and sailing on the fjords. Each part of the shoot had many challenges and a lot of the shoot took place at night and at night the crew slept in cabins, tents and on the yachts. Shooting from the ice and snow covered deck of a yacht in temperatures well below zero is not something I enjoyed. And to top it all off the weather was pretty grim fro most of the shoot. Heavy snow showers, freezing temperatures and towards the end strong winds.
Because image quality is paramount for this project I choses to use the best lenses I could, but at the same time space and time constraints dictated that zoom lenses would be desirable. We were shooting 16 bit raw as well as XAVC class 480 on my PMW-F5 and some pick-up shots in UHD XAVC-L on a PXW-FS5. For the PMW-F5 the primary lens was the Fujinon Cabrio XK6x20, 20-120mm PL zoom and to ensure we had similar looking images from the FS5 I used the new Fujinon XF 18-55mm. I have to say that I’m quite in love with both of these lenses.
Fujinon Cabrio XK6x20 PL mount cinema zoom. A beautiful lens!
The Cabrio 20-120 is a beautiful lens and it’s really nice to have a servo zoom that is truly parfocal. The 20-120 produces really nice images even in the most challenging of conditions and at T3.5 it’s reasonably fast throughout the entire zoom range. This was the lens that I used for the majority of the shoot, in particular for the many night scenes we shot. The E-Mount 18-55 on the FS5 produces images that matched really well with the bigger lens and camera. This is a combination I would love to use on more shoots where the budget will allow.
One particular scene that we had to shoot was particularly challenging. It was a set up shot of a night time arrival of a couple of snowmobiles at a Sami camp site. The Sami people are the indigenous people of Northern Norway and they have a particular style of tent know as a Laavu which is similar to a teepee or wigwam. The idea behind the shot was to have the snow scooters arriving with headlights blazing and for the drivers to then enter the tent lit only by the light of a campfire inside the tent. At the time of the shoot it was snowing heavily and was totally dark. Turn off the lights of the snowmobiles and you could not see a thing.
Wide shot of the snowmobiles arriving at the camp in the dark.
While modern cameras like the F5 are very sensitive, the light of a campfire inside a tent will not adequately light a scene like this on it’s own. I didn’t want a totally dark background, so I decided that I would subtly light the trees of the forest that we were in to add some drama and give some depth to the background and a sense of being in a forest.
A slightly closer shot of the tent with backlit trees behind it.
As we were travelling continuously on this shoot there was no space for a large or complex lighting kit and the remote location meant we needed battery powered lights. In addition I knew before we left that there was a chance of bad weather so I needed lights that would work whatever mother nature decided to throw at us.
A snow scooter comes into the shot. You can see just how heavily it was snowing in this shot.
I decided to take a set of 3 Light & Motion Stella battery powered LED lights. It’s just as well I had the Stella lamps as on top of all the other difficulties of the shoot the weather decided it was not going to play ball. We had to shoot the scene (and much of the shoot) in the middle of a snow storm. Fortunately the Stella lights are completely waterproof, so I didn’t need to worry about rain or snow protection. Just set them up turn them on and use the built in dimmer to set the light output.
To light the scene I set up a Stella Pro 5000 in the woods behind the Sami tent, aimed through the trees and pointed directly towards the camera. I chose to backlight the trees to provide a sense of there being trees rather than lighting them. I felt this would look less lit than throwing a ton of light into the forest from the front and I’m pleased with the result.
A Light & Motion Stella Pro 5000 was used to back light the trees and tent. The heavy snow was no problem as the light is totally waterproof.
The Stella Pro 5000 is very bright for a compact battery operated light, it’s 5000 lumen 120 degree output that is pretty close to what you would get from a 200W HMI, it’s very bright. It has a very high CRI and gives out great quality daylight balanced light. It was positioned so that the light itself was behind the tent on a small bank, about 20m back in the woods. You couldn’t see it in the shot, but the light coming through the trees created shafts of light in the snow and the trees appeared as silhouettes. It added depth and interest to what would have otherwise been a near totally black background.
Light & Motion Stella 2000 used to light the forground, again the lamp is waterproof so bad weather is no problem.
Then to provide a small amount of light so that we could see the riders of the snow scooters as they walked to the tent I used a Stella 2000. I didn’t really want the light from this lamp to be too obvious as this would really make the scene look “lit”. I didn’t need the full 2000 lumen output so I used the built in dimmer to reduce the output to around 70%.
The third light was a small Stella 1000 and this was placed inside the tent with a scrunched up orange gel. The Stella 1000 would typically be used as a camera top light, but it’s full dimmable and produces a very high light quality, making it suitable for many applications. The creases and folds in the orange gel helped break up the light a little creating a less lit look sympathetic to the fire inside the tent.
A Stella 1000 with orange gel was used inside the tent to give the light from the fire a small boost.
It allowed me to increase the illumination in the tent, adding to the light from the fire without it being obvious that the tent interior was lit. For some of the shots I had an assistant sit in the tent, out of shot and slowly move the gel in front of the light to add a little movement to the light to mimic the firelight even better.
One particular shot on the storyboard was the silhouette of the drivers entering the tent. The Stella 1000 really helped punch trough the canvas sides of the tent.
At the moment I can’t show you the footage. That will have to wait until after the launch of the TV. But I’m really pleased with the way this scene came out. It’s challenging trying to shoot in the dark, in a blizzard, in temperatures well below freezing. Every aspect of getting this scene was hard. Opening a flight case to get out some kit meant getting snow on everything inside it. Just positioning the light up the woods was tough, the snow was up above my knees as I waded through it. Operating the camera is so much harder when it has a rain cover on it. The viewfinder was constantly misting up as snow fell on it non stop. Seeing the witness marks on the lens is difficult (although thankfully the marks on the Fujinon 20-120 are huge and easy to see).
The Fujinon Cabrio XK6X20 lens all iced up at the end of the day. After shooting out in sub zero temperatures don’t take the camera inside until you are sure you have wrapped for the day!
But sometimes it’s challenges like these that make the job interesting. I know I was cursing and swearing at times trying to make these shots work, but seeing the scene come to life in the grade is all the more rewarding.
I’ll be writing more about the Fujinon 20-120 very soon, so why not subscribe to my blog using the subscribe bottom on the left.
Lets face it cameras are becoming more and more sensitive. We no longer need the kinds of light levels that we once used to need. So why is lighting still so incredibly important. Why do we light?
Starting at a most basic level, there are two reason for lighting a scene. The first and perhaps most obvious is to add enough light for the camera to be able to “see” the scene, to get an adequate exposure. The other reason we need to light, the creative reason why we need to light is to create shadows.
It is not the light in a scene that makes it look interesting, it is the shadows. It is the contrast between light and dark that makes an image intriguing to our eyes and brain. Shadows add depth, they can be used to add a sense of mystery or draw the viewers gaze to the brighter parts of the scene. Without shadows, without contrast most scenes will be visually uninteresting.
Take a typical daytime TV show. Perhaps a game show. Look at how it has been lit. In almost every case it will have been lit to provide a uniform and even light level across the entire set. It will be bright so that the cameras can use a reasonable aperture for a deep depth of field. This helps the camera operators keep everything focus. The flat, uniform light means that the stars or contestants can go anywhere in the set and still look OK. This is lighting for exposure, where the prime driver is a well exposed image. The majority of the light will be coming from the camera side of the set or from above the set with all the light flooding inwards into the set.
Typical TV lighting, flat, very few shadows, light coming from the camera side of the set or above the set.
Then look at a well made movie. The lighting will be very different. Often the main source of light will be coming from the side or possibly even the rear of the scene. This creates dark shadows on the opposite side of the set/scene. It will cast deep shadows across faces and it’s often the shadow side of a face that is more interesting than the bright side.
Striking example of light coming from opposite the camera to create deep shadows – Bladerunner.
A lot of movie lighting is done from diagonally opposite the cameras to create very deep shadows on faces and to keep the background of the shot dark. If, as is typical in TV production your lights are placed where the cameras are and pointed into the set, then all the light will go into set and illuminate the set from front to back. If your lights are towards the side or rear of the set and are facing towards the cameras the light will be falling out of and away from the set rather than into the set. This means you can then keep the rear of the set dark much more easily. Having the main light source opposite the camera is also why you see far more lens flare effects in movies compared to TV as the light is often shining into the camera lens.
Another example of the main light sources coming towards the camera. The assassination of Jesse James by the coward Robert Ford.
If you are shooting a night scene and you want to get nice clean pictures from your camera then contrast becomes key. When we think of what things look like at night we automatically think “dark”. But cameras don’t like darkness, they like light, even the modern super sensitive cameras still work better when there is a a decent amount of light. So one of the keys to a great looking night scene is to light the foreground faces of your cast well but keep the background very dark. You expose the camera for the bright foreground (which means you should not have any noise problems) and then rely on the fact that the background is dark to make the scene look like a night scene. Again the reason to light is for better shadows, to make the darker parts of the scene appear very dark relative to the foreground and a high level of contrast will make it look like night. Consider a bright moonlit night, faces will be bright compared to everything else.
A well lit face against a very dark background means low noise night shot. Another example from The assassination of Jesse James by the coward Robert Ford.
So in cinematography, very often the reason to add light is to create shadows and contrast rather than to simply raise the overall light level. To make this easier we need to think about reflections and how the light that we are adding will bounce around the set and reduce the high contrast that we may be seeking. For this reason most film studios have black walls and floors. It’s amazing how much light bounces of the floor. Black drapes can be hung against walls or placed on the floor as “negative fill” to suck up any stray light. Black flags can be used to cut and control any undesired light output from your lamps and a black drape or flag placed on the shadow side of a face will often help increase the contrast across that face by reducing stray reflections. Flags are as important as lights if you want to control contrast. Barn doors on a lamp help, but if you really want to precisely cut a beam of light the flag will need to be closer to the subject.
I think most people that are new to lighting focus too much on the lights themselves and don’t spend enough time learning how to modify light with diffusers, reflectors and flags. Good video lights are expensive, but if you can’t control and modify that light you may as well just by a DIY floodlight from your local hardware store.
Also consider using fewer lights. More is not necessarily better. The more lights you add the more light sources you need to control and flag. The more light you will have bouncing around your set reducing your contrast and spilling into your otherwise nice shadows. More lights means multiple shadows going in different directions that you will have to deal with. Instead of using lots of lights be more careful about where you place the lights you do have, make better use of diffusion perhaps by bringing it closer to your subject to get more light wrap around rather than using separate key and fill lights.
Well I have just returned from Iceland where I held a couple of 3D stereoscopic master classes and a workshop on video for the internet. They went well and we all had fun despite almost a foot of snow fall the morning of the classes. On the last day of my trip I decided to try and get some more Northern Lights footage. As I am often asked how I do this I put together the clip below which explains what settings I use for the Aurora and also gives a brief description of S&Q on an XDCAM EX. Basically what I do is use the EX Slow Shutter at 32 or 64 frames to increase the sensitivity of the camera. For a dim Northern Lights display I use 64 frames but for a bright display I drop down to 32 frames. The slow shutter acts like a long exposure on a stills camera. I then combine this with interval record shooting at 1 frame every second. I did also have a Canon DSLR with me and tried to shoot the Aurora with that. I found I needed a 10 second exposure at 800 asa to get a similar result to that achieved with the EX. The 10 second exposure means that it would take longer to get a decent length video sequence and most of the motion of the Aurora would be lost. Some of the exposure difference was I admit to the slower F4 lens on the Canon compared to the Sony EX’s F1.8, so perhaps with a faster lens you could bring the exposure down to around 5 seconds and this is something I hope to try when I go Aurora chasing next winter.
If you watch the video make sure you stay to the end to check out my attempt to record a piece to camera in 60 mph blowing snow! Don’t know why I even thought it would work. What I will say is that my new Vinten 5AS did a great job of keeping the camera steady in some pretty extreme conditions.
Manage your privacy
To provide the best experiences, we use technologies like cookies to store and/or access device information. Consenting to these technologies will allow us to process data such as browsing behavior or unique IDs on this site. Not consenting or withdrawing consent, may adversely affect certain features and functions.
Functional
Always active
The technical storage or access is strictly necessary for the legitimate purpose of enabling the use of a specific service explicitly requested by the subscriber or user, or for the sole purpose of carrying out the transmission of a communication over an electronic communications network.
Preferences
The technical storage or access is necessary for the legitimate purpose of storing preferences that are not requested by the subscriber or user.
Statistics
The technical storage or access that is used exclusively for statistical purposes.The technical storage or access that is used exclusively for anonymous statistical purposes. Without a subpoena, voluntary compliance on the part of your Internet Service Provider, or additional records from a third party, information stored or retrieved for this purpose alone cannot usually be used to identify you.
Marketing
The technical storage or access is required to create user profiles to send advertising, or to track the user on a website or across several websites for similar marketing purposes.