Let me start with the definition of “resolution” as given by the Oxford English Dictionary:
“The smallest interval measurable by a telescope or other scientific instrument; the resolving power.
the degree of detail visible in a photographic or television image.”
OK, so that seems clear enough – measurable or visible degree of detail.
Expanding that a little further when we talk about the resolution of an image file such as a Jpeg, TIFF etc, or perhaps RGB or YCbCr* video frame, if we have a 4K image that will normally mean a 4K pixel wide image. It will have 4K wide of red, 4K wide of blue and 4K wide of green, three lots of 4K stacked on top of each other so it is capable of containing any colour or combination of colours at 4K of points or pixels across, in effect a 4K wide image will have 12K of values across the image.
Now we know what resolution means and how it is normally used when describing an image what does it mean when we say a camera has an 8K sensor? Generally this statement means that there will be 8K of pixels across the sensor. In the case of a single sensor that is used to make a colour image some of these pixels will be for Red, some for green and some for blue (or some other arrangement of a mix of colour and clear pixels). But does this also mean that 8K sensor will be able to resolve a 8K of measurable of visible detail – no, it does not.
Typically a single sensor that uses a colour filter array (CFA) won’t be able to resolve fine details and textures anywhere close to the number of horizontal pixels. So, to say that a camera with a single 8K or 4K colour sensor is a camera that can resolve an 8K or 4K image will almost certainly be a lie.
Would it be correct to call that 4K colour sensor a 4K resolution sensor? In my opinion no – it is not correct because if we use a bayer sensor as an example then it will only actually have 2K of green, 1K of red and 1K of blue pixels on any one row. If we compare that to a 4K image such as a Jpeg then the Jpeg image will be made up of 4K wide of green, 4K wide of red, 4K wide of blue pixels. It has the ability to resolve any colour or combination of colours with 4K precision. Meanwhile that 4K bayer sensor can not, it simply doesn’t have sufficient pixels to sample each colour at 4K, in fact it doesn’t even get close.
Clever image processing can take the output from a 4K bayer sensor and use data from the differing pixels to calculate, estimate or guess what the brightness and colours are at each point across the whole sensor and the actual measurable luminance resolution will typically come out at around 0.7x the pixel count, the chroma resolution will be even lower. So if we use the dictionary definition of resolution and the measured or visible details a 4K bayer sensor can resolve we can expect a camera with a 4K pixel across bayer sensor to have a resolution of around 2.8K. Your 4k camera is unlikely to actually be able to create an image that can truly be said to be 4k resolution.
But the camera manufacturers don’t care about this. They want you to believe that your 4K camera is a 4K resolution camera. While most are honest enough not to claim that the camera can resolve 4K they are also perfectly happy to let everyone assume that this is what the camera can do. It is also fair to say the most 4K bayer cameras perform similarly, so your 4K camera will resolve broadly similarly to every other 4K bayer camera and it will be much higher resolution than most HD cameras. But can it resolve 4K, no it can not.
The inconvenient truth that bayer sensor don’t resolve anywhere near the pixel count is why we see 6K or 8K sensors becoming more and more popular as these sensors can deliver visibly sharper, more detailed 4K footage than a camera with a 4K bayer sensor can. In a 4K project the use of an 8K camera will deliver 4K luma and chroma resolution that is not far behind and as a result your 4K film will tend to have finer and more true to life textures. Of course all of this is subject to other other factors such as lens choices and how the signal from the camera is processed, but with like for like an 8K pixel camera can bring real, tangible benefits for a lot of 4K projects compared to a 4K pixel camera.
At the same time we are seeing the emergence of alternative colour filter patterns to the tried and trusted bayer pattern. Perhaps adding white (or clear) pixels for greater sensitivity, perhaps arranging the pixels in novel and different ways. This muddies the water still further as you shouldn’t directly compare sensors with different colour filter arrays based on the specification sheet alone. When you start adding more alternately coloured pixels into the array you force the spacing between each individual colour or luma sample to increase. So, you can add more pixels but might not actually gain extra resolution, in fact the resolution might actually go down. As a result 12K of one pattern type cannot be assumed to be better than 8K of another type and vice versa. It is only through empirical testing that you can be sure of what any particular CFA layout can actually deliver. It is unsafe to simply rely on a specification sheet that simply quotes the number of pixels. And it is almost unheard of for camera manufacturers to actually publish verifiable resolution tests these days……. ….. I wonder why that is?
* YCbCr video or component video can be recorded in a number of ways. A full 4:4:4 4K YCbCr image will have 4K of Y (luma or brightness), a full 4K of the chroma difference blue and a full 4K of chroma difference Red. The chroma difference values are a more efficient way to encode the colour data so the data takes less room but just like RGB etc there are 3 samples for each pixel within the image. Within a post production workflow if you work in YCbCr the image will normally be processed and handled as 4:4:4.
For further space savings many YCbCr systems can if desired subsample the chroma, this is when we see terms such as 4:2:2. The first digit is the luma and the 4 implies every pixel has a discrete value. In 4:2:2 the 2:2 means that the chroma values are interleaved, every other pixel on every other line, so the chroma resolution is halved, this saves space. This is generally transparent to the viewer as our eyes have lower chroma resolution than luma.
But it is important to understand the 4:2:2 and 4:2:0 etc are normally only used for recording systems in cameras etc where saving storage space is considered paramount or in broadcasting and distribution systems and codecs where reducing the bandwidth required can be necessary. SDI and HDMI signals are typically passed as 4:2:2. The rest of the time YCbCr is normally 4:4:4. If we do compare 4K 4:2:2 YCbCr which is 4K x 2k x 2K to a 4K Bayer sensor which has 2K G, 1K R, 1K B it should be obvious that even after processing and reconstruction the image derived from a 4K bayer sensor won’t match or exceed the luma and chroma resolutions that can be passed via 4:2:2 SDI or recorded by a 4:2:2 codec. What you really want is a 6K or better still an 8K bayer sensor.
Before the large sensor resolution most professional video cameras used 3 sensors, one each for red, green and blue. And each of those sensors normally had as many pixels as the resolution of the recording format. So you had enough pixels in each colour for full resolution in each colour.
Then along came large sensor cameras where the only way to make it work was by using a single sensor (the optical prism would be too big to accomodate any existing lens system). So now you have to have all your pixels on one sensor divided up between red, green and blue.
Almost all of camera manufacturers ignored the inconvenient truth that a colour sensor with 4K of pixels won’t deliver 4K of resolution. We were sold these new 4K cameras. But the 4K doesn’t mean 4K resolution, it means 4K of pixels. To be fair to the manufactures, they didn’t claim 4K resolution, but they were also quite happy to let end users think that that’s what the 4K meant.
My reason for writing about this topic again is because I just had someone on my facebook feed discussing how wonderful it was to be shooting at 6K with a new camera as this would give lots of space for reframing for 4K.
The nature of what he wrote – “shooting at 6K” – implies shooting at 6K resolution. But he isn’t, his 6K sensor is probably delivering around 4K resolution and he won’t have any room for reframing if he wants to end up with a 4K resolution final image. Now again, in the name of fairness, shooting with 6K of pixels is going to be better than shooting with 4K of pixels if you do choose to reframe. But we really, really need to be careful about how we use terms like 4K or 6K. What do we really mean, what are we really talking about. Because the more we muddle pixels with resolution the less clear it will be what we are actually recording. Eventually no one will really understand that the two are different and the differences really do matter.
Although it’s been on the market for a while now I have not yet had a chance to write a proper review of the PXW-Z150. I’ve played with it a few times and I’ve felt it offers good value (approx £3k/$4K). As it’s starting to gain some traction amongst corporate producers and those looking for a straight forward 4K camera with lot’s of bang for the buck I though it’s time to share my thoughts.
Cameras like the Z150 are often overlooked these days as they don’t have the “cool” factor that comes with the large sensor Super 35mm cameras that are all the rage, cameras like the PXW-FS5 or FS7.
Left side of the PXW-Z150
But not everyone wants shallow depth of field all of the time. In addition many people want zoom lenses that can zoom in to get a tight shot and zoom back out smoothly without a focus shift. If you add portability and ease of use into the mix then there is no Super 35mm camera that offers all of these. Want a big par focal zoom range – the lens gets big, heavy and very expensive.
This is where a one piece camera with a fixed zoom lens comes into it’s own. For a fraction of the the price of any of the 10 times or more par-focal S35m zoom lenses you can get a fully functioning camcorder. The PXW-Z150 has a 12x optical zoom that can be boosted up to 24x in HD (more on that later).
Right side of the PXW-Z150
So lets take a closer look at the Z150.
From the outside the PXW-Z150 resembles many other handycam style cameras and is almost identical to the HXR-NX100. But this is from the PXW product line, I’m lead to believe that stands for “Professional XAVC Writer”. So this means it will have the XAVC codec. It’s also an XDCAM camcorder and in this case that means it also includes the MPEG2 HD codec. In addition in case you haven’t spotted it there is also a big “4K” symbol on the side.
CODECS AND RECORD FORMATS
The PXW-Z150’s lens hood with built in shutter style lens cap.
So the camera can record UHD (3840 x 2160, the 4K standard for TV) at up to 30fps using Sony’s XAVC-L codec. This is the long GoP version of XAVC and comes in 60 and 100Mb/s versions in the Z150. It is worth considering that this codec does require a pretty good computer to work with it in post production, ideally a minimum of a 4 core i7 processor with 16GB of main ram plus a good NVIDIA or AMD graphics card with 2GB of dedicated video ram. In UHD XAVC-L is limited to 8 bit 4:2:0, this still produces a great looking image but is not considered good enough for main stream UHD broadcast.
The image below is a UHD frame grab from the Z150. Click on the image to see larger versions including the full 3840×2160 image. The grab is a jpeg so may have some compression artefacts not in the original frame.
UHD frame grab from the PXW-Z150. Click on the image to see a larger version or to view the full UHD frame.
If you are not shooting in UHD then you have lots of options. Again we have XAVC-L now at 25, 35 and 50Mb/s and up to 60fp. 35Mb/s and 50Mb/s XAVC-L is normally considered broadcast quality at 25/30fps. In HD XAVC-L is 10 bit 4:2:2.
As well as XAVC-L you also have two more 8 bit HD codecs, MPEG2HD and AVCHD. There are two versions of MPEG2HD, the regular HD version which is 4:2:0 at 35Mb/s as found in the older EX1 and EX3 camcorders as well as the 50Mb/s HD422 4:2:2 broadcast quality version as found in the PMW-200 and most of Sony broadcast camcorders. These older MPEG2 “XDCAM” codecs are still incredibly popular and accepted almost everywhere for broadcast HD. They are really easy to use and even though they are 8 bit still give great looking pictures. Finally if you just need something compact there is AVCHD, although frankly why you would want to use AVCHD when you have so many better options available I’m not sure. Perhaps those running older or consumer based edit software will benefit from the inclusion of AVCHD.
RECORDING MEDIA.
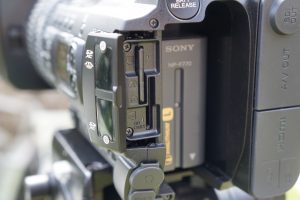
In order to be able to record all the different formats available you must use SDXC cards. These are readily available and low cost. Please remember though that SD cards are consumer media. It is normally very reliable (probably more reliable than tape used to be) but card failures can occur and a duff card could result in the loss of everything on the card. Fortunately Sony have considered this and the camera features two card slots.
The PXW-Z150 has two slots for SDXC cards.
The two card slots can be configured in a number of ways. To record long events you can use relay record where once the first card is full the camera will automatically switch to the second card. For security you can use simultaneous record where you record to both slots at the same time. This means you are creating an instant backup, so the failure of a single card should not be a drama. As a further option you can control the recording function of each card slot separately. You can use the record button on the hand grip to control one slot and the record button on the carry handle to control the other to give 2 independent recordings.
A further recording function is the ability to record a proxy file alongside the main recording. The proxy file can be used in a number of ways. One way is to provide an easier to handle 720p HD file for use as an edit proxy when shooting in UHD. Another is as a small compact file that can be uploaded to the internet via the cameras built in ftp function, perhaps for a breaking news story or remote editing and preview. As this is a proper video camera there are none of the overheating problems or limited record time issues that effect many DSLR type cameras.
One word of advice: Buy your cards from a reputable source. There is a lot of fake media out there that is almost indistinguishable from the real thing. The fake cards are often unreliable, so do make sure you only buy good quality genuine media from one of the main brands such as Transcend, Lexar, SanDisk etc.
1″ TYPE SENSOR.
The sensor that feeds all these different codecs is a “1 inch type” Exmor RS back illuminated CMOS sensor with 14.2 million effective pixels. What does all that mean?
“1 Inch Type” means the sensor size is bigger than the sensor on a 2/3″ broadcast camera but smaller than APS-C, Micro 4/3rds or Super 35mm (see this for more info on imperial type sensor sizes). So the depth of field will be deeper (more in focus) than a camera like Sony’s PXW-FS5 with it’s Super 35mm sensor, but shallower than most typical 2/3″ ENG broadcast shoulder cameras and other traditional handycams with 1/2″ or 1/3″ sensors.
Exmor RS is Sony’s latest generation of back illuminated sensor technology that gives better low light performance with small pixels compared to traditional front illuminated sensors. In addition RS stands for “Rear Stacked”. The stacking technology allows for a faster sensor readout among other things and this significantly reduces image skew and rolling shutter artefacts compared to the previous generation of these sensors. The faster readout also means that every pixel is used when shooting at up to 120 fps in HD using the cameras super slow motion function (note that this is 120fps interlace XAVC-L), so less aliasing and moire.
While RS does not eliminate rolling shutter artefacts from what I can see the Z150 offers a big improvement over cameras like the PXW-X70 and the A7S. You have to pan very fast before rolling shutter becomes a problem and in normal use skew and jello should not cause any significant problems.
12X OPTICAL ZOOM LENS.
PXW-Z150’s 12x “G” series optical zoom lens.
Light is fed to the sensor by a 12x optical zoom lens. On the side of the camera there is a big and bold “18X“. That’s there because this camera also has Sony’s clever “Clear Image Zoom” technology. In the past if you mentioned a digital zoom it used to make people cringe as it normally meant a drop in picture quality. But Clear Image Zoom really is very clever.
First of all remember that in HD you have a UHD sensor, so you can crop into this by 2 times with virtually no loss in image quality anyway. So in HD you have an additional 2x zoom on top of the optical zoom giving a combined total of 24x. In UHD the camera uses a database of textures to determine the best way to process the image. This allows for a virtually transparent extra 1.5x electronic zoom on top of the optical one. This gives you the 18x zoom range indicated on the camera body. In use, the clear image zoom function works seamlessly with the optical zoom. So as you zoom in or out the electronic zoom takes over where the optical one finishes.
PXW-Z100 full Wide.
PXW-Z100 12 x optical zoom (click on image to see higher resolution versions)
PXW-Z150 Full 18x zoom, 12x optical plus clear image zoom (click on the image to view higher resolution versions).
There is the very slightest of bumps in the zoom at the changeover point from optical to digital which I don’t think most audiences would spot. After shooting so much recently with Super 35mm cameras I really had forgotten just how much quicker it can be to shoot with a good par-focal zoom with a high zoom ratio (par focal – focus remains constant through the zoom range). The lens is reasonably wide at the equivalent of 29mm going all the way optically to a 348mm in full frame 35mm terms. The only downside really to the zoom is that the widest aperture ramps from f2.8 to f4.5 as you zoom in. This is one of the penalties you pay for having a larger sensor.
Another slight peculiarity of the aperture is that the minimum is f11. Most lenses go down to f16 or smaller, but this is limited to f11. I suspect this may be to prevent something called diffraction limiting. When light travels though a very small aperture it can become slightly defocussed. When you have very small pixels (like when you cram 4K’s worth of pixels onto a smallish sensor) this slight defocussing has a big impact and can lead to soft and blurry looking pictures. I suspect that Sony may be limiting the smallest aperture to f11 to prevent this and help ensure sharp pictures at all times. If you have too much light then don’t worry as you have a 4 way ND filter system where you can choose between clear, 1/4, 1/16th and 1/64 ND.
The zoom rocker.
The lens has three control rings. One for aperture, one for zoom and one for focus. Unfortunately none of these have any markings as they are all electronic controls with no direct connection to the mechanics of the lens. Fortunately though the lens is quite responsive. The iris ring works well with almost no lag. The zoom ring is the weakest link as you can turn the zoom ring faster than the lens can zoom and this can result in some lag as you wait for the zoom to catch up. The zoom speed range is pretty good, using the rocker on the hand grip you can go from a very slow creeping zoom to a respectable 2.5 seconds (approx) from fully wide to 12x.
There are 3 control rings on the PXW-Z150’s zoom lens.
The focus ring is big and chunky, easy to find and easy to grip. While you can’t crash focus with it the manual focus, it is nice and responsive and doesn’t exhibit any nasty overshoots or other surprises. So manual focussing is nice and easy. This is assisted by a good viewfinder peaking and a focus magnification system that helps you determine the sharpest parts of the image with ease. One observation though is that if you leave the peaking on the default “White” setting it can make some scenes appear over exposed as white sparkles appear across areas of fine detail. For this reason I normally use the Red or Blue peaking colors.
INPUT AND OUTPUT CONNECTIONS
The PXW-Z150’s built in stereo microphone.
For audio there is a built in stereo mic on the front of the handle that is adequate for background and ambient sound recording. You then have the usual 2x XLR connectors with switchable phantom power on the front of the hand grip plus Sony’s MI Shoe on the top. Using the MI Shoe you can connect Sony’s UWP-D radio microphones directly to the camera via a low cost mounting adapter (SMAD-P3) eliminating the need for wires or batteries in the microphone receiver. It’s a very neat system.
Video output options on the PXW-Z150
To output your pictures you have an HDSDI connector on the rear of the camera for HD plus an HDMI port that can deliver UHD. There is also a legacy standard definition composite video output, this is one of the few Sony professional cameras to still have this built in. There is of course also a headphone socket on the rear panel of the camera just above the DC in socket.
POWER AND BUILD QUALITY.
The PXW-Z150 runs off NPF-F type batteries.
The PXW-Z150 runs off readily available and incredibly common Sony NP-F series batteries. It’s a low power camera so a single battery lasts for ages. I got about 3.5 hours from one of the smaller F770 batteries. An F970 would give at least half a working day, so two of those is all that most people would need.
Build Quality:
When I first picked the camera up it felt good. Like most modern cameras it’s constructed from a mix of plastics and alloy. The plastics appear to be of good quality and it seems to be well constructed. Perhaps not quite as high quality as the PXW-FS5 or FS7 but this is a much cheaper camera.
Audio switches and controls on the PXW-Z150
Buttons and switches:
There are very few switches on this camera. Just the on/off switch and switches for the audio inputs. But there are plenty of buttons including 6 user assignable buttons. For exposure control you have push buttons that select the gain, white balance and shutter settings and work in conjunction with a small up/down rocker button on the front left of the body. The rocker is used to scroll though the selections available for each of these. In practice this works quite well except that once you select one of these functions, lets say the gain, it remains selected and the rocker switch active unless you press a different function. If you press gain again to try to deselect it, gain will switch to auto and you have to press it again to go back to manual. It’s a minor thing but did result in me ending up accidentally going to auto gain or shutter when I didn’t mean to. I’m sure if you were to use the camera regularly you would soon get used to this.
Iris(aperture) is switched between auto and manual via a dedicated button as is focus. Autofocus works surprisingly well even in low light. It’s not fast but hunting is minimal once it’s focussed and it was able to track moving objects quite well.
While a one inch sensor is bigger than 2/3″ or 1/2″ it’s still significantly smaller than the Super 35mm sensors that are all the range. The Z150 has a lot of pixels squeezed onto quite a small space, so don’t expect amazing low light performance, it’s not that kind of camera. However it’s low light performance is very good for this class of compact all-in-one UHD/4K camera. For all but the most critical applications you can add 12dB of gain without any major dramas to boost the low light performance. +24dB isn’t horrendous if you really have to push the camera and the top limit of +33dB is impressive but rather noisy. In low light the lens works best when it’s wide and at f2.8. Zoom in and it drops down to f4.5 and that does drop your brightness by over a stop or the equivalent of a little over 6dB of gain (1 f-stop = 6dB = Double/half the ISO).
So picture quality… that’s a pretty important factor.
Single small sensor cameras have come a long way in recent years and the Z150 is no exception. The picture quality is pretty good for a budget camera. The smallish sensor with it’s tightly packed and very small pixels does impose some limitations on just how good it can be, especially in dynamic range and sensitivity but it does produce a nice picture for what it is.
Colours are vibrant, noise levels are low and dynamic range perfectly useable. I estimate about 10 stops of dynamic range so it’s not in the same league as the super 35mm cameras, but respectable none the less. Noise levels are low enough that you can afford to slightly under expose the camera and tweak the pictures a little in post production if you need to. This can be useful if you notice the camera is struggling with bright highlights. I used the cameras built in Histogram to help judge exposure and found that if I had bright highlights such as the bright clouds in the sky as seen in the frame grabs here, that the best results were achieved when ensuring the highlights were below the grey 100% line on the histogram. If you expose the highlights all the way to the far right of the histogram (109%) the highlight areas are flattened by the cameras knee and they can look a bit odd. I felt it was best to expose just a little lower as this gives better looking highlights (about half to one stop). If using auto exposure, including a -0.5 to -1 EV offset to the auto exposure (in the camera menu) has the same effect. Chromatic aberration is very low, probably being hidden by in camera processing. and the sharpening/detail correction well balanced. The PXW-Z150 creates good looking images for a single smaller chip sensor out of the box.
But as well as the standard look the camera does include 6 picture profiles which can be found towards the bottom of the camera menu. Each profile gives a quite different look.
PXW-Z150 Picture Profile 1 (standard camera settings)
PXW-Z150 Picture Profile 1 (standard camera settings)
PXW-Z150 Picture Profile 2, DSLR Look.
PXW-Z150 Picture Profile 2, DSLR look.
PXW-Z150 Picture Profile 3 Rec-709 with Pro Color.
PXW-Z150 Picture Profile 3, Rec-709 with Pro Color.
PXW-Z150 Picture Profile 4, Rec709.
PXW-Z150 Picture Profile 4, Rec709.
PXW-Z150, Picture Profile 5, Cinematone 1, Negative Film.
PXW-Z150, Picture Profile 5, Cinematone 1, Negative Film.
PXW-Z150, Picture Profile 6, Cinematone 2, Print Film.
PXW-Z150, Picture Profile 6, Cinematone 2, Print Film.
As you can see each of these looks is quite different (The Z150 also has several different scene settings that can be used for shooting in full auto under differing lighting conditions, these change the way the camera works out the auto exposure levels).
The dynamic range is no different in each profile. PP2, the DSLR look adds contrast by crushing the mid range and blacks, it’s also highly saturated to give stronger colors, particularly reds. The red flower in the frame grab was not that red.
Picture Profile 3 mixes Rec709 gamma with Sony’s “Pro” color matrix. I like the Pro color settings as it gives true to life colors and it grades quite well if you want to make tweaks in post production.
Picture Profile 4 is Rec709 (ITU709) gamma and color. To me the colors are not as accurate as they could be. The flower looks a little too “electric” compared to the real life color.
The Cinematone Gammas in picture profiles 5 and 6 flatten the image a little and bring up the shadows. This can help a little if you wish to tweak or adjust the images in post production. The Cinematone gammas are not the same as the Cinegammas found in the higher dynamic range cameras like the FS5 or A7.
Personally I did not like the colors associated with the Cinematone color settings. But one of the great things about the Picture Profiles is you can mix and match the various gamma curves and color matrix settings to create your own looks and styles. The “Pro” color matrix offers some very accurate colors and I quite like the look that you get when you combine Cinematone 2 gamma with the Pro color matrix. If you find the colors a little flat you can boost the saturation level a bit, I found that setting the saturation to +15 gave a great look straight from the camera. Don’t be afraid to go into the Picture Profile settings and experiment with different combinations of Gamma curve and Color matrix. Just don’t turn up the Saturation too high, I would not recommend going above +20.
The Z150’s only menu controls are on the top of the handle.
One small annoyance I found with the PXW-Z150 was that the only menu button is up on the top of the hand grip. As I like to fiddle around with the Picture Profile settings I did find it a little awkward to access the menu controls on the very top of the camera, especially if it was at shoulder height or above on a tripod. You can’t see them up there!
Like most modern cameras the PXW-Z150 has a full set of WiFi features including the ability to transfer files wirelessly via ftp to a remote server, to stream live or control the camera from a tablet or mobile phone. A future firmware update will add Sony’s QoS (Quality Of Service) streaming error correction that promises much improved image quality over poor network connections when streaming to a Sony QoS server. To remotely control the camera you need to install Content Browser Mobile on your Android or iOS device.
SUPER SLOW MOTION
One more trick that the PXW-Z150 has is the ability to shoot continuously at up to 120fps (100fps when the camera is set to 50i area). The image is full HD but more highly compressed than the regular HD recordings, plus it’s interlaced, not progressive. In addition the inevitable faster shutter speeds mean that you do need plenty of light to get the very best results. I could definitely see a small drop in image quality when shooting at 100 or 120 fps, but the footage is perfectly useable and it is great to be able to slow down motion by 4 or 5 times. You do need to be a little careful if using the interlaced footage within a progressive production as very fast moving objects that travel through the frame may exhibit the combing artefact common in regular interlace material when show progressively. To get the full 5x slow down the camera needs to be set to 60i area to allow the selection of 120fps.
Summary:
The PXW-Z150 is a compact jack of all trades camera that’s easy to work with, has a great zoom range and delivers a respectable looking image. The largeish 1″ sensor gives a greater degree of control over the depth of field than you will have with a camera with a 1/2″ or 1/3″ sensor. But it’s isn’t going to give you that super shallow film look unless you are using longer focal lengths.
I think the Z150 will find a home in many corporate and industrial production applications. The ability to shoot in 4K gives the flexibility to crop int the image to re-frame shots for HD productions. And the price is good too, you get a lot of camera for the money.
I often hear people talking about future proofing content or providing the best they can for their clients when talking about 4K. Comments such as “You’d be crazy not shoot shoot 4K for a professional production”. While on the whole I am a believer in shooting in 4K, I think you also need to qualify this by saying you need to shoot good 4K.
As always you must remember that bigger isn’t always better. Resolution is only one part of the image quality equation. Just take a look at how Arri’s cameras, the Alexa etc, continue to be incredibly popular for high end production even those these are in effect only HD/2K cameras.
Great images are a combination of many factors and frankly resolution comes some way down the list in my opinion. Just look at how DVD has managed to hang on for so long, feature films on DVD still look OK even though the resolution is very low. Contrast and dynamic range are more important, good color is vital and low noise and artefact levels are also essential.
A nice contrasty image with great color, low noise and minimal artefacts up scaled from HD to 4K may well look a lot better than a 4K originated image that lacks contrast or has other artefacts such as compression noise or poor color.
So it’s not just about the number of pixels that you have but also about the quality of those pixels. If you really want to future proof your content it has to be the best quality you can get today, not just the largest you can get today.
So this is interesting. Sony have launched a new shoulder camera at NAB, the PXW-Z450. On the outside it looks much like any other ENG style shoulder camera, it’s almost a clone of the recently launched PXW-X400.
On the inside though this is a UHD, single chip (I believe), 2/3″ CMOS camera. It records to SxS cards (or XQD via an adapter) using the XAVC codec in UHD and HD at up to 60fps as well as MPEG2 HD422 (XDCAM HD422) up to 30fps.
The PXW-Z450, looks just like any other ENG shoulder camera.
As the sensor is a 2/3″ sensor (Exmor R, back illuminated) it takes regular B4 2/3″ ENG lenses, but being a 4K sensor you are going to need a really, really good lens. You don’t want to be using some old SD lens on this camera.
It will have full wireless capability including streaming over WiFi or via a 4G dongle of XAVC proxy files and even has an “Online” button for live feeds. There’s a slot for a drop in radio mic receiver and 4 control dials for the 4 audio channels.
There’s an SDI input for recording from external sources, so great for news pool applications where you may need to record footage from other cameras or sources.
It will be supplied as a body only and can be used with the HDVF-EL20 or HDVF-EL30 Oled viewfinders.
It won’t be available until the end of the year (which is possibly why there isn’t too much PR for this particular launch) and the camera at the show is a very early pre-production unit, so difficult to asses what the final image quality will be like at this stage. However the camera includes S-Log3 and Hybrid Log Gamma for HDR productions, so clearly the engineers are expecting the dynamic range to be very good.
In addition next year (2017) there will be an upgrade kit to convert the PXW-X400 to UHD. I’m assuming this kit will include a new optical block to swap out the sensor as well as new firmware for the X400 to enable UHD recording.
NextoDI will be showing their new NVS-25 storage bridge at IBC. This is the next step in their range of portable backup devices for solid state media. The current devices like the NVS2825 are brilliant for backing up media such as SxS or P2 cards. But as 4K becomes common and file sizes increase there is a growing need for fast, simple to use devices that can backup large files to high capacity hard drives and SSD’s. The new NVX25 is modular in design and can take adapters for most media types including SxS, XQD, P2, Red, AXS etc.
The device has two internal drives and a 3rd drive can be connected to it by USB 3. It can make up to 3 copies (1 to each drive) at the same time extremely quickly. It will CRC check your copies and produce a log of what has been copied. There is a 5″ screen to control the unit as well as for viewing playback of your backed up media. It even has an HDMI port to connect it to a larger monitor.
Finally an affordable way to securely backup large 4K files and raw on location without needing a computer. Very exciting!
So, we have seen that it is possible to trick an F5 into thinking its an F55 by altering an all file from the F5 and adding some F55 4K settings. This enables 4K internal recording and 4K output over HDMI on the F5. Internal 4K is one of the key differences between the lower cost F5 and the much more expensive F55. Another major difference is that the F55 has a global shutter so no CMOS image skew or other rolling shutter artefacts and the F55 has a larger colour gamut allowing better colour rendition and capture.
A question that has been asked is: Well if we can get 4K, can we also enable the larger colour gamut? One thing we do know is that the sensor used in the F55 is different to the sensor in the F5 as the sensor is replaced if you upgrade your F5 to an F55.
A cameras gamut is determined more by the sensors colour filters than the recording gamut. The recording gamut is like a bucket, the sensor a scoop. If the scoop isn’t big enough you won’t fill the bucket.
The color filters on the F55 are very different to those in the F5, so the F55 can capture a much greater gamut than the F5.
If you think about it, if you hold a red gel up infront of your eyes you will only see an extremely narrow colour gamut, just a single narrow part of the red spectrum. Imagine if you have a red, green and blue filter, you will now see a bit of red, a bit of green and a bit of blue. But you might only see a very narrow part of the full blue spectrum or a very narrow part of red or of green, you won’t see the full spectrum or a large gamut, just narrow slithers of it. The trick is to make filters that are wide enough and with the righ charcteristics to pass all of the R, G and B spectrum but sharply cut off unwanted colors, infra-red or UV at the exactly the right point. This is very hard to do. So the quality and accuracy of the color filters determines both the gamut and the precision of the colors that the camera can capture.
In practice it can be hard to see this difference as none of the monitors available today can show the full gamut that the F55 can capture so you can’t directly see it. But it does make a difference in post as the F55 is able to separate subtle hues more accurately and capture an extended tonal range, for example very subtle differences in skin tones that may be lost on a camera with poorer filters. This means when grading you are able to draw more tonal information out of the image when you transform the color space in to Rec 709 or DCI-P3 and it results in a more natural looking image.
The F5’s sensor gamut is probably somewhere around the size of DCI P3, maybe a bit bigger, but it’s clearly not as big as the F55’s. In addition the colour precision is not as great so some subtle tones are lost. It’s not a massive difference and the F5 does a great job. It’s not something that can be changed with software, it’s all down to the sensor hardware. The F5 just can’t fill the S-Gamut recording bucket so by using S-Gamut your wasting a lot of data. By using a smaller recording gamut like S-Gamut3.cine you can more effectively fill the bucket and make better use of the data available to you.
STOP PRESS: It’s been found that this modification is also changing the exposure and dynamic range! See bottom of post.
Well, Paul Ream over at http://extrashot.co.uk/ has worked out how to make the F5 record 4K internally. It’s actually pretty straight forward. The camera can save a file called an “All File” on an SD card to memorise the way it’s set up. By mdifying this file you can trick the F5 to go into 4K or UHD frame size instead of the usual HD or 2K. First you have to modify line 15o of an existing All File (they are simple text files) where the frame rate and frame size are saved using a text editor, putting in the frame size you want. Then delete line 1 where the files MD5 checksum is stored. Save the file. Next determine the checksum of the file, then add the new checksum to line 1 and finally save the file to the SD card and read it in to the camera. By loading this modified (hacked???) all file in to the camera you can enable 4K and UHD recording to the SxS cards.
It’s certainly created a stir. Many F55 owners think they have been short changed because of this hack and of course most F5 are very happy. It will be interesting to see if any other F55 features can be unlocked on the F5 such as 4K output or 4K playback. Right now the hack is a little limited as you can’t even playback files to see if they are OK. Full details over on Extrashot in the latest podcast…. if you can grind your way through the bit on shoes and iphones without nodding off first.
UPDATE: So, now a few people have tried this, there have been a couple of reports of the dynamic range of image clipping and some other issues. I’ve had a quick look on an F5 (not mine, I’m travelling) and there is most definitely something odd going on as the pictures are darker and clip earlier in 4K XAVC compared to HD and 2K. I need to test this further to see what’s going on, but it’s not quite as perfect as perhaps hoped.
What we know: The hack tricks the camera into behaving like a PMW-F55. We know the F5 and F55 have different sensors with very different behaviour, different colour filters and different sensitivity, so the processing must be different for these two cameras.
My very quick test, shooting the same scene in 4K and in normal HD XAVC shows the 4K to be darker. Others are reporting that the 4K clips appear to over-exposure more readily than the HD.
SPECULATION: If the hack is doing more than just turning on 4K recording, if it is making the camera use the F55’s processing, then there will be a miss-match between the sensor and the processing and this might cause issues with dynamic range, gain and colour.
As soon as I get a chance (should be tomorrow) I will do some more involved testing to see exactly what is going on.
Here’s a short clip to keep you going until later in the week when I will upload the full length version of my video “Dancers on the line” shot with the new Sony PXW-X70 camcorder. As well as the film there will be a behind the scenes video with some insight into what the camera is like to shoot with and how the images look. It’s all good stuff, this is a great little compact handycam and a pretty big step up from the AX100.
Frame grab from the PXW-X70.
It has a nice big 1″ size sensor, built in ND filters and a nice power zoom lens. It records XAVC long GOP 10bit 422 at 50Mbps at up to 60fps. Also has AVCHD and standard definition DV. The ergonomics are brilliant, clearly Sony have done a lot of works on this area and it a delight to operate run and gun or when your pressed for time. You get great battery life and the pictures are pretty amazing for a compact handycam. You can even dial in your own picture profiles for a custom look. Dual SD card slots allow for relay recording or dual card recording, there’s an full size SDI and HDMI out too. LAst thing for now… it’s 4K ready. There will be a paid upgrade to 4K option in the first half of next year. More details to come as the week progresses.
Here’s the press release from Sony.
Basingstoke, July 29, 2014: Sony has today launched the 4K-ready PXW-X70, the first compact XDCAM professional camcorder ever produced. Expanding the popular file-based XDCAM family to a new smaller form factor and lower price point, Sony has combined stunning picture quality, speed of shooting and robust performance into a package which is ideal for a wide range of applications from news gathering and documentary to events work.??
The PXW-X70 features a 1.0 type Exmor® R CMOS Sensor with a resolution of 20 megapixels. The sensor, which is even larger than the Super 16mm film frame, delivers high resolution and fantastic low light performance, as well as offering more depth of field control as demanded by today’s diverse shooting requirements. The new camcorder has the ability to record High Definition in XAVC Long GOP, enabling 422 10-bit sampling at 50 Mbit/s. This in-turn supports a broadcast-quality workflow, increasingly adopted by productions in many different professional applications.
This addition to the expanding next generation XDCAM family follows the recently announced PXW-X180 and PXW-X160 and builds upon Sony’s successful heritage of compact professional camcorders. The PXW-X70 is the first professional compact camcorder from Sony to include Wi-Fi-enabled control via Smart Phone or Tablet using the Content Browser Mobile application. An upcoming release will also provide customers with the ability to upgrade the PXW-X70 to record in 4K Ultra High Definition, with file transferring, and live video streaming capabilities.
“This first compact member of the XDCAM family brings the performance and workflow benefits associated with XAVC to an even wider range of shooting scenarios,” said Robbie Fleming, Product Marketing Manager, at Sony Professional Solutions Europe. “Over the past couple of years we’ve seen the broadcast industry really embrace the picture quality benefits associated with large sensors; the one-inch sensor at the heart of the PXW-X70 sets a new standard for colour, depth and texture in a professional compact camcorder. Coupled with the ability to upgrade to 4K, this represents a multipurpose, future-proof option for customers looking for a tough camcorder which doesn’t compromise on image.”
Key features of the PXW-X70
• 1.0 type Exmor® R CMOS Sensor and Carl Zeiss Vario Sonnar T* lens for stunning picture quality. High sensitivity and fantastic resolution with 14.2 million effective pixels delivers striking detail and colours, even in low light conditions. The lens offers a 12x Optical Zoom, which can be increased to 24x with Clear Image Zoom while retaining full resolution thanks to Super Resolution Technology. Zoom performance can be doubled at any point with a Digital Extender by up to 48x.
• Compact, lightweight XDCAM camcorder packed with adaptable professional functions. The PXW-X70 weighs less than 1.4kg, including the XLR handle unit, battery (NP-FV70), lens hood and large eye-cup. It offers professional interfaces such as 3G-SDI and HDMI output connectors plus an XLR x 2 handle unit with zoom lever. Other professional features include a manual lens ring that can intuitively control zoom and focus, ergonomic palm grip with large zoom lever, two SD memory card slots for backup, simultaneous and relay recording, and a three-level switchable ND filter.
• Breadth of recording format capabilities. Provides multiple choices depending on application required, including XAVC, AVCHD and DV® file-based recording. When recording in XAVC, the PXW-X70 uses the MXF file format, efficiently compressing full HD (1920 x 1080) resolution using the MPEG-4 AVC/H.264 CODEC. Image sampling is 4:2:2 10-bit with high-efficiency Long-GOP compression at 50 Mbps, 35 Mbps or 25 Mbps.
• Built-in Wi-Fi control functionality for monitoring and remote control versatility. Near Field Communication functions enable easy, one-touch wireless LAN connection to a smartphone or tablet, while the Content Browser Mobile application allows confirmation of shot angles and operation of the camcorder by remote, including field angle setting, spot focus and iris adjustment.
• Upcoming announcements to add even greater, future-proof functionality. Sony is set to make upgrades to 4K and file transfer and streaming by Wi-Fi function available for the PXW-X70 in the coming months.
This came up as a question in response to the post about my prototype lens adapter. The adapter is based around an electronic Canon EF mount and the question was, what do I think about DSLR zooms?
There is a lot of variation between lenses when it comes to sharpness, contrast and distortions. A zoom will always be a compromise compared to a prime lens. DSLR lenses are designed to work with 24MP sensors. A 4K camera only has around 9MP, so your working well within the design limits of the lens even at 4K. While a dedicated PL mount zoom like an Angenieux Optimo will most likely out perform a similar DSLR zoom. The difference at like for like apertures will not be huge when using smaller zoom ratios (say 4x). But 10x and 14x zooms make more compromises in image quality, perhaps a bit of corner softness or more CA and these imperfections will be better or worse at different focal lengths and apertures. At the end of the day zooms are compromises but for many shoots it may simply be that it is only by accepting some small compromises that you will get the shots you want. Take my storm chasing shoots. I could use primes and get better image quality, but when you only have 90 seconds to get a shot there simply isn’t time to swap lenses, so if you end up with a wide on the camera when a long lens is what is really needed, your just not going to get the shot. Using a zoom means I will get the shot. It might not be the very best quality possible but it will look good. It is going to be better than I could get with an HD camera and a very slightly compromised shot is better than no shot at all.
If the budget would allow I would have a couple of cameras with different prime lenses ready to go. Or I would use a big, heavy and expensive PL zoom and have an assistant or team tasked solely with getting the tripod set up and ready asap. But my budget isn’t that big. I could spend weeks out storm chasing before I get a decent shot, so anything I can do to minimise costs is important.
It’s all about checks and balances. It is a compromise, but a necessary one. It’s not a huge compromise as I suspect the end viewer is not going to look at the shot and say “why is that so soft” unless they have a side by side, like for like shot to compare. DSLR zooms are not that bad! So yes, using a DSLR zoom is not going to deliver quality to match that of a similar dedicated PL zoom in most cases, but the difference is likely to be so small that the end viewer will never notice and thats a compromise I’m prepared to accept in order to get a portable camera that shoots 4K with a 14x zoom lens.
What about DSLR primes and why have I chosen the Canon Mount?
This is where the image performance gap gets even narrower. A high quality DSLR prime can perform just as well as many much more expensive PL mount lenses. The difference here is more about the usability of the lens. Some DSLR lenses can be tiny and this makes them fiddly to use. They are all All sorts of sizes, so swapping lenses may mean swapping Matte boxes or follow focus positions etc. Talking of focus, very often the focus travel on a DSLR lens is very, very short so focussing is fiddly. If the lens has an aperture ring it will probably have click stops making smooth aperture changes mid shot difficult. My prime lenses are de-clicked or never had clicks in the first place (like the Samyang Cine Primes). It’s not so much the issue of requiring a finer step than the one stop click, but more the ability to pull aperture during the shot. It’s not something I need to do often, but if I suddenly find I need to do it, I want a smooth aperture change. That being said, one of the issues with using Canon EF lenses with their electronic iris is that they operate in 1/8th stop steps and this is visible in any footage. Ultimately I am still committed to using the Canon mount lenses simply because there are so many to choose from and they focus in the right direction unlike Nikon lenses which focus back to front. For primes I’m using the excellent and fully manual Samyang T1.5 Cine Primes. I really like these lenses and they produce beautiful images at a fraction of the price of a PL mount lens. My zoom selection is a bit of a mish-mash. One thing about having a Canon mount on the camera is that I can still use Nikon lenses if I fit the lens with a low cost Nikon to Canon adapter ring. If you do this you can only use lenses with an actual iris ring, so generally these are slightly older lenses, but for example I have a nice Sigma 24-70mm f2.8 with a manual iris ring (and it focusses the RIGHT way, like most Sigmas but unlike most Nikon mount lenses). In addition I have a 70-300mm f4 Nikon mount Sigma as well as an Old Tokina 28-70mm f2.6 (lovely lens, a little soft but very nice warm colour). One thing I have found is that most of the Nikon to Canon adapter rings are little bit on the thin side. This prevents any zooms from being Parfocal as it puts the back focus out. Most of the adpaters are made in two parts and it’s quite easy to take the front and back parts apart and add shims made out of of thin plastic sheet or even card between the two halves to correct the back focus distance.
So there you have it. Overall DSLR lenses are not a huge compromise. Of course I would love to own a flight case full of good quality PL mount, 4K ready, glass. Perhaps one day I will, but it’s a serious investment. Currently I use DSLR lenses for my own projects and then hire in better glass where the budget will allow. For any commercials or features this normally means renting in a set of Ultra Primes or similar. I am keeping a close eye on the developments from Zunow. I like their 16-28mm f2.8 and the prototype PL primes I saw at NAB look very good. I also like the look of the Zeiss 15.5 to 45 light weight zoom. Then of course there is the excellent Fujinon 19-90mm Cabrio servo zoom, but these are all big bucks. Hopefully I’ll get some nice big projects to work on this year that will allow me to invest in some top end lenses.
Manage your privacy
To provide the best experiences, we use technologies like cookies to store and/or access device information. Consenting to these technologies will allow us to process data such as browsing behavior or unique IDs on this site. Not consenting or withdrawing consent, may adversely affect certain features and functions.
Functional
Always active
The technical storage or access is strictly necessary for the legitimate purpose of enabling the use of a specific service explicitly requested by the subscriber or user, or for the sole purpose of carrying out the transmission of a communication over an electronic communications network.
Preferences
The technical storage or access is necessary for the legitimate purpose of storing preferences that are not requested by the subscriber or user.
Statistics
The technical storage or access that is used exclusively for statistical purposes.The technical storage or access that is used exclusively for anonymous statistical purposes. Without a subpoena, voluntary compliance on the part of your Internet Service Provider, or additional records from a third party, information stored or retrieved for this purpose alone cannot usually be used to identify you.
Marketing
The technical storage or access is required to create user profiles to send advertising, or to track the user on a website or across several websites for similar marketing purposes.


 It won’t be available until the end of the year (which is possibly why there isn’t too much PR for this particular launch) and the camera at the show is a very early pre-production unit, so difficult to asses what the final image quality will be like at this stage. However the camera includes S-Log3 and Hybrid Log Gamma for HDR productions, so clearly the engineers are expecting the dynamic range to be very good.
