Fujinon MK18-55mm t2.9 E-Mount zoom lens.

Fujinon have a long history of producing excellent lenses. When I used to shoot motorsports, windsurfing and TV news I used to use Fujinon lenses on my 2/3″ Betacam, Digibeta and DVCAM camcorders. I still have a Fujinon remote zoom demand sitting in the cupboard. Today Fujinon still produce high quality lenses for broadcast cameras.

But Fujinon don’t just make lenses for broadcast cameras, they also make PL mount lenses for use with super 35mm cameras. Perhaps their best known cinema lenses are their “Cabrio” zoom lenses. When it was introduced the 19-90mm T2.9mm Cabrio was ground breaking as it offered a silky smooth zoom servo with an ENG style handgrip on a compact zoom lens.

The Fujinon Cabrio 19-90mm cinema zoom. A lens I’ve always enjoyed using and would love to own.

The 19-90 Cabrio was the workhorse servo zoom that many F5/F55, Red and Arri users had been wanting for a long time. I’ve used the Cabrio’s and they are great lenses, I’d love to own one, but my budget just won’t stretch that far. The 19-90 costs around $40K but it is a beautiful lens.

Aware of the demand for a similar lens at a lower cost, last year Fujinon introduced a more affordable 20-120mm T3.5 lens. However even though much cheaper, at £13.5K/$16K it is still quite an expensive lens, especially when you consider that a camera like the Sony FS7 only costs £6k/$8K.

The Fujinon XK20-120 cinema zoom. A servo unit can be added to turn it into a servo zoom.

That brings us to today. Fujinon have developed a pair of new lenses specifically for E-Mount cameras. An 18-55 and a 55-135. The 55-135 isn’t ready just yet but the wider one, the MK18-55 is, and I’ve been lucky enough to have been loaned one to test.

The new Fujinon MK18-55 E-Mount zoom lens.

As you can see the lens looks very similar to the more expensive XK20-120, but it’s actually a bit smaller and a lot lighter. The lens is an 18-55mm T2.9 (f2.8) Parfocal zoom. Parfocal means that the focus does not shift as you zoom as happens with most DSLR lenses. It’s E-Mount only, so you can’t use it on a Canon camera, but you can put it straight on to a FS5, FS7, even an A7S/A7R (The lens is designed for s35/APS-C so you need to use crop sensor mode or clear image zoom on a full frame sensor). No adapters needed! It’s a manual lens, no autofocus and there isn’t a zoom servo. But what you do get is beautiful image quality!

The MK18-55 T2.9 on my FS7

The short back focus distance of E-Mount compared to PL or EF makes it easier to produce an affordable high quality zoom lens, that’s why this lens is E-Mount only. To ensure that the lens remains parfocal on different cameras it has a backfocus adjustment ring. This ring also functions as a macro focus ring by pressing a small button. This allows you to focus on objects around 1ft/38cm from the lens. When not using macro the minimum focus distance is 0.85m/2ft9″.

The MK18-55’s macro function allows you to get very close to the subject. Click on the image for the full resolution frame grab.
Frame grab from the MK18-55mm Fujinon lens. Click on the image for the full resolution frame grab.

The iris is a 9 blade iris with curved blades that produces a pleasing bokeh both inside and outside of focus.

Near and Far bokeh is pleasing thanks to a 9 blade iris. Click on the image for the full resolution frame grab.

To keep the weight down a lot of the lens exterior is made from plastic. It is quite a long (in length) lens. If it was all metal it would make a light camera like the FS7 front heavy, so while perhaps it doesn’t have the tactile feel of a $40K Cabrio it also doesn’t have the weight, the 19-90 is almost 6lb/2.7kg, the MK18-80 is just 34.6ox/980g. However it does feel well made. The focus, zoom and iris rings all feel very smooth and have just the right amount of rotation resistance and damping.

The focus ring has around 180 degrees of travel and the focus markings (in both metric and imperial) are clear and easy to read. Each ring also has a 0.8mm pitch gear ring.

The MK18-55 with the supplied lens hood.

In use I found the lens a pleasure to use. I can perform nice smooth manual zooms with ease. It is easy to focus with just the right amount of focus travel, not too much not too little.  Focus breathing is very well controlled and quite minimal. It’s certainly one of the best lenses I’ve used at this price point. It feels and behaves like a proper cinema lens.

So what about the image quality? This lens does not disappoint. The images are sharp from edge to edge, corner to corner throughout the zoom range, even when wide open at T2.9. Contrast is good and even when shooting into the sun, flare is minimal. A square lens hood is provided with the lens that works well, but of course you can also use it with a matte box if you wish.

To me the images from this lens look closer to the ones I get from prime lenses than a zoom. I can see this lens being used instead of a set of primes for many productions and it certainly works out very cost effective compared to a set of decent prime lenses.

The Fujinon MK18-55 at 55mm. Click on the image for the full resolution frame grab.
The Fujinon MK18-55 at 18mm. Click on the image for the full resolution frame grab.

Chromatic aberration is well controlled and minimal and I didn’t notice any significant colour cast or tint. The lens is also remarkably free from geometric distortions (unlike the  Sony 18-105 that is supplied as a kit lens with the FS5 that’s full of all kinds of distortions). There is a little, but it’s no worse than most other wide zoom lenses and nothing that I am concerned about.

Even shooting into the sun flare is minimal and shadows remain dark. Click on the image for the full resolution frame grab.

While T2.9 isn’t super fast it is at least a stop faster than most (all?) of the other budget cinema zooms on the market. Plus it’s absolutely useable at T2.9 unlike some other lenses that go a little soft or become prone to flare when wide open. I’d be perfectly happy to shoot at T2.9 all day.

Wide open at t2.9 the MK18-55 still produces a nice sharp image. Click on the image for the full resolution frame grab.

So, in case you haven’t noticed yet I really like this lens. It may not have the zoom range of the new Sony 18-110, but it’s a stop faster. It may not have the ability to be used on different mounts like the Canon 18-80 t4.4 but again it’s faster and has a real manual focus ring with hard stops and repeatable calibration. The new Zeiss 21-100 t2.9/t3.9 is interesting, but more expensive and not as wide nor as fast. You should be able to buy both the 18-55 and the 50-135 for less than the Zeiss.

So, if you are in the market for a proper digital cinema lens for your FS5 or FS7 do take a close look at the Fujinon MK18-55. I hope to get a chance to shoot some more interesting footage with this lens very soon and share it with you.

UPDATE: I should have anticipated this, I’ve been asked this many times today already. Given that the new Sony 18-110 f4 and the MK18-55mm are similar prices, which one would I choose?

I would probably choose the Fujinon, but my needs are not necessarily the same as others. Very often if I need a zoom lens I need a very big zoom range. For my storm chasing I use a Tamron 16-300mm dslr lens, I need a BIG zoom range. It’s a compromise, I know I can get better image quality with primes or a shorter zoom, but I often need to go from super wide to super long and the Tamron 19x 16-300mm zoom fits the bill.  For run and gun handheld work I actually quite like the cheaper Sony 18-105mm. Sure the focus is a bit wonky and it has a lot of different geometric distortions, but it’s really small, very light and the autofocus works OK. It does the job I need of it.

Currently I own various prime lenses. I also have the Sigma 18-35mm f1.8 which I rate highly. For a drama or documentary shoot with my FS7 right now I would probably pack my 18-35mm Sigma, 20mm Sigma, my 14, 35, 55 and 85mm Samyangs plus the 16-300mm Tamron. I could see the Fujinon 18-55mm replacing ALL of the lenses below the 85mm Samyang, except perhaps the 14mm. So instead of carrying 4 lenses, I only need to take one and achieve the same kind of image quality (the Samyangs are T1.4, but normally I stop them down to T2 -T2.8 as they are a bit soft wide open). I will have less breathing, plus I can zoom during the shot. In addition I’m getting near prime lens quality without the need to keep swapping lenses when I need a different focal length.

The Fujinon is light and compact a big bonus when travelling. Once the MK50-135mm becomes available the pair would cover the majority of drama or short film focal lengths. Just 2 light and compact lenses. For me the Sony at f4 just isn’t quite fast enough for film style productions – great for run and gun and general purpose shoots but it’s not really the lens I want.

The only question that remains is what should I get for my F5 with it’s PL/FZ mount? If only the MK18-55mm would fit the F5. Have to save my pennies for the Fujinon XK6x20 20-120mm.


Camrade PXW-FS7 and PXW-FS7 II rain covers.

I was recently sent a new rain cover by Camrade for my FS7 (there is also one for the FS7 II). I’ve used Camrade “wet suits” as they call them for years. They are great covers made from a low noise fabric. That means that if you need to fiddle with the cover while shooting it makes very little noise. The fabric is high quality, soft and supple but also completely waterproof.

Camrade “wet suit” rain cover for the PXW-FS7

The FS7 cover set covers the whole camera and lens and also has a separate cover for the viewfinder that can be used either with the extension tube attached or thanks to a large clear panel that allows you to clearly see the LCD screen it can be used without the extension tube. There is also a cover for the arm and handgrip.

The Camrade FS7 rain cover kit includes a cover for the viewfinder.
The Camrade cover can be used with or without the viewfinder extension tube.

The main camera body cover has clear panels that allow you to see all the major controls and switches on both sides. In addition the clear panels can be opened and rolled up and secured open by velcro  if you want easy access to the camera while it’s not raining.

Clear panels can be rolled up and secured for easy access to the camera on the Camrade rain cover.

Along the top of the cover there is a long velcro opening that allows the mount for the viewfinder to exit the cover as well as an elasticated opening for a shot gun mic. There are further openings for the front MI shoe as well as the cameras top handle.

The Camrade FS7 rain cover has an elasticated sleeve for a shotgun mic there plus opening for the front shoe of the FS7.

Overall the cover is quite large and the fit is quite baggy on a bare bones FS7. But this does mean that you can attach radio mic receivers or timecode sync boxes etc to the camera and keep them protected from the elements under the cover.  The bagginess also allows you to grip the top handle through the rain cover, so even when carrying the camera from location to location it remains protected from the elements.

The length of the cover means that there is space at the back for the XDCA extension unit and/or an external battery system. There’s even a little flap at the back that allows you to see the top of the battery to check the batter status. This is great with my PAG-Link batteries (love my PAG-Links).

There are access panels and flaps just where you need them on the Camrade FS7 rain cover.

If you are using a long lens then you can add an included extension section to the front of the cover that will protect most lenses. Underneath the main cover there is a zip that allows you to almost completely close the rain cover so that when using the camera on your shoulder it doesn’t flap about.

Cameras like the FS7 are expensive. While the FS7 does have a degree of built in protection against a splash of water it really isn’t designed to survive a heavy rain shower. The Camrade covers are not expensive and much better than wrapping the camera in a bin bag. When not in use the cover slips into a nice soft pouch that you can keep in your camera bag until the next time you need it.

San Francisco/Bay Area Private Workshop, 4th of March, 2 places left.

I’m looking to fill the last 2 places on this intermediate to high level full day workshop. Please note: All participants signed up so far are seasoned pros with at least a decade of professional experience. Topics covered will be:

Scene Files and Paint Settings – Gamma Curves, Dynamic Range, Matrix and Color.
Gain and ISO, what do these really mean. Understanding the signal to noise ratio.
S-Log, S-Gamut and Exposure Indexing.
LUT’s and Looks, LUT creation and LUT use.
File handling and backup.
Grading introduction including color managed workflows such as ACES.
HDR – Introduction to HDR, what we need to know and how will it effect us.

This is a private workshop and there is a fee to attend. Please use the contact form if you are interested.

Sony FDR-X3000 4K Action Cam – built in gimbal.

One of the cameras I used a lot in Norway is the new Sony FDR-X3000 action cam. What’s different about this POV camera is that the lens and sensor are actually mounted in an internal miniaturised gimbal. This really does work and helps stabilise the image.

There is also a tiny bluetooth monitor that you can wear on your wrist to view the pictures and control the camera. The image quality you get from these tiny cameras really is quite amazing. Take a look at the video to find out more and see some sample footage.

PXW-FS5 Native ISO’s

THIS DOCUMENT IS OUT OF DATE NEW FIRMWARE HAS CHANGED THE CAMERAS ISO”S.

This is as much for my benefit as yours as I can never remember what the native ISO (0dB) is for each of the gamma curves in the FS5.

Standard 1000 ISO
Still 800 ISO
Cinegamma 1  800 ISO
Cinegamma 2  640 ISO
Cinegamma 3  1000 ISO
Cinegamma 4  1000 ISO
ITU709 1000 ISO
ITU709(800) 3200 ISO
S-Log2 3200 ISO
S-Log3 3200 ISO

Using dB and setting it to 0dB really is so much easier with this camera!

The new Sony FS7 zoom lens, the Sony SELP18110G.

Sony SELP18110G servo zoom lens.

When Sony launched the FS7 II they also launched a new lens to go along with it. The previous zoom lens that was bundled with the FS7 was the SELP28135G, a 28-135mm f4 zoom lens that would work with Super 35mm, APS-C and full frame cameras. While generally well received this lens is not without it’s problems. For a start it’s not really wide enough for use as a general purpose lens on an APS-C or Super 35mm sensor. The other problem is that the zoom is very slow. Even when set to manual zooming in and out takes a long time. You turn the zoom ring and then have to wait for the lens to catch up.

The new lens is a wider 18mm to 110mm f4 lens. This is a really useful zoom range for a Super 35mm camera. But the new lens can only be used on S35mm and APS-C cameras. It can’t be used with full frame cameras like the A7s in full frame mode.

The front element of the Sony SELP18110G.

But what about the zoom speed? Well this has been addressed too. On the 28-135mm lens the zoom function is electronic. There is no mechanical connection between the zoom ring and the optics of the lens. The 18-110 has a proper mechanical connection between the zoom ring and the internal lenses, so now you can crash zoom in and out as fast as you want. In addition the zoom servo motor is much faster and motorised zooms take place much more rapidly. One downside to this is that it’s a bit harder to control the zoom speed. You can do slow creeping zooms if you are very careful with the cameras zoom rocker, but it’s hard to do. The difference in pressure on the zoom rocker between creeping zoom and medium speed is tiny. The lens tended to change zoom speed quite quickly. While it is indeed very nice to have a variable speed motorised zoom, don’t expect the fine degree of control that you get from admittedly more expensive traditional ENG lenses. Lets face it this lens is only around £3K/$5K which is remarkable cheap for a parfocal s35mm zoom. Take a look at the video below for an idea of the zoom speeds etc.

Is it really parfocal? Well yes, it does seem to be parfocal. I only had the lens for a morning to play with, but in all my tests the focus remained constant throughout the zoom range.

So, what about focus? Like the 28-135mm lens there is a nice big focus ring that slides fore and aft.

Focus, zoom and iris rings on the SELP18110G.

In the rear position the focus is manual and there are calibrated focus markings and end stops. You get about 180 degrees of focus travel from 0.95m (3.1ft) to infinity (in autofocus you can focus slightly closer when the lens is at the wide end). The focus ring has 0.8mm pitch teeth for use with most standard follow focus units, although this gear ring is very close to the end of the lens, so it may be tricky to use if you have a matte box in place. Breathing is very well controlled and barely noticeable unless going through very large focus throws. Out of focus Bokeh isn’t bad either, I didn’t observe any nasty surprises in the limited time I had to play with the lens.

Frame Grab. Near and far out of focus bokeh is reasonable on the Sony SELP18110G. Click on the image to view a full size copy.

Sharpness and flare. The lens appears to be nice and sharp at the wide end but just a touch soft at the long end. It’s not bad overall but when shooting at 4K I could just about detect the lens becoming marginally softer as I zoomed in. The sample I had was a well used pre-production prototype, but I’m going to guess that the production lenses won’t be hugely different. Shooting the roof of a house against a bright sky revealed only a small amount of flare, certainly nothing out of the unusual for a zoom lens.

Frame grab from the Sony SELP18110G at 110mm. Click on the image to view a full size copy.
Frame grab shot with Sony SELP18110G at 18mm. Click on the image to view the full size image.

Overall I really like this lens. It even has a support point at the front of the lens body for additional stability. While f4 isn’t the largest of apertures it is quite usable and even wide open the lens performs well. For the money it is a lot of lens. I think we need to be realistic with our expectations for zoom lenses and large sensors. Bigger zoom ratios require bigger lens elements if we want to maintain a constant aperture. Bigger lens elements cost more to produce.

Underside of the Sony SELP18110G showing the extra lens support points. A lens foot that attaches to the rear mounting is included with the lens.

One advantage Sony have over the competition is that it’s easier to make zoom lenses for the very short flange back distance of the E-Mount cameras compared to the deeper flange back of PL or Canon mounts. The closest competition to this lens is the Canon 18-80mm T4.4 (f4 ish) which is a fair bit more expensive (£4K/$6K). If you want a similar zoom range then you’re looking at the beautiful  Fujinon 20-120 T3.4 at around £14K/$19K.

Northern Colour – new Northern Lights video.

It’s that time of year again. After another simply amazing trip to northern Norway I am pleased to be able to share with you my latest Aurora video. It was shot with a Sony A7s and a Sony A6300. The lenses used were a Sigma 20mm f1.4 art lens. An older Sigma 20mm f1.8, a samyang 14mm f2.8 and a Sony 16mm f2.8 pancake lens. A Metabones Speedbooster Ultra was used on the A6300. For the slider shots I used a home built track (made so it fits my suitcase perfectly) and a Cinetics Cinemoco controller. Hope you enjoy it.

Not all raw is created equal. Log may be better

This keeps cropping up time and time again.

Unfortunately every now and again a new term or buzzword comes along that gets taken as a holy grail term. Two that come to mind right now are log and raw. Neither log, nor raw, are magic bullet solutions that guarantee the best performance. Used incorrectly or inappropriately both can result in inferior results. In addition there are many flavours of log and raw each with very different performance ranges.

A particular point in case is the 12 bit raw available from several of Sony’s mid range large sensor cameras, the FS700, FS7 and FS5.

Raw can be either log or linear. This particular flavour of raw is encoded using linear data.  If it is linear then each successively brighter stop of exposure should be recorded with twice as many code values or shades as the previous stop. This accurately replicates the change in the light in the scene you are shooting.  If you make the scene twice as bright, you need to record it with twice as much data. Every time you go up a stop in exposure you are doubling the light in the scene. 12 bit linear raw is actually very rare, especially from a camera with a high dynamic range. To my knowledge, Sony are the only company that offer 14 stops of dynamic range using 12 bit linear data.

There’s actually a very good reason for this: Strictly speaking, it’s impossible! Here’s why: For each stop we go up in exposure we need twice as many code values. With 12 bit data there are a maximum of 4096 code values, this is not enough to record 14 stops.

If stop 1 uses 1 code value, stop 2 will use 2, stop 3 will use 4, stop 4 will use 8 and so on.

STOP:  CODE VALUES:  TOTAL CODE VALUES REQUIRED.

+1          1                                   1
+2          2                                   3
+3          4                                   8
+4          8                                   16
+5          16                                32
+6          32                                64
+7          64                                128
+8          128                             256 Middle Grey
+9          256                             512
+10       512                             1,024
+11       1,024                          2,048
+12       2,048                         4,096
+13       4,096                         8,192
+14       8,192                         16,384

As you can see from the above if we only have 12 bit data and as a result 4096 code values to play with, we can only record an absolute maximum of 12 stops of dynamic range using linear data. To get even 12 stops we must record the first couple of stops with an extremely small amount of tonal information. This is why most 14 stop raw cameras use 16 bit data for linear or use log encoded raw data for 12 bit, where each stop above middle grey (around stop +8) is recorded with the same amount of data.

So how are Sony doing it on the FS5, FS7 etc? I suspect (I’m pretty damn certain in fact) that Sony use something called floating point math. In essence what they do is take the linear data coming off the sensor and round the values recorded to the nearest 4 or 8. So, stop +14 is now only recorded with 2,048 values, stop +13 with 512 values etc. This is fine for the brighter stops where there are hundreds or even thousands of values, it has no significant impact on the brighter parts of the final image. But in the darker parts of the image it does have an impact as for example stop +5 which starts off with 16 values ends up only being recorded with 4 values and each stop below this only has 1 or two discreet levels. This results in blocky and often noisy looking shadow areas – a common complaint with 12 bit linear raw. I don’t know for a fact that this is what they are doing. But if you look at what they need to do, the options available and you look at the end results for 12 bit raw, this certainly appears to be the case.

Meanwhile a camera like the FS7 which can record 10 bit log will retain the full data range in the shadows because if you use log encoding, the brighter stops are each recorded with the same amount of data. With S-Log2 and 10 bit XAVC-I the FS7 uses approx 650 code values to record the 6 brightest stops in it’s capture range reserving approx 250 code values for the 8 darkest stops. Compare this to the linear example above and in fact what you will see is that 10 bit S-Log2 has as much data as you would expect to find in a straight 16 bit linear recording below middle grey (S-Log 3 actually reserves slightly more data for the shadows). BUT that’s for 16 bit. Sony’s 12 bit raw is squeezing 14 stops into what should be an impossibly small number of code values, so in practice what I have found  is that 10 bit S-log has noticeably more data in the shadows than 12 bit raw.

In the highlights 12 bit linear raw will have more data than 10 bit S-log2 and S-Log3 and this is borne out in practice where a brightly exposed raw image will give amazing results with beautiful highlights and mid range. But if your 12 bit raw is dark or underexposed it is not going to perform as well as you might expect. For dark and low key scenes 10 bit S-Log is most likely going to give a noticeably better image. (Note: 8 bit S-log2/3 as you would have from an FS5 in UHD only has a quarter of the data that 10 bit has. The FS5 records the first 8 stops in  8 bit S-log 2 with approx 64 code values, S-Log3 is only marginally better at approx 80 code values. 12 bit linear outperforms 8 bit log across the entire range).

Sony’s F5 and F55 cameras record to the R5 and R7 recorders using 16 bit linear data. 16 bit data is enough for 14 stops. But I believe that Sony still use floating point math for 16 bit recording. This time instead of using the floating point math to make room for an otherwise impossible dynamic range they use it to take a little bit of data from the brightest stop to give extra code values in the shadows. When you have 16,384 code values to play with you can afford to do that. This then adds a lot of extra tonal values and shades to the shadows compared to 10 bit log and as a result 16 bit linear raw will outperform 10 bit log across the entire exposure range by a fairly large margin.

So there you have it.  I know it’s hugely confusing sometimes. Not all types of raw are created equal. It’s really important to understand this stuff if you’re buying a camera. Just because it has raw it doesn’t necessarily mean an automatic improvement in image quality in every shooting situation. Log can be just as good or possibly even better in some situations, raw better in others. There are reasons why cameras like the F5/R5 cost more than a FS5/Shogun/Odyssey.

Camrade CB-HD camera bag.

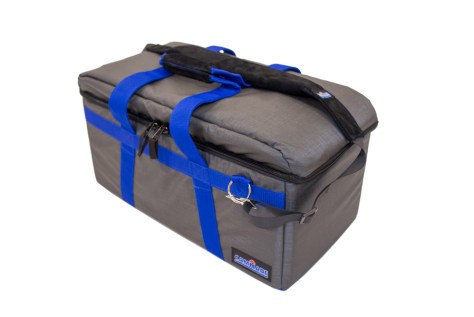
I’ve been using Camrade bags for years. They are tough, protect my gear well without being heavy and clunky like pelicases and other hard shell cases. In addition they don’t scream “expensive equipment here”. They just look like large holdalls.  One of the best features is the use of dividers, pads and inserts that are attached with velcro that allow you to reconfigure the bags for different applications.

Camrade CB-HD equipment bag with reconfigurable velcro dividers and pads.

One thing I often do is carry my camera in a standard carry-on bag when I’m flying. Meanwhile my tripod goes in the camera bag in the hold. When I get to my destination the tripod comes out of the camera bag, I re-arrange the dividers and the camera then lives in the camera bag until I need to fly again. This is so easy to do with the Camrade bags. Although the bags look like soft bags they are extremely ridged. The sides, top and bottom have hard inserts in them that can withstand very large loads, they are strong enough for you to sit on them without collapsing. The bags have strong carry straps and come with a high quality, removable camera strap. There are mesh pockets on the outside as well as on the inside of the lid for those little accessories and bits and pieces that would otherwise get lost. Another bonus is a 90% white card for white balance and use as an exposure reference.

Here’s a video of the medium size Camrade CB-HD bag, designed to take the PXW-FS7 or other similar digital cinema cameras. It’s a bit taller than some of their other bags so perfect for cameras rigged up with base plates and matte boxes.