Sony have released the version 4 firmware update for the FX9. This update adds a number of new features related to their C3 Cloud Portal such as cloud management of LUT’s. One of the new features is included in the image above, can you spot it?
To bring the FX9 in line with the FX30, FX3 and FR7 Cinema Line cameras it gains the ability to automatically store the LUT you use when shooting in the CineEI mode on the XQD card along with the existing metadata about the EI used. This then allows the LUT to be applied to your footage automatically and with the correct exposure offset in post production. HOWEVER the only application that currently supports this is Sony’s Catalyst Browse. We can only hope that other edit and grading manufacturers will make use of the embedded LUT and metadata to do the same in future updates as it makes the post production process very easy, especially for fast turn around jobs or when handing the footage over to clients.
One issue addressed in this update is that when using proxies if you switch to S&Q recording, as before, proxy recording will stop. But now when you come back out of S&Q the proxy recording will resume automatically.
And we now get assignable buttons that light up when the function attached to them is enabled. Not every function will cause them to light up, but as an example if you enable S&Q button 1 now lights up. I have cache record assigned to button 8 and when enabled, button 8 lights up orange as in the image above. It’s a nice feature, but why has it taken so long to enable it?
As with previous FX9 firmware updates the update process can be a little nerve wracking as the LCD screen will go blank for quite a few minutes, giving the impression it may have stopped and this update sat at 57% for a very long time before continuing. Whatever you do don’t turn the camera off, WAIT. It can take up to an hour for the update to complete. See this video on how to do an FX9 update.
Whats included in Version 4 for the FX9. – C3 Portal integration improvements Cloud service management of 3D LUT files is supported. Cloud service management of ALL files is supported. Uploading an original file automatically is supported. – Shooting workflow improvements LUT data (Cube data) can now be recorded as metadata. – Audio level meter CH1/CH2 and CH3/CH4 indicator switching support – Assignable button support for switching the audio monitor channel – Assignable button flashing indication support – Changes to proxy recording control when switching Slow & Quick Motion settings
TVtools are running a Sony Cinema Line workshop in Helsinki on the 22nd of November 2022. This will be a great opportunity to see most of the Cinema Line cameras and to learn how to get the very best from them.
Full details and registration for the event can be found by clicking here.
I attempts to turn the FX6 into a shoulder camera I am seeing a lot of people removing the FX6’s handgrip from the side of the camera and then attaching an extension arm to the camera body where the hand grip normally attaches, perhaps either directly with a dedicated arm or by fitting a rosette to the camera body.
I strongly recommend you do not do this!
A long arm increases the amount of force that can be applied to the body of the camera and it wasn’t designed to take the forces an arm places on it. Especially if the camera is loaded up with other accessories such as monitors, V-Lock adapters or a base plate. There have been several instances of the camera body fracturing around the hand grip mount when an extension arm has been used. Replacing the camera body is not cheap and it is unlikely to be covered under any warranty as it wasn’t designed to be used this way.
Instead mount the arm to a base plate, there are many FX6 base plates that include a suitable rosette for arms and other accessories.
This tripped me up recently and I really should know better.
Don’t mix wireless and cabled microphones with differing amounts of latency because if you do you may have a nasty and difficult to remove echo or phase issues in your audio.
Digital + Analog don’t mix well.
In my particular case I was using a couple of Sony UWP-D wireless microphones to mic up two out of 3 members of a discussion panel. For the 3rd member I had planned to use another UWP-D but that microphone became unavailable at the last minute, so instead I used a lower cost digital microphone that works on the 2.5Ghz band. There is absolutely nothing fundamentally wrong with this lower cost microphone but the digital processing and transmission adds a very slight delay to the audio.
The Sony UWP-D’s are extremely low latency (delay) microphones and the audio arrives at the camera almost instantly. However most of the lower cost digital microphones have a very slight delay. That delay may be 1 frame or less, but there is still a delay. So the audio from the digital microphone arrives at the camera slightly late. If this is the only microphone you are using this isn’t an issue. But if you mix a very low latency microphone with one with a very slight delay, if both mics pick up any of the same sounds in the background there will be an echo or possibly a phase issue.
As the delay is almost never exactly 1 frame this can be difficult to resolve in most normal video post production suites where you can only shift things in 1 frame increments.
Phase Issues:
Phase issues occur when the audio from one source arrives very slightly out of sync with the other so that the one source cancels certain frequencies of the other out when the two are mixed together. This can make the audio sound thin or have a reduced frequency response.
So… don’t mix different types of digital wireless microphones and don’t mix lower cost digital microphones with more expensive low latency microphones. And when you are checking and monitoring your audio listen to a full mix of all your audio channels. If you monitor the channels separately the echo or any phasing issues might not be heard.
A fundamental aspect of electronic cameras is that the bulk of the noise comes from the sensor. So the amount of noise in the final image is mostly a function of the amount of light you put on to the sensor v the noise the sensor produces (which is more or less constant). This is known as the signal to noise ratio, often abbreviated to SNR.
Whether you use S-Log3 or S-Cinetone, even though the base ISO number the camera displays changes the sensitivity of the camera is actually the same, after all we are not changing the sensor when we change modes. In fact if you set the camera to dB you will see that in custom mode the base for both S-Cinetone and S-log3 (and every other gamma curve) is always 0dB.
All we are changing when we switch between S-Cinetone and S-Log3 is the gamma curve – which is a form of gain curve. The base ISO number changes between S-Log3 and S-Cinetone because if you were using an external light meter this would be the number to put into the meter to get the “correct” exposure, but the actual sensitivity of the camera remains the same.
First let’s think about what is happening at the base ISO of each if we were to use an external light meter to set the exposure…..
If we shoot at S-Cinetone and use the 320 ISO value in the light meter the aperture will be a little over a stop more open than if you shoot with S-Log3 and use 800 ISO for the light meter. So when using S-Cinetone at the base ISO there is a little over twice as much light going on to the sensor compared to S-Log3 at the base ISO and as a result the S-Cinetone will be much less noisy than the S-Log3. Not because of a sensitivity or noise performance difference but simply because you are exposing the sensor more brightly.
And if we use the SAME ISO value for S-Cinetone and S-Log3?
So now think about what might happen if you were to put 400 ISO into your light meter and use the values for shutter and aperture the meter gives and shoot with either S-Cinetone or S-Log3 using the very same aperture and shutter settings so that the same amount of light is hitting the sensor for both. The result will be that the amount of noise in the resulting image will be broadly similar for both and the same would happen if you were to use, let’s say, 4000 ISO (assuming you switch to high base for both).
There will tend to be a bit more noise in the S-Log and CineEI at the default settings, because by default NR is turned off in CineEI. But with the same in camera NR settings, again both the S-Log3 and S-Cinetone will have very, very similar noise levels when the sensor receives the same amount of light.
What about when there isn’t enough light?
So – when you are struggling for light, both will perform similarly from a noise point of view. BUT where there may be a difference is that with S-Cinetone all your image processing is done before it is compressed by the codec and what you see in the viewfinder is what you get. With S-Log3 the “underexposed” image gets compressed and then you will need to process that in post and when you add your post corrections this will be to the recorded image + compression artefacts so there will always be a lot of uncertainty as to how the final image will come out.
Personally I tend to favour S-Cinetone for under exposed situations. Generally if it’s under exposed dynamic range isn’t going to be an issue. S-Cinetone also spreads what image information you do have over a greater range of code values than S-Log3 and this may also help a little. But there is no right or wrong way and any differences will be small.
Yesterday Sony launched the A7RV – that’s the A – 7 – R – 5 mirrorless digital stills and video camera to you and me, not some kind of motorhome.
This camera is being sold as first and foremost as a photo camera, it is not a part of Sony’s Cinema Line, but as well as it’s high resolution photo capabilities thanks to it’s 61MP sensor it can also shoot very high quality video at 8K 24p as well as 4K 60p from a 1.24x crop of the full frame sensor. It has S-Log3, S-Cinetone as well as HLG and all the usual codecs we now see in Sony Alpha’s including XAVC-SI and XAVC-HS. As well as the RV there is also the A1, another camera capable of shooting great looking 8K video.
Sony’s Cinema Line Cameras (not shown here is the FX30)
If we then look at the Cinema Line, we start at the bottom with the new FX30, which is an APSC/Super 35mm sized sensor camera that shoots great looking S-Log3 or S-Cinetone. It has a fully functional and very useful CineEI mode with built in LUTs and the ability to add user LUT’s. From there we move up through the FX3 and on to the more box shaped FX6 and FX9.
These two cameras are clearly designed for video and they gain the benefit of a built in variable ND filter, SDI outputs and arguably better LCD screens for monitoring. But in terms of the quality of the images they record there is little difference between these and the FX30 and FX3. What is missing from the Cinema Line right now is a camera less expensive than Venice that can record at more than 4K. My guess is that this is something we will see in the next year or so.
In the mean time, I’ve been wondering if I should add an A1 or perhaps the new A7RV to my fleet of cameras to tick the “8K” box. Having shot with the 8K Venice and the A1 I can see that that for some projects starting at 8K does have benefits. I absolutely adore the images from the 8K Venice 2 sensor and the A1 looks pretty good too. I shot this 8K video in Norway.
So then you start thinking – Do I really need big cameras like the FX9 or FX6? Purely from an image quality point of view I don’t think you do. BUT from an ergonomic point of view there can be a lot of issues with small cameras. Let’s take a look…..
ND FILTER No ND filter. The built in ND filter of the FX6/FX9 and Venice make life so, so much easier whenever you want to shoot outside. For most daylight shoots, when shooting at 800 ISO you are going to need an ND filter if you want to use a sensible shutter speed and aperture. Of course, you can add an ND filter to the front of your lenses, but it’s hard to ignore the convenience and consistency of a built in behind the lens ND filter system. It saves time, is less fiddly, makes swapping lenses easy and is one thing I miss every time I use a DSLR style camera body. BUT it isn’t a deal breaker, you can still add external ND’s.
OUTPUTS Outputs: This is harder to resolve. The Sony DSLR style cameras all have some serious output limitations. They only have a single HDMI output and when you use the HDMI output there are limitations over where you can see the screen overlays and information about shutter speed, frame rates etc. Plus you get things like having to use the cameras touch screen to control the touch focus, but the live images only being on the external monitor (or in the EVF in the case of the A7RV, A1). The HDMI on the newer cameras is 10 bit and you could add a splitter or SDI converter if that’s what you need, but then you are hanging a load of extra boxes off the camera.
SIZE AND SPACE. And talking of extra boxes – when the camera is so small, where do you attach any extras like a better external viewfinder, a monitor, wireless video sender etc? There simply isn’t enough real estate on these very small cameras, even the FX6 can lack sufficient space if you ave a lot of extra stuff you want to attach to the camera.
POWER. There is the issue of powering it all. It’s not as bad as it used to be as in most cases you can use the cameras USB-C port and a USB-PD compatible power source to power the camera. But this isn’t as convenient as running everything of a single V-Lock battery. You can adapt from D-Tap to USB-C and some V-Mounts have USB-C, but it still gets messy and the USB-C connector is not very robust.
BURIED. Finally by the time you’ve got the DSLR sized camera rigged up it becomes so buried in wires, cables and accessories that the tiny buttons become hard to get at, the built in LCD gets hard to see and it all becomes an ergonomic nightmare. While the camera remains the size and shape of a DSLR many of these issues will remain.
So- while I have to say I am extremely tempted by the A1 or A7RV I still can’t see how one would replace my FX6 or FX9. I could perhaps see an A1 becoming an alternative to my FX3, but I would miss the Cine EI mode. The one thing that keeps the FX3 easy to use when shooting S-Log3 is that Cine EI mode. Without it, I would want to use an external monitor with LUT’s and then that defeats the purpose of a very small camera like the FX3.
But still, despite all of the above, the A1, A7RV, A7SIII etc are extremely capable cameras. In the right hands there is no reason why they won’t produce stunning content that audiences would not be able to separate from content from full size cinema cameras. Of course, if you do side by side, like for like tests you will find differences, but show an average viewer 2 different shots, equally well executed, one from perhaps a Venice and the other from an A1, in most cases it would be extremely hard to categorically say which is which. So really it comes down to the skill of the operator, the lenses used, the choice of locations and the lighting. Whether you shoot with an A1 or and FX6, an FX30 or a Venice, the camera isn’t going to be what decides the final quality, it will be how you use it, what you shoot with it, your composition and lighting.
And that makes this a really exciting time to be a film maker, because even a low cost camera like the FX30 could be used to shoot an award winning film.
In the coming years we will no doubt see replacements for cameras like the FX6 and FX9 and I am sure that these will get 8K capable sensors. But 8K isn’t the “be all and end all”. Resolution is just one part of the image and other factors such as dynamic range, colour response and noise are equally and possibly more important. I’ve produced 8K demo content for various people, I’ve shot with the 8K Venice and the A1 and it IS nice to have. But it will be a very, very long time before most of us need to deliver in anything greater than 4K. Heck, even though 4K cameras have been around for a decade or more there are only a handful of 4K TV channels and I often struggle to tell whether the online content I am watching is 4K or HD. So, after thinking this through and writing this I’ve decided to hold off for now. I’ll wait for an 8K FX6 or FX9, unless some project that absolutely must have 8K comes along that would justify the cost of another cameras. My FX6 and FX9 can and do produce wonderful images and will continue to do so for a long time.
Sony’s Future Film Maker awards is a film making competition with 3 categories for film makers, student film makers plus a future format category. There are some really great prizes for the winners and those shortlisted. Prizes include up to $5000 USD as well as FX9 cameras and other film making equipment. The winning and shortlisted filmmakers will be flown to Los Angeles, the home of Hollywood, for a two-day event that will take place at the Sony Pictures studio lot in Culver City, California. The 30 successful filmmakers will gain unparalleled insight into all aspects of the filmmaking process. From pitching to legal to working with talent agencies and using cutting-edge technologies, the outstanding workshops provide exclusive access into the inner workings of the industry. Winners are announced during a black-tie awards ceremony at the Cary Grant Theatre.
Entires close December 13th, so you don’t have long to get your entries in. For more information go to the competition website: https://www.sonyfuturefilmmakerawards.com/
Want to learn more about the new Sony FR7? Why not sign up for this webinar where I’ll show some recently shoot FR7 footage. The FR7 is a new remote control pan/tilt/zoom camera based on the FX6, so it offers the image quality of a Cinema Line large sensor camera but in a PTZ style housing.
I’ll be there along with Sony Expert Jin Koide and minicam specialist Dan Greenway.
Dan Greenway runs a hire company specialising in minicams and remote head cameras, providing equipment and crew for shows such as Gogglebox, Million Pound Drop as well as live events and sports. He’s already conducted one FR7 shoot for a primetime ITV production.
Alister Chapman is a freelance TV cameraman, Director of Photography (DoP) and Digital Imaging Technician (DIT). He is also a well-known instructor for shooting techniques and production methods.
The workshop will be followed by a live Q&A session.
Here’s a handy chart of the base ISO levels for Sony’s cinema line cameras including Venice, the FX9, FX6, FX3 and FX30 as well as the A7SIII and A7IV. The new Sony FR7 is the same as the FX6. I’ve include the base ISO’s for both S-Log3 and S-Cinetone. If you use other gammas the base levels may be different to the S-Cinetone base level, so these values should only be used for S-Cinetone and S-Log3. You can click on the image for a bigger version or left click on it to download it.
The base ISO levels for the FX9, FX6, FX3, FX30, and Venice Cameras.
As explained above there is a difference in the way the dual ISO functions work between the FX6/FX3/A7SIII and the other cameras. Venice, the FX9 and FX30 have sensors with two distinctly different sensitivities. These cameras offer near identical performance at either the low or high base ISO. Sony call these cameras “Dual Base ISO” as in most cases the two base ISO’s can be used in exactly the same way depending on which best suits the light level you are working at and a near identical image produced.
The other cameras (FX6, FX3, A7SIII) probably have a dual gain sensor plus additional processing to deliver their 2 distinctly different sensitivity ranges. The result is that there is a more visible increase in noise at the high range (compared to the Dual Base ISO cameras) plus a very slight reduction in dynamic range. However, the noise level in the high base setting is significantly lower than you would have by adding gain to get to the same level and the upper base sensitivities are very usable and allow for shooting at very low light levels.
Sony’s new FR7 Cinema Line Pan, Tilt and Zoom camera.
I first came across the new Sony FR7 PTZ camera (Pan, Tilt and Zoom) at IBC in Amsterdam in September and at first I was a little confused by it. PTZ cameras are not new and this is a fairly big unit, so who would actually want one and what would they use it for, especially given the shorter zoom ranges possible because of the use of a large sensor. But now I am convinced that the FR7 will be a big hit – what’s changed my mind?
For those that haven’t seen it yet the FR7 is in essence a Sony FX6 camera that has been adapted and modified to fit in a remotely controlled pan and tilt head. You really do get all of the FX6’s features and performance including onboard recording to SD and CFExpress type A cards, S-Cinetone, S-Log3 and CineEI, raw output, built in variable ND filter and Sony great autofocus etc etc. But in a form factor that allows you to operate the camera remotely via either an optional control panel with a joystick or via any device with a web browser.
Remote PTZ (Pan, Tilt, Zoom) cameras get used a lot in shows like Big Brother, Love Island, First Date etc but until now, generally the image quality hasn’t been as good as most mainstream broadcast cameras. This means that when you cut between the PTZ camera and other main cameras the difference is often quite obvious. So, straight away there is the obvious use of the FR7 for these types of shows, so that the image quality will be as good as any of the other cameras being used. It may mean that more PTZ cameras will be used as quality is no longer going to be an issue.
Wildlife.
PTZ cameras also get used a lot in wildlife productions. A PTZ camera can be placed close to an animals nest or placed closer to a feeding area without disturbing the animals natural behaviour as a camera operator might. PTZ cameras can be used to film animals that may be dangerous to a camera operator or left somewhere remote for days, weeks or even months on end. Again, often the quality of these cameras is noticably different to the main cameras used and more often than not the small sensors in most PTZ cameras don’t do well in low light. The ability to use the FR7’s high sensitivity mode and shoot S-Log3 at 12,800 ISO with a fast lens will really open up a lot of new possibilities for wildlife film makers. Because you can fit just about any reasonably sized lens to the FR7 it opens up the possibility of fitting one with an image intensifier for extreme low light work. In addition the built in variable ND filter will be a great help for wildlife film makers working in variable and changing lighting conditions. The FR7 is controlled over an ethernet connection, so with a simple 4G router and a connection to the internet the camera could be controlled from the comfort of a warm studio anywhere in the world.
But what about other applications? Would a freelance camera operator like me benefit from one? Well I think the answer may be yes.
The Ultimate “B” Camera?
For 2 camera shoots such as interviews the FR7 can be used as a second camera and you have the ability to control it from the main camera position. This would be so much easier than having to walk over to the second camera to make a simple adjustment or reframe it. Instead of being a simple locked off shot that never ever changes your B camera can be moved and adjusted more frequently to add more variety to your shots. Program in some preset positions and you can confidently reframe your shot at the single press of a button. Creating presets is quick and easy.
Placing it where you can’t normally put a camera.
And what about getting shots from places or angles that aren’t normally possible? If you shoot conferences, events or performances, being able to place the camera on the front of the stage or in front of the podium opens up a lot of new possibilities. The FR7 won’t obstruct the audiences view in the same way that a camera on a tripod with an operator will and it’s far less distracting. I’m going to be shooting some live performances with one very soon and it will allow me to get the camera into locations around the performances where you just can’t normally get a shot. You can hang it from a ceiling or a lighting truss for overhead shots. You can even mount it on a jib. Once you start thinking about all the places you can place one, places that are unsafe for a camera operator or just simply inaccessible it does start to become an interesting proposition.
Time-lapse and trick shots.
You can also use it for time-lapse or other shots where you need to repeat the same move over and over. By setting up preset positions for the start and end points and then adjusting the speed of the move you can perform extremely slow moves all the way to very fast moves from point to point and each time the move is the same. Like the FX6 the FR7 has a built in intervalometer (interval record), so shooting time-lapse is easy. You can also make it speed ramp the moves if you need to.
The big deal about the FR7 is that while PTZ cameras are not new, they have never offered the image performance possible from a large sensor camera. Because the images from the FR7 closely match the rest of the Sony cinema line it opens up more possible uses. And the cost isn’t prohibitive, it’s not that much more than a normal FX6. Its limiting factor is the range of power zoom lenses that are currently available. The 28-135mm power zoom will be the lens that most will use with it and while this is going to be very useable for many things it isn’t a vast zoom range compared to the zooms typically fitted to PTZ cameras with very small sensors. You can use the cameras clear image zoom function to extend the zoom range by up to 1.5x in 4K if you need to. If you need a longer focal lengths then I believe it is possible to use the Sony 70-200mm with the 2x extender, but this isn’t a power zoom. Hopefully we will see more E-Mount power zoom lenses coming in the future for this very interesting camera.
Come back in about a month to find out how I get on shooting a live performance with the FR7. I’m really looking forward to putting it through its paces as I’m strongly considering getting one for myself – thinks – Northern Lights remotely controlled from home??????
Manage your privacy
To provide the best experiences, we use technologies like cookies to store and/or access device information. Consenting to these technologies will allow us to process data such as browsing behavior or unique IDs on this site. Not consenting or withdrawing consent, may adversely affect certain features and functions.
Functional
Always active
The technical storage or access is strictly necessary for the legitimate purpose of enabling the use of a specific service explicitly requested by the subscriber or user, or for the sole purpose of carrying out the transmission of a communication over an electronic communications network.
Preferences
The technical storage or access is necessary for the legitimate purpose of storing preferences that are not requested by the subscriber or user.
Statistics
The technical storage or access that is used exclusively for statistical purposes.The technical storage or access that is used exclusively for anonymous statistical purposes. Without a subpoena, voluntary compliance on the part of your Internet Service Provider, or additional records from a third party, information stored or retrieved for this purpose alone cannot usually be used to identify you.
Marketing
The technical storage or access is required to create user profiles to send advertising, or to track the user on a website or across several websites for similar marketing purposes.
 Sony have released the version 4 firmware update for the FX9. This update adds a number of new features related to their C3 Cloud Portal such as cloud management of LUT’s. One of the new features is included in the image above, can you spot it?
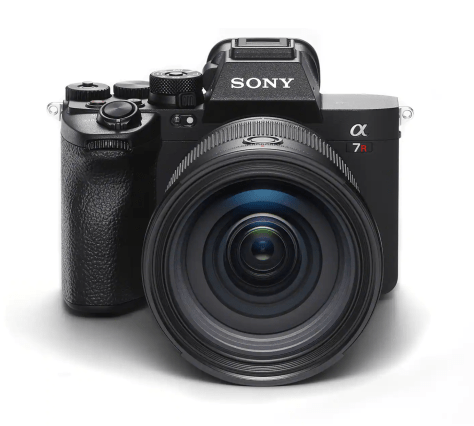


 Sony’s Future Film Maker awards is a film making competition with 3 categories for film makers, student film makers plus a future format category. There are some really great prizes for the winners and those shortlisted. Prizes include up to $5000 USD as well as FX9 cameras and other film making equipment.
  Want to learn more about the new Sony FR7? Why not sign up for this webinar where I’ll show some recently shoot FR7 footage. The FR7 is a new remote control pan/tilt/zoom camera based on the FX6, so it offers the image quality of a Cinema Line large sensor camera but in a PTZ style housing.
