Category Archives: shoots

Why is exposing log brightly beneficial?

I have been asked whether you should still expose log a bit brighter than the recommended base levels on the Sony PXW-FS5 now that Sony have released new firmware that gives it a slightly lower base ISO. In this article I take a look at why it might be a good idea to expose log (with any camera) a bit brighter than perhaps the manufacturer recommends.

There are a couple of reasons to expose log nice and bright, not just noise. Exposing log brighter makes no difference to the dynamic range. That’s determined by the sensor and the gain point at which the sensor is working. You want the camera to be at it’s native sensitivity or 0dB gain to get that maximum dynamic range.

Exposing brighter or darker doesn’t change the dynamic range but it does move the mid point of the exposure range up and down.  Exposing brighter increases the under exposure range but decreases the over exposure range. Exposing darker decreases the under exposure range but increases the over exposure range.

Something that’s important when thinking about dynamic range and big dynamic ranges in particular is that dynamic range isn’t just about the highlights it’s also about the shadows, it isn’t just over exposure, it’s under exposure too, it’s RANGE.

So why is a little bit of extra light often beneficial? You might call it “over exposure” but that’s not a term I like to use as it implies “too much exposure”. I prefer to use “brighter exposure”.

It’s actually quite simple, it’s about putting a bit more light on to the sensor. Most sensors perform better when you put a little extra light on them. One thing you can be absolutely sure of – if you don’t put enough light on the sensor you won’t get the best pictures.

Put more light on to the sensor and the shadows come up out of the sensors noise floor. So you will see further into the shadows. I’ve had people comment that “why would I ever want to use the shadows, they are always noisy and grainy”? But that’s the whole point – expose a bit brighter and the shadows will be much less noisy, they will come up out of the noise. Expose 1 stop brighter and you halve the shadow noise (for the same shadows at the previous exposure).  Shadows are are only ever noise ridden if you have under exposed them.

This is particularly relevant in controlled lighting. Say you light a scene for 9 stops. So you have 9 stops of dynamic range but a 14 stop sensor. Open up the aperture, put more light on the sensor, you get a better signal to noise ratio, less noisy shadows but no compromise of any type to the highlights because if the scene is 9 stops and you have 14 to play with, you can bring the exposure up by a couple of stops comfortably within the 14 stop capture range.

Chart showing S-Log2 and S-Log3 plotted against f-stops and code values. Note how little data there is for each of the darker stops, the best data is above middle grey. Note that current sensor only go to +6 stops ove middle grey so S-Log2 and S-Log record to different peak levels.

Look at the above diagram of Sony’s S-Log2 and S-Log3 curves. The vertical 0 line in the middle is middle grey. Note how above middle grey the log curves are more or less straight lines. That’s because above the nominal middle grey exposure level each stop is recorded with the same amount of data, this you get a straight line when you plot the curve against exposure stops. So that means that it makes very little difference where you expose the brighter parts of the image. Expose skin tones at stop + 1 or stop +3 and they will have a very similar amount of code values (I’m not considering the way dynamic range expands in the scene you shoot as you increase the light in the scene in this discussion). So it makes little difference whether you expose those skin tones at stop +1 or +3, after grading they will look the same.

Looking at the S-Log curve plots again note what happens below the “0” middle grey line. The curves roll off into the shadows. Each stop you go down has less data than the one before, roughly half as much. This mimics the way the light in a real scene behaves, but it also means there is less data for each stop. This is one of the key reasons why you never, ever want to be under exposed as if you are underexposed you mid range ends up in this roll off and will lack data making it not only noisy but also hard to grade as it will lack contrast and tonal information.

Open up by 1 additional stop and each of those darker stops is raised higher up the recording curve by one stop and every stop that was previously below middle grey doubles the amount of tonal values compared to before, so that’s 8 stops that will have 2x more data than before. This gives you a nice fat (lots of data) mid range that grades much better, not just because it has less noise but because you have a lot more data where you really need it – in the mid range.

Note: Skin tones can cover a wide exposure range, but typically the mid point is around 1 to 1.5 stops above middle grey. In a high contrast lighting situation skin tones will start just under middle grey and extend to about 2 stops over. If you accidentally under expose by 1 stop or perhaps don’t have enough light for the correct exposure you will seriously degrade the quality of your skin tones as half of your skin tones will be well below middle grey and in the data roll-off.

Now of course you do have to remember that if your scene does have a very large dynamic range opening up an extra stop might mean that some of the very brightest highlights might end up clipped. But I’d happily give up a couple of specular highlights for a richer more detailed mid range because when it comes to highlights – A: you can’t show them properly anyway because we don’t have 14 stop TV screens and B: because highlights are the least important part of our visual range.

A further consideration when we think about the highlights is that with log there is no highlight roll-off. Most conventional gamma curves incorporate a highlight roll-off to help increase the highlight range. These traditional highlight roll-offs reduce the contrast in the highlights as the levels are squeezed together and as a result the highlights contain very little tonal information. So even after grading they never look good, no matter what you do. But log has no highlight roll-off. So even the very brightest stop, the one right on the edge of clipping contains just as much tonal information as each of the other brighter than middle grey stops. As a result there is an amazingly large amount of detail than can be pulled out of these very bright stops, much more than you would ever be able to pull from most conventional gammas.

Compare log to standard gammas for a moment. Log has a shadow roll-off but no highlight roll-off. Most standard gammas have a strong highlight roll-off. Log is the opposite of standard gammas. With standard gammas, because of the highlight roll-off, we normally avoid over exposure because it doesn’t look good. With Log we need to avoid under exposure because of the shadow roll-off, it is the opposite to shooting with standard gammas.

As a result I strongly recommend you never, ever under expose log. I normally like to shoot log between 1 and 2 stops brighter than the manufacturers base recommendation.

Next week: Why is a Sony camera like the FS7,F5 800 ISO with standard gamma but 2000 ISO in log and how does that impact the image?


Why do I always shoot at 800 EI (FS7 and F5)?

This is a question that comes up time and time again. I’ve been using the F5 and FS7 for almost 5 years. What I’ve discovered in that time is that the one thing that people notice more than anything from these cameras is noise if you get your exposure wrong. In addition it’s much harder to grade a noisy image than a clean one.
Lets take a look at a few key things about how we expose and how the F5/FS7 works (note the same principle applies to most log based cameras, the FS5 also benefits from being exposed brighter than the suggested base settings).
What in the image is important? What will your audience notice first? Mid-range, shadows or highlights?
I would suggest that most audiences first look at the mid range – faces, skin tones, building walls, plants etc. Next they will notice noise and grain or perhaps poor, muddy or murky shadows. The last thing they will notice is a few very brightly highlights such as specular reflections that might be clipped.
The old notion of protecting the highlights comes from traditional gamma curves with a knee or highlight roll off where everything brighter than a piece of white paper (90% white) is compressed into a very small recording range. As a result when shooting with conventional gamma curves ALL of the brighter parts of the image are compromised to some degree, typically showing a lack of contrast and texture, often showing some weird monotone colors. Log is not like that, there is no highlight roll off, so those brighter than white highlights are not compromised in the same way.
 
In the standard gammas at 0dB the PXW-FS7, like the PMW-F5 is rated at 800 ISO. This gives a good balance between noise and sensitivity. Footage shoot at 0dB/800ISO with the standard gammas or Hypergammas generally looks nice and clean with no obvious noise problems. However when we switch to log the native ISO rating of the cameras becomes 2000 ISO, so to expose “correctly” we need to stop the aperture down by 1.3 stops. This means that compared to 709 and HG1 to HG4, the sensor is being under exposed by 1.3 stops. Less light on the sensor will mean more noise in the final image. 1.3 stops is the equivalent of 9dB. Imagine how Rec709 looks if it is under exposed by 1.3 stops or has to have +9dB of gain added in. Well – thats what log at 2000 ISO will look like.
 
However log has lots of spare headroom and no highlight compression. So we can choose to expose brighter than the base ISO because pushing that white piece of paper brighter in exposure does not cause it to become compressed.
If you open the aperture back up by 1.3 stops you get back to where you would be with 709 in terms of noise and grain. This would be “rating” the camera at 800 ISO or using 800 EI. Rating the camera at 800EI you still have 4.7 stops of over exposure range, so the only things that will be clipped will in most cases be specular reflections or extreme highlights. There is no TV or monitor in existence that can show these properly, so no matter what you do, they will never be true to life. So don’t worry if you have some clipped highlights, ignore them. Bringing your exposure down to protect these is going to compromise the mid range and they will never look great anyway.
 
You should also be extremely cautious about ever using an EI higher that 2000. The camera is not becoming more sensitive, people are often misslead by high EI’s into thinking somehow they are capturing more than they really are. If you were to shoot at 4000 EI you will end up with footage 15dB noisier than if you were shooting the same scene using 709 at 800 ISO. That’s a lot of extra noise and you won’t necessarily appreciate just how noisy the footage will be while shooting looking at a small monitor or viewfinder.
 
I’ve been shooting with the F5 and then the FS7 for almost 5 years and I’ve never found a situation where I going to an EI higher than 800 would have resulted in a better end result. At the same time I’ve seen a lot of 2000 EI footage where noise in the mid range has been an issue, one particular example springs to mind of a high end car shoot where 2000 EI was used but the gloss and shine of the car bodywork is spoilt because it’s noisy, especially the darker coloured cars.
 
Of course this is just my opinion, based on my own experience, others may differ and the best thing you can do is test for yourself.

Watch your viewfinder in bright sunshine (viewfinders with magnifiers or loupes).

Just a reminder to anyone using a viewfinder fitted with an eyepiece, magnifier or loupe not to leave it pointing up at the sun. Every year I see dozens of examples of burnt  and damaged LCD screens and OLED displays caused by sunlight entering the viewfinder eyepiece and getting focussed onto the screen and burning or melting it.

It can only take a few seconds for the damage to occur and it’s normally irreversible. Even walking from shot to shot with the camera viewfinder pointed towards the sky can be enough to do damage if the sun is out.

So be careful, cover or cap the viewfinder when you are not using it. Tilt it down when carrying the camera between locations or shots. Don’t turn to chat to someone else on set and leave the VF pointing at the sun. If you are shooting outside on a bright sunny day consider using a comfort shade such as an umbrella or large flag above your shooting position to keep both you and the camera out of the sun.

Damage to the viewfinder can appear as a smudge or dark patch on the screen that does not wipe off. If the cameras was left for a long period it may appear as a dark line across the image. You can also sometimes melt the surround to the LCD or OLED screen.

As well as the viewfinder don’t point your camera directly into the sun. Even an ND filter may not protect the sensor from damage as most regular ND filters allow the infra red wavelengths that do much of the damage straight through.  Shutter speed makes no difference to the amount of light hitting the sensor in a video camera, so even at a high shutter speed damage to the cameras sensor or internal ND’s can occur. So be careful when shooting into the sun. Use an IR ND filter and avoid shooting with the aperture wide open, especially with static shots such as time-lapse.


The Fujinon Cabrio XK6x120 alongside the MK 18-55.

Having done a fair bit of shooting with the new and very nice Fujinon MK 18-55mm E-Mount lens I decided to take a much closer look at the Fujinon Cabrio XK6x20 20 to 120mm T3.5 lens with the servo hand grip.

The Fujinon XK6X20 20 to 120mm lens on my PMW-F5. The lens was loaned to me by Fujinon at my request as I wanted to test it for myself.

The price of this lens is very competitive and it can now be found as low as £11K/$16K. Lets not try to pretend that good quality PL mount zooms are cheap, but this is a great price for what is very high quality glass. The 20 to 120mm zoom range is nice and of course it’s truly parfocal there is a back focus adjuster along with macro function.

The XK6X20 viewed from the top.

Like the other similar ENG style PL zooms this lens is quite heavy. The front element of the lens is huge and I’m sure a lot of the weight comes from this big lump of glass. One of the nice things about this lenses baby brother the MK 18-55, is that the 18-55 is really very light, which is great on the smaller cameras like the FS5 or FS7.

The XK6X20 and it huge front element on the left and the smaller and lighter MK18-55 on the right.

The 20-120mm Cabrio exudes quality. The build quality of the lens is wonderful, the witness marks are crisp and well engraved, the servo zoom is silky smooth. The large servo module acts as a handgrip just like traditional ENG lenses and it really comfortable to hold and use this way. But if you don’t need it it can be easily removed leaving the bare bones lens body and saving a little bit of weight. There are the usual 0.8 mod pitch gears on each of the focus zoom and iris rings. Focus ring travel is huge at about 200 degrees and due to the physical size of the lens this is as much as I’d ever want. Even towards infinity there is still a nice range of travel so focussing accurately on distant objects is easy.

But what about the image quality, how does the lens perform in real world situations?

To find out I used it for a shoot in Norway. The shoot was for TV manufacturer Philips. We wanted to obtain some high quality 4K HDR footage to show off the capabilities of a new 4K OLED Ambilight TV. Unfortunately the weather conditions on the shoot were pretty grim most of the time and this made it all the more challenging. But I’m pleased to say that both lenses performed very well despite snow, ice and cold.

You can see the size difference here – XK6X20 on the left and MK18-55 on the right.

One of the great things about having both the high end Cabrio 20-120mm and the budget friendly 18-55mm for the shoot was that the overall look of the images from the FS5 and F5 was the same. Often mixing lenses from different manufacturers results in different looking images giving the colourist more work to do in post. Fujinon now have a range of lenses to suit most budgets from the high end Cabrio 19-90mm T2.9 down through the Cabrio 20-120 T3.5 to the MK 18-55 T2.9.

So what do the images from these lenses look like? I’m afraid I can’t show any of the footage from the Philips shoot yet, I should be able to show it later in the year. Below are a couple of frame grabs to give you an idea of the kind of images you can get. We didn’t shoot the same shots with the F5/XK6x20 and FS5/MK18-55 at the same time, I was the only cinematographer. So I don’t have a side by side comparison from the shoot, but the different scenes shot with each lens/camera combo match really well.

Sami woman feeding reindeer shot with the XK6X20 in Norway. Click on the image for a hi res version.
Wide of Sami woman feeding reindeer shot with the XK6X20 in Norway. Click on the image for a hi res version.
Annika Summerson filmed in Tromso with the Fujinon XK6X20.
Boats in the harbour on a cold but bright morning (the only one we had).
Icicles on the window. Shot with the Fujinon XK6X20 with my PMW-F5.

TESTING BOTH LENSES:

In order to better directly compare the two lenses I shot some test shots. The XK6x20 on my F5 and the MK18-55 on my FS7. Both cameras were set to the same settings and hypergamma 3 with the cinema matrix used. The images you will see below have not been touched, this is how they looked straight from the camera. If you click on the picture you should get a link to the full frame 4K image, but do remember this are Jpegs.

Testing the Fujinon MK18-55 and XK6X20 with my PMW-F5 and PXW-FS7.

I tried to get the same shots with both combinations but you will see some small variations. I apologise for that. To give as fair a comparison as possible I did most of the shots at 20mm and 55mm, but then in addition shot at 18mm on the MK18-55 and 120mm on the XK6X20 so you can see the additional range each lens offers.

First test was of a neighbours Cherry tree in blossom.

The FS7 with XF 18-55mm at 55mm. Click on the image for the full size 4K frame.
PMW-F5 with XK20X6 at approx 55mm (sorry about the different framing). Click on the image for the size 4K full frame.
The FS7 with XF 18-55mm at approx 20mm. Click on the image for the full size 4K frame.
PMW-F5 with XK20X6 at 20mm. Click on the image for the size 4K full frame.
PMW-F5 with the Cabrio XK6X20 at 120mm showing the extra reach of the 20-120mm zoom.

The next test was a simple setup shot of a couple of beer bottles on a table with strong sunlight from above and behind to create deep contrast. I wanted to see if either lens showed signs of loosing shadow detail due to the very large, very bright table top introducing flare into the shadows.

PXW-FS7 with XF18-55mm at approx 20mm, high contrast scene.
PMW-F5 with XK20X6 at 20mm. High Contrast scene. Click on the image for the size 4K full frame.
PXW-FS7 with XF18-55mm at 55mm, high contrast scene.
PMW-F5 with XK20X6 at approx 55mm. High contrast scene. Click on the image for the size 4K full frame.
The FS7 with the XF18-55 at 18mm showing the extra “width” that 18mm gives over 20mm.

My conclusion with the above shots is that there is remarkably little difference between these two lenses. Both perform extremely well. I think the XK6X20 might be marginally sharper at the wide end than the 18-55mm, either that or the slightly better viewfinder of the F5 is allowing me to focus more precisely. In addition I think the bokeh of the more expensive Cabrio is marginally smoother than the 18-55, but again it’s a tiny difference (not as big as the difference in white balance of the two cameras).

Finally a shot of my ugly mug just so you can take a look at some skin tones.

PXW-FS7 with Fujinon XF 18-55 at approx 30mm. Click on the image for full size 4K frame.
PMW-F5 with Fujinon Cabrio XK6X20 at approx 30mm. Click on the image for the full size frame.

Again very little difference between these lenses which is a good thing. Both perform very well, both produce pleasing images. Sure the XK6X20 20-120mm is more than twice the price of the MK18-55 but then it does offer twice the zoom range and it’s very hard to make fast parfocal lenses with big zoom ranges for large sensors. There will be a companion MK50-135mm lens coming later in the year, so with both the MK lenses you will be able to get the full range of the XK6X20 and a bit more, provided you don’t mind swapping lenses. It’s a tough choice if you have an E-mount Sony camera, which to get? For E-Mount I think the pair of MK lenses will be the way to go. If you have a PL mount camera the XK6X20 has to be a very serious contender. It’s a great all-round cinema zoom lens and a realistic price. Whichever way you do go you won’t be disappointed, these are proper cinema lenses.

Anatomy of a shot. Night Scene in Arctic Norway – Fujinon lenses, Stella Lights.

I have just return from one of the most challenging shoots I have been involved in. The shoot took place over 5 days in and around Tromso in Norway. The aim was to gather footage to show off the capabilities of a new type of 4K TV from Phillips.

We shot the Northern Lights, we shot dog sledding , snow mobiles, shots of the city and sailing on the fjords. Each part of the shoot had many challenges and a lot of the shoot took place at night and at night the crew slept in cabins, tents and on the yachts. Shooting from the ice and snow covered deck of a yacht in temperatures well below zero is not something I enjoyed. And to top it all off the weather was pretty grim fro most of the shoot. Heavy snow showers, freezing temperatures and towards the end strong winds.

Because image quality is paramount for this project I choses to use the best lenses I could, but at the same time space and time constraints dictated that zoom lenses would be desirable. We were shooting 16 bit raw as well as XAVC class 480 on my PMW-F5 and some pick-up shots in UHD XAVC-L on a PXW-FS5. For the PMW-F5 the primary lens was the Fujinon Cabrio XK6x20, 20-120mm PL zoom and to ensure we had similar looking images from the FS5 I used the new Fujinon XF 18-55mm. I have to say that I’m quite in love with both of these lenses.

Fujinon Cabrio XK6x20 PL mount cinema zoom. A beautiful lens!

The Cabrio 20-120 is a beautiful lens and it’s really nice to have a servo zoom that is truly parfocal. The 20-120 produces really nice images even in the most challenging of conditions and at T3.5 it’s reasonably fast throughout the entire zoom range. This was the lens that I used for the majority of the shoot, in particular for the many night scenes we shot. The E-Mount 18-55 on the FS5 produces images that matched really well with the bigger lens and camera. This is a combination I would love to use on more shoots where the budget will allow.

One particular scene that we had to shoot was particularly challenging. It was a set up shot of a night time arrival of a couple of snowmobiles at a Sami camp site. The Sami people are the indigenous people of Northern Norway and they have a particular style of tent know as a Laavu which is similar to a teepee or wigwam. The idea behind the shot was to have the snow scooters arriving with headlights blazing and for the drivers to then enter the tent lit only by the light of a campfire inside the tent. At the time of the shoot it was snowing heavily and was totally dark. Turn off the lights of the snowmobiles and you could not see a thing.

Wide shot of the snowmobiles arriving at the camp in the dark.

While modern cameras like the F5 are very sensitive, the light of a campfire inside a tent will not adequately light a scene like this on it’s own. I didn’t want a totally dark background, so I decided that I would subtly light the trees of the forest that we were in to add some drama and give some depth to the background and a sense of being in a forest.

A slightly closer shot of the tent with backlit trees behind it.

As we were travelling continuously on this shoot there was no space for a large or complex lighting kit and the remote location meant we needed battery powered lights. In addition I knew before we left that there was a chance of bad weather so I needed lights that would work whatever mother nature decided to throw at us.

A snow scooter comes into the shot. You can see just how heavily it was snowing in this shot.

I decided to take a set of 3 Light & Motion Stella battery powered LED lights. It’s just as well I had the Stella lamps as on top of all the other difficulties of the shoot the weather decided it was not going to play ball. We had to shoot the scene (and much of the shoot) in the middle of a snow storm. Fortunately the Stella lights are completely waterproof, so I didn’t need to worry about rain or snow protection. Just set them up turn them on and use the built in dimmer to set the light output.

To light the scene I set up a Stella Pro 5000 in the woods behind the Sami tent, aimed through the trees and pointed directly towards the camera. I chose to backlight the trees to provide a sense of there being trees rather than lighting them. I felt this would look less lit than throwing a ton of light into the forest from the front and I’m pleased with the result.

A Light & Motion Stella Pro 5000 was used to back light the trees and tent. The heavy snow was no problem as the light is totally waterproof.

The Stella Pro 5000 is very bright for a compact battery operated light, it’s 5000 lumen 120 degree output that is pretty close to what you would get from a 200W HMI, it’s very bright. It has a very high CRI and gives out great quality daylight balanced light.  It was positioned so that the light itself was behind the tent on a small bank, about 20m back in the woods. You couldn’t see it in the shot, but the light coming through the trees created shafts of light in the snow and the trees appeared as silhouettes. It added depth and interest to what would have otherwise been a near totally black background.

Light & Motion Stella 2000 used to light the forground, again the lamp is waterproof so bad weather is no problem.

Then to provide a small amount of light so that we could see the riders of the snow scooters as they walked to the tent I used a Stella 2000. I didn’t really want the light from this lamp to be too obvious as this would really make the scene look “lit”. I didn’t need the full 2000 lumen output so I used the built in dimmer to reduce the output to around 70%.

The third light was a small Stella 1000 and this was placed inside the tent with a scrunched up orange gel. The Stella 1000 would typically be used as a camera top light, but it’s full dimmable and produces a very high light quality, making it suitable for many applications. The creases and folds in the orange gel helped break up the light a little creating a less lit look sympathetic to the fire inside the tent.

A Stella 1000 with orange gel was used inside the tent to give the light from the fire a small boost.

It allowed me to increase the illumination in the tent, adding to the light from the fire without it being obvious that the tent interior was lit. For some of the shots I had an assistant sit in the tent, out of shot and slowly move the gel in front of the light to add a little movement to the light to mimic the firelight even better.

One particular shot on the storyboard was the silhouette of the drivers entering the tent. The Stella 1000 really helped punch trough the canvas sides of the tent.

At the moment I can’t show you the footage. That will have to wait until after the launch of the TV. But I’m really pleased with the way this scene came out. It’s challenging trying to shoot in the dark, in a blizzard, in temperatures well below freezing. Every aspect of getting this scene was hard. Opening a flight case to get out some kit meant getting snow on everything inside it. Just positioning the light up the woods was tough, the snow was up above my knees as I waded through it. Operating the camera is so much harder when it has a rain cover on it. The viewfinder was constantly misting up as snow fell on it non stop. Seeing the witness marks on the lens is difficult (although thankfully the marks on the Fujinon 20-120 are huge and easy to see).

The Fujinon Cabrio XK6X20 lens all iced up at the end of the day. After shooting out in sub zero temperatures don’t take the camera inside until you are sure you have wrapped for the day!

But sometimes it’s challenges like these that make the job interesting. I know I was cursing and swearing at times trying to make these shots work, but seeing the scene come to life in the grade is all the more rewarding.

I’ll be writing more about the Fujinon 20-120 very soon, so why not subscribe to my blog using the subscribe bottom on the left.

Camrade PXW-FS7 and PXW-FS7 II rain covers.

I was recently sent a new rain cover by Camrade for my FS7 (there is also one for the FS7 II). I’ve used Camrade “wet suits” as they call them for years. They are great covers made from a low noise fabric. That means that if you need to fiddle with the cover while shooting it makes very little noise. The fabric is high quality, soft and supple but also completely waterproof.

Camrade “wet suit” rain cover for the PXW-FS7

The FS7 cover set covers the whole camera and lens and also has a separate cover for the viewfinder that can be used either with the extension tube attached or thanks to a large clear panel that allows you to clearly see the LCD screen it can be used without the extension tube. There is also a cover for the arm and handgrip.

The Camrade FS7 rain cover kit includes a cover for the viewfinder.
The Camrade cover can be used with or without the viewfinder extension tube.

The main camera body cover has clear panels that allow you to see all the major controls and switches on both sides. In addition the clear panels can be opened and rolled up and secured open by velcro  if you want easy access to the camera while it’s not raining.

Clear panels can be rolled up and secured for easy access to the camera on the Camrade rain cover.

Along the top of the cover there is a long velcro opening that allows the mount for the viewfinder to exit the cover as well as an elasticated opening for a shot gun mic. There are further openings for the front MI shoe as well as the cameras top handle.

The Camrade FS7 rain cover has an elasticated sleeve for a shotgun mic there plus opening for the front shoe of the FS7.

Overall the cover is quite large and the fit is quite baggy on a bare bones FS7. But this does mean that you can attach radio mic receivers or timecode sync boxes etc to the camera and keep them protected from the elements under the cover.  The bagginess also allows you to grip the top handle through the rain cover, so even when carrying the camera from location to location it remains protected from the elements.

The length of the cover means that there is space at the back for the XDCA extension unit and/or an external battery system. There’s even a little flap at the back that allows you to see the top of the battery to check the batter status. This is great with my PAG-Link batteries (love my PAG-Links).

There are access panels and flaps just where you need them on the Camrade FS7 rain cover.

If you are using a long lens then you can add an included extension section to the front of the cover that will protect most lenses. Underneath the main cover there is a zip that allows you to almost completely close the rain cover so that when using the camera on your shoulder it doesn’t flap about.

Cameras like the FS7 are expensive. While the FS7 does have a degree of built in protection against a splash of water it really isn’t designed to survive a heavy rain shower. The Camrade covers are not expensive and much better than wrapping the camera in a bin bag. When not in use the cover slips into a nice soft pouch that you can keep in your camera bag until the next time you need it.

Sony FDR-X3000 4K Action Cam – built in gimbal.

One of the cameras I used a lot in Norway is the new Sony FDR-X3000 action cam. What’s different about this POV camera is that the lens and sensor are actually mounted in an internal miniaturised gimbal. This really does work and helps stabilise the image.

There is also a tiny bluetooth monitor that you can wear on your wrist to view the pictures and control the camera. The image quality you get from these tiny cameras really is quite amazing. Take a look at the video to find out more and see some sample footage.

Northern Colour – new Northern Lights video.

It’s that time of year again. After another simply amazing trip to northern Norway I am pleased to be able to share with you my latest Aurora video. It was shot with a Sony A7s and a Sony A6300. The lenses used were a Sigma 20mm f1.4 art lens. An older Sigma 20mm f1.8, a samyang 14mm f2.8 and a Sony 16mm f2.8 pancake lens. A Metabones Speedbooster Ultra was used on the A6300. For the slider shots I used a home built track (made so it fits my suitcase perfectly) and a Cinetics Cinemoco controller. Hope you enjoy it.

Camrade CB-HD camera bag.

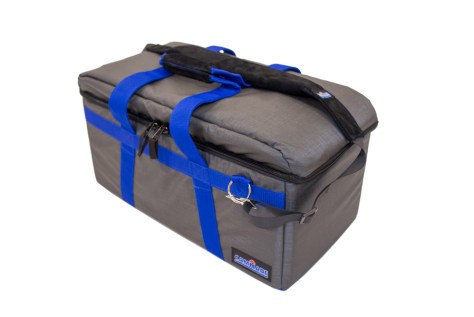
I’ve been using Camrade bags for years. They are tough, protect my gear well without being heavy and clunky like pelicases and other hard shell cases. In addition they don’t scream “expensive equipment here”. They just look like large holdalls.  One of the best features is the use of dividers, pads and inserts that are attached with velcro that allow you to reconfigure the bags for different applications.

Camrade CB-HD equipment bag with reconfigurable velcro dividers and pads.

One thing I often do is carry my camera in a standard carry-on bag when I’m flying. Meanwhile my tripod goes in the camera bag in the hold. When I get to my destination the tripod comes out of the camera bag, I re-arrange the dividers and the camera then lives in the camera bag until I need to fly again. This is so easy to do with the Camrade bags. Although the bags look like soft bags they are extremely ridged. The sides, top and bottom have hard inserts in them that can withstand very large loads, they are strong enough for you to sit on them without collapsing. The bags have strong carry straps and come with a high quality, removable camera strap. There are mesh pockets on the outside as well as on the inside of the lid for those little accessories and bits and pieces that would otherwise get lost. Another bonus is a 90% white card for white balance and use as an exposure reference.

Here’s a video of the medium size Camrade CB-HD bag, designed to take the PXW-FS7 or other similar digital cinema cameras. It’s a bit taller than some of their other bags so perfect for cameras rigged up with base plates and matte boxes.


Norway and the Northern Lights Video Blogs.

I produced 3 video blogs during my trip to Norway to shoot the northern lights. These blogs are now on youtube for you to watch. In the first video I take a look at some of the equipment that I took to Norway for the trip. I also look at how I like to lay everything out before I pack it and give some insight into some of the accessories that I like to take.

The second video looks back at the first week of the trip. You will see examples of the weather we had to deal with as well as some information on how some of the time lapse sequences of the aurora were shot.

The third video is about shooting a sunrise with 3 different cameras. The Sony a6300, FDR-AX3000 Action Cam and the PXW-FS5.
Packing for the shoot.

At the bottom of the page you’ll find a quick cut of a small selection of some of the Aurora footage shot on this trip.

Review of the first week in Norway.

Shooting a sunrise with 3 different cameras.

Quick sample of some of the Aurora footage: