After a test run starting and finishing in Alta last year I have decided to run the trips from Alta again next year. The hotel is nicer and the itinerary more relaxed. Starting and finishing at Alta gives us more time at the cabins.
2017/2018 Northern Lights Expeditions to Norway, travelling by road and snow scooter, staying in mountain cabins. Including food for 4 days, ice fishing, snow scooter use and optional photo/video tuition. You must book your own flights to Alta, Norway.
2018 Tour 1: Arctic Dawn. On this tour we will see the very first sunrise of the year. The moon will be absent during the night, so best suited for shooting and viewing faint Aurora. Arrive Friday 12th January 2018, depart Thursday 18th January 2018. £1,350 per person. Max 8 people. (cost of flights NOT included). You must arrange your own transport to and from Alta, Norway.
2018 Tour 2: Moonrise Tour. On this tour we will have a rising moon (after new moon) The moon will start at 18% illumination and increase to 53% illumination over the course of the tour. This will provide interesting possibilities for moonlit landscapes, but if the Aurora is very, very faint it will be harder to see. The days will be longer during this tour than the first tour. Arrive Thursday 18th of January 2018, Depart Wednesday 24th of January 2018. £1350 per person max 8 guests.
These really are amazing adventures. Not just a chance to see the Northern Lights but also a chance to experience some of the most beautiful scenery on the planet. Full details can be found by clicking here.
One of the cameras I used a lot in Norway is the new Sony FDR-X3000 action cam. What’s different about this POV camera is that the lens and sensor are actually mounted in an internal miniaturised gimbal. This really does work and helps stabilise the image.
There is also a tiny bluetooth monitor that you can wear on your wrist to view the pictures and control the camera. The image quality you get from these tiny cameras really is quite amazing. Take a look at the video to find out more and see some sample footage.
It’s that time of year again. After another simply amazing trip to northern Norway I am pleased to be able to share with you my latest Aurora video. It was shot with a Sony A7s and a Sony A6300. The lenses used were a Sigma 20mm f1.4 art lens. An older Sigma 20mm f1.8, a samyang 14mm f2.8 and a Sony 16mm f2.8 pancake lens. A Metabones Speedbooster Ultra was used on the A6300. For the slider shots I used a home built track (made so it fits my suitcase perfectly) and a Cinetics Cinemoco controller. Hope you enjoy it.
I’ve been using Camrade bags for years. They are tough, protect my gear well without being heavy and clunky like pelicases and other hard shell cases. In addition they don’t scream “expensive equipment here”. They just look like large holdalls. One of the best features is the use of dividers, pads and inserts that are attached with velcro that allow you to reconfigure the bags for different applications.
Camrade CB-HD equipment bag with reconfigurable velcro dividers and pads.
One thing I often do is carry my camera in a standard carry-on bag when I’m flying. Meanwhile my tripod goes in the camera bag in the hold. When I get to my destination the tripod comes out of the camera bag, I re-arrange the dividers and the camera then lives in the camera bag until I need to fly again. This is so easy to do with the Camrade bags. Although the bags look like soft bags they are extremely ridged. The sides, top and bottom have hard inserts in them that can withstand very large loads, they are strong enough for you to sit on them without collapsing. The bags have strong carry straps and come with a high quality, removable camera strap. There are mesh pockets on the outside as well as on the inside of the lid for those little accessories and bits and pieces that would otherwise get lost. Another bonus is a 90% white card for white balance and use as an exposure reference.
Here’s a video of the medium size Camrade CB-HD bag, designed to take the PXW-FS7 or other similar digital cinema cameras. It’s a bit taller than some of their other bags so perfect for cameras rigged up with base plates and matte boxes.
I produced 3 video blogs during my trip to Norway to shoot the northern lights. These blogs are now on youtube for you to watch. In the first video I take a look at some of the equipment that I took to Norway for the trip. I also look at how I like to lay everything out before I pack it and give some insight into some of the accessories that I like to take.
The second video looks back at the first week of the trip. You will see examples of the weather we had to deal with as well as some information on how some of the time lapse sequences of the aurora were shot.
The third video is about shooting a sunrise with 3 different cameras. The Sony a6300, FDR-AX3000 Action Cam and the PXW-FS5.
Packing for the shoot.
At the bottom of the page you’ll find a quick cut of a small selection of some of the Aurora footage shot on this trip.
I will be running a one week, limited numbers, intensive workshop in Arizona between August 21st and August 28th.
Lightning over Tucson
This workshop is timed to coincide with the Arizona monsoon season which will should give us some really exciting opportunities to put into practice many of the things that will be taught during the week.
Each day will begin with a 2 to 3 hour workshop on different aspects of modern video production including such things as log, raw and high dynamic range. We will also cover timelapse photography, lightning photography and include some basic motion control methods. So the workshop will be suitable for both still photographers as well as video camera operators. Below is an idea of the topics that will be covered:
Sunday 21st: Arrival day. Social evening, time to meet everyone.
Day 1: An introduction to lightning photography and video, including basic time lapse and slow motion techniques.
Day 2: An introduction to scene files, picture profiles, log and raw.
Day 3: CineEI, exposure index, gain and ISO and offsetting your exposure for the best results.
Day 4: Post production grading with DaVinci Resolve including the use and creation of LUT’s. How to use ACES to streamline your workflow.
Day 5: HDR, high dynamic range and Rec 2020.
Saturday 27th: Putting it all together, editing, grading and viewing your footage before social evening and diner.
Sunday 28th: departure day.
Night time thunderstorm in Arizona.
This schedule is subject to change as we will want to maximise opportunities to get out and shoot any interesting weather and storms. Most afternoons and evenings we will be out and about putting the things taught in the workshops into practice. For one half of the week we will likely be based in Tucson, Arizona and the other half Flagstaff. This will give us opportunities to shoot the incredible lighting storms that are common at this time of year as well as spectacular scenery such as the Grand Canyon or old western towns such as Tombstone (the location of the OK Coral). We will shoot conventional video clips as well as time lapse, so expect some early starts or late finishes as we shoot sunsets and possibly sunrises.
The minimum number of participants for this workshop is 4 and the maximum is 8. Ideally you should bring your own camera equipment and a laptop to edit with, but this is not a requirement.
The course fee is $1,500 USD per person. This does not include accommodation, food or your transport to Tucson, Arizona. It does include transportation each day of the course. We will be staying in a mid-priced motel (Holiday Inn Express, Hilton, Hampton Inn or similar), and you should budget around $110-$150 per night for accommodation.
Please use the contact form if you are interested in joining this exciting workshop.
I have one spot still open on my storm chasing photo and video trip.
This is NOT a trip where we will try to get as close to a tornado as possible. The aim of this trip is to capture some of the incredible beauty of mother nature when she is angry. So we will be trying to capture incredible stormscapes, lightning, supercell storms and maybe tornadoes from a safe distance (at least 1 mile). Full details are here: https://www.xdcam-user.com/tornado-chasing/
Supercell Thunderstorm in South Dakota
You will get to spend 10 days between June 6th and June 16th with me as your guide and mentor. I will help you get the very best images. There is no guarantee that the weather will play ball and there will be long hours in the car travelling. But if you spend a week in “tornado alley” in June and are prepared to travel, then it would be very unusual not to see some incredible weather and storms. If that happens then we will make good use of the time shooting some of the spectacular scenery that states like Colorado, Kansas, Nebraska, Montana, Wyoming and the Dakotas have to offer. Use the contact form if you are interested in joining me.
Bennington, Kansas Tornado from about 2 miles away.Dying Supercell Thunderstorm at Sunset in Nebraska.
Unbelievably I still have two places left for my Northern Lights trip in February. Normally these tours sell out well in advance, but I’ve had a number of cancellations, re-bookings and other changes that mean that there are still 2 places left. These trips really are a big, exciting adventure. We stay in at an amazing location miles from the nearest town and only accessible by snow scooter. We go ice fishing, cook out in a Sami tent, go dog sledding, snowmobiling and enjoy traditional saunas. The sun is still very active and the Aurora has been amazing this winter. It probably won’t be this good in 2017 and then we will go into the low side of the 11 year sunspot cycle, so it could be a long wait for the next big show. Full details are here: https://www.xdcam-user.com/northern-lights-expeditions-to-norway/
With the UK set to see a couple of days of strong and severe thunderstorms I thought I would put together a very quick guide to shooting lightning with both stills cameras and video cameras. Your first issue will be finding somewhere dry to shoot from, you don’t want rain on your camera or lens. You also do need to consider safety. Lightning is dangerous, it can strike many miles from a thunderstorm. If you can hear thunder you are in the strike risk area, so do take care. One of the safest places to be in a thunderstorm is inside a car. If the car is struck the electricity will pass through the body of the car and not through the occupants, before jumping from the underside of the car to the ground. If you are shooting from a car stay inside the car, don’t sit with your feet out of the door or any part of you touching the ground. Don’t sit in the car while holding on to a camera on a tripod outside the car. Don’t stand under trees, they can explode when struck by lightning, don’t stand on the very top of a hill. Use your common sense.
Long exposure captures great nigh time lightning.
For either stills or video you’re really going to want to use a tripod to get the very best results. As you often get strong winds around thunderstorms you want a good stable tripod. If it is windy keep a close eye on the camera and tripod, you don’t want it blown over by a strong gust of wind.
A wide angle lens will increase your chances of getting a lightning bolt in your shot, but the wider the shot the less detail you will see in the lightning bolt. You can always crop in to a wide shot a bit if it’s too wide. I like to have something in the foreground to give some interest to the image, but try to avoid too many obstructions to the skyline as these will block your view of the lightning.
NIGHT FOCUS:
This is probably the easiest for still photos, but it has many challenges. One is focus as it’s hard to focus on a brief flash of lightning. You will need to use manual focus, autofocus will not work. Start by focussing on a very distant object, perhaps lights on the horizon, the moon, stars or any other VERY distant object, preferably a mile or more away. Then check and double check your focus. Lightning is very fine and if it’s out of focus it will ruin the shot. If you don’t have anything to focus on set the lens to infinity, the sideways “8” symbol is infinity and there will normally be a line to mark the point of infinity focus. Infinity is often NOT at the very end of the lenses focus travel so check for the proper infinity mark. By the way, take a torch/flashlight if your going out in the dark!
STILL PHOTO’s or DSLR AT NIGHT:
You will need to use a tripod. If you have a cable release or other electronic shutter release use it to trigger the camera to prevent shaking the camera as you will need to use a long exposure. As you will be using a long exposure you want to use a low ISO. I typically use 200ISO with an exposure of between 10 and 30 seconds depending on the frequency of the lightning and how bright the surrounding area is. If you are in a town or city with lots of street light you will probably need to use a shorter exposure, maybe 10 to 15 seconds. Out in the countryside you might be able to use 20 to 30 seconds. For the aperture you don’t want super shallow depth of field as this will show up any focus errors, so don’t use your lens wide open. I normally use somewhere around f4 to f8, so f5.6 is probably a good starting point. Take some test shots and check that you are not over exposed.
As a starting point try: 200ISO, f5.6, 10 second exposures, manual focus.
Once the camera is set, it simply a case of snapping away taking pictures until you get lucky and capture one in the frame. It takes a bit of luck and patience, but don’t give up too soon, just keep snapping away. You can just delete all the no good shots later.
Evening thunderstorm in Tucson, Arizona
DAY and NIGHT VIDEO:
If your camcorder has a CMOS sensor (as most do these days) you want to use the slowest shutter speed that you can get away with. If you can control the shutter manually turn it off or reduce it to 1/25 or 1/30. This will reduce the likelihood of you getting lightning bolts that only go half way down the screen, an effect know as “rolling shutter” or “flash band”. If shooting after dark, if you have a camera with full manual control then instead of shooting at the usual 24, 25 or 30 frames per second, consider shooting at half of this, perhaps at 12, 12.5 or 15 frames per second (S&Q motion, slow shutter etc), again with the shutter set to OFF. While this does mean that the motion in your final video will be sped up it almost guarantees that you won’t get any rolling shutter issues. You will need to have the camera on a tripod if doing this to prevent excessive image blur from movement of the camera. The slightly sped up video can also give the pleasing (but fake) impression that the lightning is more frequent than it really is making your shots more dramtic. If you don’t want this simply play the video back at half speed.
STILL PHOTOS DURING THE DAY:
This is really tough unless you have special equipment. You can’t use a long exposure as you would at night because the bright daytime light will wash out the lightning bolts.
Very often a lightning bolt is made up of several flashes in rapid succession. If you do have fast enough reactions and a fast enough camera, you can get the secondary flashes. You will need to use manual focus and manual exposure so there isn’t a delay while the camera thinks about focus and exposure which delays the release of the shutter. Use a tripod with a cable release or remote shutter and use a longish exposure, 1/30th or 1/15th as there can be up to 1/10th of a second delay between flashes and there could be multiple flashes, you don’t want too fast a shutter speed. Set your focus on a very distant object, use a low ISO, again I typically use 100 or 200 ISO. Shoot a couple of test images and set the aperture so that you have a very slightly underexposed shot, may -1EV to -1.5EV, the slightly darker overall image will help the bright lightning show up better. Then it’s just a case of pointing the camera at the storm on a tripod, with your finger on the trigger and try to hit that shutter release as soon as you see any lightning. I find it’s better to not look through the viewfinder, just look in the direction the camera is pointed. You may be lucky, maybe not, a lot will depend on the type of lightning in the storm and your reaction speed. A better way is to use a dedicated lightning trigger such as a Patchmaster: http://www.fotokonijnenberg.nl/patchmaster. This will trigger the camera electronically if it detects any lightning. It’s MUCH faster and can react much quicker than any human, but it still has some lag time so even a lightning trigger won’t capture every bolt.
A final daytime method is to use an adaptation of the night time DSLR method. If you add a strong ND filter a small aperture around f16 and use a low ISO you may be able to get an acceptable long exposure during daytime, perhaps a couple of seconds. Then set the camera to take photo’s continuously (so when you hold the shutter button down the camera will take one photo after another). By locking down a remote shutter release the camera will take a continuous stream of photos with only a very minimal gap between each picture taken. So you have a high likely hood of capturing any lightning bolts, but you will also end up with a lot of pictures that don’t have any lightning in them. You can either discard these empty frames or use all the frames to create a time-lapse video of the storm.
Have fun, stay safe.
If you find the guide useful, please consider buying me a beer or a coffee.
With winter well upon us I thought it would be good to share some of my arctic shooting experience. I’ve shot in temperatures down to -45c in the arctic in winter.
Overall modern tapeless cameras do OK in extreme cold. The most reliable cameras are generally larger solid state cameras. Larger cameras cool slower than small ones and larger cameras will hold on to heat generated internally better than small ones. Cameras and electronics with lots of cooling vents can sometimes also be troublesome as the vents allow them to cool more quickly. But cold is not necessarily going to be the biggest problem.
IMPORTANT NOTE: It is EXTREMELY dangerous to charge normal lithium batteries that are below freezing. Below freezing the lithium in the battery migrates to the anode of the battery cell. This cuase permanent damage to the battery shortening its life and if enough builds up around the anode it can short the battery out causing a sudden fire/explosion. Each time you charge a very cold lithium battery more lithium builds up. It is possible for a lithium battery that has been charged when very cold to suddenly burst into flames some weeks/months/years later if bumped or knocked causing the lithium build around the anode to shift. Always warm up any lithium batteries before attempting to charge them.
Filming in a remote arctic area. Photo by Jan Helmer Olsen.
Condensation:
Condensation is the big deal breaker. When you take the very cold camera inside into a warm house/hotel/car/tent you will get condensation. If the camera is very cold this can then freeze on the body of camera including the glass of the lens. If there is condensation on the outside of the camera, there will almost certainly also be condensation inside the camera and this can kill your camera.
To prevent or at least reduce the condensation you can place the camera in a large ziplock or other sealed bag BEFORE taking it inside, take the camera inside in the bag. Then allow the camera to warm up to the ambient temperature before removing it from the bag. Peli cases are another option, but the large volume of the pelicase means there will be more moisture inside the case to condense and the insulating properties of the case mean that it could take many, many hours to warm up.
I don’t recommend storing a cold or damp camera in a Pelicase (or any other similar waterproof case) as there is nowhere for the moisture to go, so the camera will remain damp until the case is opened and everything dried out properly.
Rather than moving a camera repeatedly from outside to inside and repeatedly generating risky condensation you should consider leaving the camera outside. You can leave the camera outside provided it does not get below -30c. Below -30c you risk the LCD panel freezing and cracking. LCD panels freeze at between -30 to -40c. If you are using a camera in very cold conditions and you notice the edges of the LCD screen going blue or dark you should start thinking about warming up that LCD panel as it may be close to freezing.
LCD displays will become slow and sluggish to respond in the cold. Your pictures may look blurry and smeary because of this. It doesn’t affect the recording, only what you see on the LCD.
Very often in cold regions houses will have an unheated reception room or porch. This is a good place to store your camera rather than taking it inside into the warm. Repeatedly taking a camera from cold to warm without taking precautions against condensation will shorten the life of your camera.
If you can, leave the camera on between shots. The camera generates some heat internally and this will prevent many issues.
BATTERY LIFE:
Li-Ion batteries are effected by the cold but they are not nearly as bad as Nicads or NiMh batteries which are all but useless below freezing. li-Ion battery life gets reduced by between 25 and 50% depending on how cold it is and the quality of the battery (very cheap cells may have a higher water content which can freeze causing the cell to dramatically lose capacity and the ability to deliver power).
Down to about -10c there is only a very marginal loss of capacity. Down to -25c you will lose about 20%-30% below -25c the capacity will fall away further and it becomes impossible to use the full capacity of the battery.
Keep your spare batteries in a pocket inside your coat or jacket until you need them. After use let the battery warm up before you charge it if you can. Charging a very cold battery will reduce the lifespan of the battery and it won’t fully charge (see note above – DO NOT CHARGE a battery that is below freezing, it is very dangerous). One top tip for shooting outside for extended periods is to get a cool box. Get some chemical hand warmers or better still electric rechargeable handwarmers and place them in the cool box with your batteries to keep them warm. If you don’t have hand warmers you can also use a hot water bottle. Chemical hand warms typically use an iron powder mixed with salts. The heat comes from the iron rapidly rusting. This process needs moisture to work. A chemical handwarmer will work great in a pocket close to your body moisture but when it is very cold there isn’t enough moisture in the air for a chemical warmer to work when it is away from your body moisture. As a result chemical warmers inside camera covers or in a cool box might not actually produce any heat.
Watch your breath
If your lens has and snow or ice on it, don’t be tempted to breath or blow on the lens to blow the ice off. Do not to breath on the lens when cleaning it as your warm breath will condense on the cold glass and freeze. Also try to avoid breathing out close to the viewfinder. When it is very cold and if you are warm in your nice thick winter clothes even standing close to the camera can lead to frost and ice building up on it. Small amounts of sweat from your body will evaporate and this moisture will find its way to the camera, even if you are a few feet (1 or 2m) from it. If doing a timelapse of the Northern Lights, once the camera is running you should move away from the camera.
A small soft paint brush is good for keeping your lens clean as in very cold conditions you’ll simply be able to brush and snow or ice off. Otherwise a large lens cloth.
Your lens will get cold and in some conditions you will get frost on the front element. To help combat this wrap some insulating fabric around the body of the lens. Wrist sweat bands are quite good for this or an old sock with the toes cut off. For time-lapse long sessions in very cold weather you might want to get a lens heater for the lens. These are normally 12 volt or USB powered and wrap around the lens. They don’t use lots of power but they do warm the lens just enough to keep the worst of the condensation, dew and frost off the lens. They are sometimes also called “dew heaters” and are sold by most good telescope suppliers.
Covers.
Conventional plastic rain covers become brittle below about -15c and can even shatter like glass below -20c. The clear plastic panels in other covers can also suffer the same fate. So use if you use a cover use one made out of fabric. Special insulated cold weather covers often called “polar bears” can be used and these often have pockets inside for chemical heat packs (although when very cold these don’t work, use a USB hand warmer instead). These are well worth getting if you are going to be doing a lot of arctic shooting with a larger camera and will help keep the camera warm. But for very small cameras the bulk of a thick cover can make it almost impossible to use. As an alternative wrap the camera in a scarf or cut the sleeves of an old sweater to make a tube you can slide over the camera. If you have a sewing machine you could make a simple cover out of some fleece type material.
For DSLR’s and stills cameras a balaclava can be used to cover the camera body to provide some protection. However unheated covers don’t make a big difference when the camera is outside in very cold temperatures for extended periods unless it is always left turned on, eventually the cold will get to it.
Brittle Plastic.
Plastics get brittle at low temperatures so be very gentle with anything plastic, especially things made from very hard, cheap plastic. The plastic Sony use appears to be pretty tough even at low temps. Wires and cables may become as rigid as a steel rod. Be gentle, bend then too much and the insulation may split and the cable break. I try to avoid bending any cable once it has become very cold.
Other considerations are tripods. If outside in very low temps for more than 30mins or so the grease in the tripod will become very thick and may even freeze, so your fluid damping will become either very stiff or freeze up all together. Contact your tripod manufacturer to see what temperatures their greases can be used over. Vinten and some of the other tripod companies can winterise the tripod and replace the normal grease with arctic grease. If you are unsure put your tripod head in your deep freeze at home for a few hours and see if it still works when you take it out.
Looking after yourself.
I find that the best way to operate the camera is by wearing a pair of large top quality mittens (gloves are next to useless below -15c), Consider getting a pair of Army surplus arctic mittens, they are very cheap on ebay and from surplus stores and will normally have an additional “trigger finger”. This extra finger makes it easier to press the record button and things like that. If you can get Swedish or Finnish military winter mittens, these are amongst the best. I wear a pair of thin “thinsulate” fleece gloves that will fit inside the mittens, i can then slip my hands in and out of the mittens to operate the camera. If you can get gloves with finger tips compatible with touch screens this will allow you to use any touch functions on a camera or your phone. Get extra large mittens, then it is easier to slip your hand in and out.
I keep a chemical hand warmer inside the mittens to warm my fingers back up after using the camera (or use heated mittens powered by a USB battery pack).
The hardest thing to keep warm is your feet. If you’ll be standing in snow or standing on ice then conventional hiking boots etc will not keep your feet warm. A Scandinavian trick if standing outside for long periods is to get some small twigs and tree branches to stand on and help insulate your feet from the cold ground. If your feet get cold then you are at risk of frostbite or frost nip. Invest in or hire some decent snow boots like Baffin’s. There is almost nothing worse than having ice cold feet when working. Don’t forget that if you do get cold, moving around, running on the spot etc will help get your circulation going and help you to warm up. Also consider some high energy food and snacks, you will burn a lot more calories in the cold than you would do normally. Also a flask with a hot drink is always welcome. I have an arctic clothing guide here; Arctic Clothing Guide |
Manage your privacy
To provide the best experiences, we use technologies like cookies to store and/or access device information. Consenting to these technologies will allow us to process data such as browsing behavior or unique IDs on this site. Not consenting or withdrawing consent, may adversely affect certain features and functions.
Functional
Always active
The technical storage or access is strictly necessary for the legitimate purpose of enabling the use of a specific service explicitly requested by the subscriber or user, or for the sole purpose of carrying out the transmission of a communication over an electronic communications network.
Preferences
The technical storage or access is necessary for the legitimate purpose of storing preferences that are not requested by the subscriber or user.
Statistics
The technical storage or access that is used exclusively for statistical purposes.The technical storage or access that is used exclusively for anonymous statistical purposes. Without a subpoena, voluntary compliance on the part of your Internet Service Provider, or additional records from a third party, information stored or retrieved for this purpose alone cannot usually be used to identify you.
Marketing
The technical storage or access is required to create user profiles to send advertising, or to track the user on a website or across several websites for similar marketing purposes.
 After a test run starting and finishing in Alta last year I have decided to run the trips from Alta again next year. The hotel is nicer and the itinerary more relaxed. Starting and finishing at Alta gives us more time at the cabins.
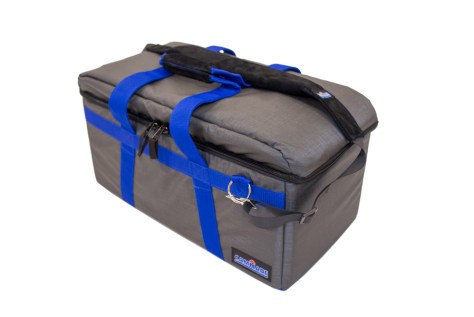 I’ve been using Camrade bags for years. They are tough, protect my gear well without being heavy and clunky like pelicases and other hard shell cases. In addition they don’t scream “expensive equipment here”. They just look like large holdalls. One of the best features is the use of dividers, pads and inserts that are attached with velcro that allow you to reconfigure the bags for different applications.


 (Updated 12/2023)


