Tag Archives: ProRes

XAVC-I v ProResHQ, multi-generation test.

I often hear people saying that XAVC-I isn’t good enough or that you MUST use ProRes or some other codec. My own experience is that XAVC-I is actually a really good codec and recording to ProRes only ever makes the very tiniest (if any) difference to the finished production.

I’ve been using XAVC-I for over 8 years and it really worked very well for me. I’ve also tested and compared it against ProRes many times and I know the differences are very small, so I am always confident that when using XAVC-I that I will get a great result. But I decided to make this video to show just how close they are.

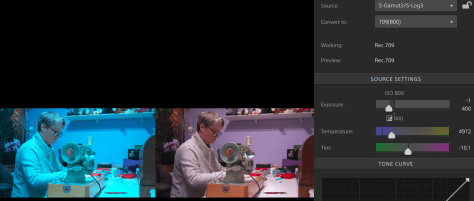
It was shot with a Sony FX6 using internal XAVC-I (class 300) on an SD card alongside an external recording using ProResHQ on a Shogun 7. I deliberately chose to use Cine EI and S-Log3 at the cameras high base ISO of 12,800 as noise will stress any codec that little bit harder and adding a LUT adds another layer of complexity that might show up any issues all  just to make the test that little bit tougher. The slightly higher noise level of the high base ISO also allows you to see how each codec handles noise more easily.

A sample clip of each codec was place in the timeline (DaVinci Resolve) and a caption added. This was then rendered out, ProRes HQ rendered using ProRes HQ and the XAVC-I files rendered to XAVC-I. So for most of the examples seen the XAVC-I files have been copied and re-encoded 5 times plus the encoding to the file uploaded to YouTube, plus YouTubes own encoding, a pretty tough test.

Because in most workflows I don’t believe many people will use XAVC-I in post production as an intermediate codec I also repeated the tests with the XAVC-I rendered to ProResHQ 5 times over as this is probably more representative of a typical real world workflow. These examples are shown at the end of the video. Of course the YouTube compression will restrict your ability to see some of the differences between the two codecs. But, this is how many people will be distributing their content. Even if not via YouTube, via other highly compressed means, so it’s not an unfair test and reflects many real world applications.

Where the s709 LUT has been added it was added AFTER each further copy of the clip, so this is really a “worst case scenario”. Overall in the end the ProRes HQ and XAVC-I are remarkably similar in performance. In the 300% blow up you can see differences between the XAVC-I that is 6 generations old compared to the 6th generation ProRes HQ if you look very carefully at the noise. But the differences are very, very hard to spot and going 6 generations of XAVC-I is not realistic. It was designed a s a camera codec. In the same test where the XAVC was rendered to ProRes HQ for each post production generation any difference is incredibly hard to find even when magnified 300%. I am not claiming that XAVC-I Class 300 is as good as ProRes HQ. But I think it is worth considering what you need when shooting. Do you really want to have to use an external recorder, do you really want to have to deal with files that are 3 to 4 times larger. Do you want to have to remember to switch recording methods between slow motion and normal speeds? For most productions I very much doubt that the end viewer would ever be able to tell the difference between material shot using XAVC-I class 300 and ProResHQ. And that audience certainly isn’t going to feel they are watching a substandard image, and that’s what counts. 

There is so much emphasis placed on using “better” codecs that I think some people are starting to believe that XAVC-I is unusable or going to limit what they can do. This isn’t the case. It is a pretty good codec and frankly if you can’t get a great looking image when using XAVC then a better codec is unlikely to change that.

Raw Isn’t Magic. With the right tools Log does it too.

Raw can be a brilliant tool, I use it a lot. High quality raw is my preferred way of shooting. But it isn’t magic, it’s just a different type of recording codec.
 
All too often – and I’m as guilty as anyone – people talk about raw as “raw sensor data” a term that implies that raw really is something very different to a normal recording. In reality it’s really not that different. When shooting raw all that happens is that the video frames from the sensor are recorded before they are converted to a colour image. A raw frame is still a picture, it’s just that it’s a bitmap image made up of brightness values, each pixel represented by a single brightness code value rather than a colour image where each location in the image is represented by 3 values one for each of Red, Green and Blue or Luma, Cb and Cr.

As that raw frame is still nothing more than a normal bitmap all the cameras settings such as white balance, ISO etc are in fact baked in to the recording. Each pixel only has one single value and that value will have been determined by the way the camera is setup. Nothing you do in post production can change what was actually recorded. Most CMOS sensors are daylight balanced, so unless the camera adjusts the white balance prior to recording – which is what Sony normally do – your raw recording will be daylight balanced.

Modern cameras when shooting log or raw also record metadata that describes how the camera was set when the image was captured. 

So the recorded raw file already has a particular white balance and ISO. I know lots of people will be disappointed to hear this or simply refuse to believe this but that’s the truth about a raw bitmap image with a single code value for each pixel and that value is determined by the camera settings.

This can be adjusted later in post production, but the adjustment range is not unlimited and it is not the same as making an adjustment in the camera. Plus there can be consequences to the image quality if you make large adjustments. 

Log can be also adjusted extensively in post too. For decades feature films shot on film were scanned using 10 bit Cineon log (which is the log gamma curve S-Log3 is based on) and 10 bit log used for post production until 12 bit and then 16 bit linear intermediates came along like OpenEXR. So this should tell you that actually log can be graded very well and very extensively.

But then many people will tell you that you can’t grade log as well as raw. Often they will give photographers as an example where there is a huge difference between what you can do with a raw photo and a normal image. But we also have to remember this is typically comparing what you can do with a highly compressed 8 bit jpeg file and an often uncompressed 12 or 14 bit raw file. It’s not a fair comparison, of course you would expect the 14 bit file to be better.

The other argument often given is that it’s very hard to change the white balance of log in post, it doesn’t look right or it falls apart. Often these issues are nothing to do with the log recording but more to do with the tools being used.

When you work with raw in your editing or grading software you will almost always be using a dedicated raw tool or raw plugin designed for the flavour of raw you are using. As a result everything you do to the file is optimised for the exact flavour of raw you are dealing with. It shouldn’t come as a surprise to find that to get the best from log you should be using tools specifically designed for the type of log you are using. In the example below you can see how Sony’s Catalyst Browse can perfectly correctly change the white balance and exposure of S-log material with simple sliders just as effectively as most raw formats.
 
Screenshot-2020-11-27-at-17.14.07 Raw Isn't Magic. With the right tools Log does it too.
On the left is the original S-Log3 clip with the wrong white balance (3200K) and on the left is the corrected image. The only corrections made are via the Temperature slider and exposure slider.
 
Applying the normal linear or power law (709 is power law) corrections found in most edit software to Log won’t have the desired effect and basic edit software rarely has proper log controls. You need to use a proper grading package like Resolve and it’s dedicated log controls. Better still some form of colour managed workflow like ACES where your specific type of log is precisely converted on the fly to a special digital intermediate and the corrections are made to the intermediate file. There is no transcoding, you just tell ACES what the footage was was shot on and magic happens under the hood. Once you have done that you can change the white balance or ISO of log material in exactly the same way as raw. There is very, very little difference.
 
Screenshot-2020-11-27-at-17.29.27 Raw Isn't Magic. With the right tools Log does it too.
The same S-Log3 clip as in the above example, this time in DaVinci Resolve using ACES. The only corrections being made are via the Temp slider for the white balance change and the Log-Offset wheel which in ACES provides a precise exposure adjustment.
 
When people say you can’t push log, more often than not it isn’t a matter of can’t, it’s a case of can – but you need to use the right tools.
 
After-correction-450x253 Raw Isn't Magic. With the right tools Log does it too.
This is what log shot with completely the wrong white balance and slightly over exposed looks like after using nothing but the WB and ISO sliders in Catalyst Browse. I don’t believe raw would have looked any different.
 
Less compression or a greater bit depth are where the biggest differences between a log or raw recording come from, not so much from whether the data is log or raw.  Don’t forget raw is often recorded using log, which kind of makes the “you can’t grade log” argument a bit daft.
 
Camera manufactures and raw recorder manufacturers are perfectly happy to allow everyone to believe raw is magic and worse still, let people believe that ANY type of raw must be better than all other types of recordings. Read though any camera forum and you will see plenty of examples of “it’s raw so it must be better” or “I need raw because log isn’t as good” without any comprehension of what raw is and how in reality it’s the way the raw is compressed and the bit depth that really matters.

If we take ProRes Raw as an example: For a 4K 24/25fps file the bit rate is around 900Mb/s. For a conventional ProRes HQ file the bit rate is around 800Mb/s. So the file size difference between the two is not at all big.
 
But the ProRes Raw file only has to store around 1/3 as many data points as the component ProResHQ file. As a result, even though the ProRes Raw file often has a higher bit depth, which in itself usually means better a better quality recording, it is also much, much less compressed and as a result will have fewer artefacts. 

It’s the reduced compression and deeper bit depth possible with raw that can lead to higher quality recordings and as a result may bring some grading advantages compared to a normal ProRes or other compressed file. The best bit is there is no significant file size penalty. So you have the same amount of data, but you data should be of higher quality. So given that you won’t need more storage, which should you use? The higher bit depth less compressed file or the more compressed file?

But, not all raw files are the same. Some cameras feature highly compressed 10 bit raw, which frankly won’t be any better than most other 10 bit recordings as you are having to do all the complex math to create a colour image starting with just 10 bit. Most cameras do this internally at at least 12 bit. I believe raw needs to be at least 12 bit to be worth having.

If you could record uncompressed 12 bit RGB or 12 bit component log from these cameras that would likely be just as good and just as flexible as any raw recordings. But the files would be huge. It’s not that raw is magic, it’s just that raw is generally much less compressed and  depending on the camera may also have a greater bit depth. That’s where the benefits come from.

S709 LUT (Venice Look) And 709(800) For LEGAL RANGE PRORES S-Log3 On Atomos and other Recorders.

As noted in my previous post there can be some issues with the way ProRes is recorded on many external monitors as a legal range files rather than Data Range.

Another side effect of this is that LUT’s designed for post production as well as most camera LUT’s don’t work correctly in the monitor. So even when you apply the same LUT in the camera as in the monitor the images look different.

To address this I am providing here 2 sets of LUTs for S-Log3 and SGamut3.cine designed to match the built in s709 and 709(800) Luts included in many Sony cameras. These LUTs are specifically for external recorders and should not be used in camera. When you use these LUT’s the pictures on the monitor should now match the the images in the cameras viewfinder when the built in  LUT has been applied.

You will find 3 LUTs of each type. One for the base exposure, one for footage exposed 1 stop brighter (minus1) and one for footage exposed 2 stops brighter than base (minus2).

As always (to date at least) I offer these as a free download available by clicking on the links below. Try them before you decide then pay what you feel is fair. All contributions are greatly appreciated and it really does help keep this website up and running. If you can’t afford to pay, then just download the LUT’s and enjoy using them, tell your friends and send them here. If in the future you should choose to use them on a paying project, please remember where you got them and come back and make a contribution. More contributions means more LUT offerings in the future.

Click Here to download the 709(800) and S709 Legal In LUTS for external recorders.

If you want to share the LUT’s please do so by a link to this page. You may not sell or distribute these LUTs anywhere without my prior consent.

To make a contribution please use the drop down menu here, there are several contribution levels to choose from.


Your choice:


pixel S709 LUT (Venice Look) And 709(800) For LEGAL RANGE PRORES S-Log3 On Atomos and other Recorders.

Why Does S-Log Recorded Internally Look Different To S-Log Recorded On An External Recorder?

I have written about this many times before, but I’ll try to be a bit more concise here.

So – You have recorded S-Log2 or S-Log3 on your Sony camera and at the same time recorded on an external ProRes Recorder such as an Atomos, Blackmagic or other ProRes recorder. But the pictures look different and they don’t grade in the same way. It’s a common problem. Often the external recording will look more contrasty and when you add a LUT the blacks and shadow areas come out very differently.


Video signals can be recorded using a several different data ranges. S-Log2 and S-Log3 signals are always Data Range.  When you record in the camera the cameras adds information to the recording called metadata that tells your editing or grading software that the material is Data Range. This way the edit and grading software knows how to correctly handle the footage and how to apply any LUT’s.

However when you record to an external recorder the external recorder doesn’t have this extra metadata. So the recorder will record the Data Range signal that comes from the camera but it doesn’t add the metadata. The ProRes codec is normally used for Legal Range video and by default, unless there is metadata that says otherwise, edit and grading software will assume any ProRes recordings to be Legal Range.

So what happens is that your edit software takes the file, assumes it’s Legal Range and handles it as a Legal Range file when in fact the data in the file is Data Range. This results in the recording levels being transposed into incorrect levels for processing. So when you add a LUT it will look wrong, perhaps with very dark shadows or very bright over exposed looking highlights. It can also limit how much you can grade the footage.

What Can We Do About It?

Premiere CC.

You don’t need to do anything in Premiere for the internal .mp4 or MXF recordings. They are handled correctly but Premiere isn’t handling the ProRes files correctly.

My approach for this has always been to use the legacy fast color corrector filter to transform the input range to the required output range. If you apply the fast color corrector filter to a clip you can use the input and output level sliders to set the input and output range. In this case we need to set the output black level to CV16 (as that is legal range black) and we need to set output white to CV235 to match legal range white. If you do this you will then see that the external recording appears to have almost exactly the same values as the internal recording. However there is some non-linearity in the transform, it’s not quite perfect.

Screenshot-2019-03-01-at-11.04.04 Why Does S-Log Recorded Internally Look Different To S-Log Recorded On An External Recorder?
Using the legacy “fast color corrector” filter to transform the external recording to the correct range within Premiere.

Now when you apply a LUT the picture and the levels are more or less what you would expect and almost identical to the internal recordings. I say almost because there is a slight hue shift. I don’t know where the hue shift comes from. In Resolve the internal and external recordings look pretty much identical and there is no hue shift. In Premiere they are not quite the same. The hue is slightly different and I don’t know why. My recommendation – use Resolve, it’s so much better for anything that needs any form of grading or color correction. DaVinci Resolve: It’s very easy to tell Resolve to treat the clips as Data Range recordings. In the media bin, right click on the clip and under “clip attributes” change the input range from “auto” to “full”. If you don’t do this DaVinci Resolve will assume the ProRes file to be legal range and it will scale the clip incorrectly in the same way as Premiere does. But if you tell Resolve the clip is full range then it is handled correctly.

Don’t Convert Raw to ProRes Before You Do Your recording.

This comes up again and again, hence why I am writing about it once again.
Raw should never be converted to log before recording if you want any benefit from the raw. You may as well just record the 10 bit log that most cameras are capable of internally. Or take log and output it via the cameras 10 bit output (if it has one) and record that directly on the ProRes recorder. It doesn’t matter how you do it but if you convert between different recording types you will always reduce the image quality and this is as bad a way to do it as you can get. This mainly relates to cameras like the PXW-FS7. The FS5 is different because it’s internal UHD recordings are only 8 bit, so even though the raw is still compromised by converting it to ProRes log, this can still be better than the internal 8 bit log.
S-Log like any other log is a compromise recording format. Log was developed to squash a big dynamic range into the same sized recording bucket as would normally be used for conventional low dynamic range gammas. It does this by discarding a lot of tonal and textural information from everything brighter than 1 stop above middle grey, instead of the amount of data doubling for each stop up you go in exposure, it’s held at a constant amount. Normally this is largely transparent as human vision is less acute in the highlight range, but it is still a compromise.
The idea behind Linear raw is that it should give nothing away, each stop SHOULD contain double the data as the one below. But if you only have 12 bit data that would only allow you to record 11 stops of dynamic range as you would quickly run out of code values. So Sony have to use floating point math or something very similar to reduce the size of each stop by diving down the number of code values each stop has. This has almost no impact on highlights where you start off with 100’s or 1000’s values but in the shadows where a stop may only have 8 or 16 values dividing by 4 means you now only have 2 or 4 tonal levels. So once again this is a compromise recording format. To record a big dynamic range using linear what you really need is 16 bit data.
In summary so far:
S-Log reduces the number of highlight tonal values to fit it a big DR in a normal sized bucket.
Sony’s FSRaw, 12 Bit Linear reduces the number of tonal Values across the entire range to fit it in a compact 12 bit recording bucket, but the assumption is that the recording will be at least 12 bit. The greatest impact of the reduction is in the shadows.
Convert 12 bit linear to 10 bit S-Log and now you are compromising both the highlight range and the shadow range. You have the worst of both, you have 10 bit S-Log but with much less shadow data than the S-log straight from the camera. It’s really not a good thing to do and the internally generated S-Log won’t have shadows compromised in the same way.
If you have even the tiniest bit of under exposure or you attempt to lift the shadows in any way this will accentuate the reduced shadow data and banding is highly likely as the values become stretched even further apart as you bring them up the output gamma range.
If you expose brightly and then reduce the shadows this has the effect of compressing the values closer together or pushing them further down the output curve, closing them together as they go down the output gamma range, this reduces banding. This is one of the reasons why exposing more brightly can often help both log and raw recordings. So a bit of over exposure might help, but any under exposure is really, really going to hurt. Again, you would probably be better off using the internally generated S-Log.
To make matters worse there is also often an issue with S-Log in a ProRes file.
If all that is not enough there is also a big problem in the way ProRes files record S-Log. S-Log should always be recorded as full range data. When you record an internal XAVC file the metadata in the clips tells the edit or grading software that the file is full range. Then when you apply a LUT or do your grading the correct transforms occur and all shadow textures are preserved. But ProRes files are by default treated as legal range files. So when you record full range S-Log inside a ProRes file there is a high likelihood that your edit or grading software will handle the data in the clip incorrectly and this too can lead to problems in the shadows including truncated data, clipping and banding, even though the actual recorded data may be OK. This is purely a metadata issue, grading software such as DaVinci resolve can be forced to treat the ProRes files as full range.
 
 
more on S-Log and ProRes files here: https://www.xdcam-user.com/2019/03/sonys-internal-recording-levels-are-correct/

ProRes Raw Over Exposure Magic Tricks – It’s all smoke and mirrors!

There are a lot of videos circulating on the web right now showing what appears to be some kind of magic trick where someone has shot over exposed, recorded the over exposed images using ProRes Raw and then as if by magic made some adjustments to the footage and it goes from being almost nothing but a white out of over exposure to a perfectly exposed image.

This isn’t magic, this isn’t raw suddenly giving you more over exposure range than you have with log, this is nothing more than a quirk of the way FCP-X handles ProRes Raw material.

Before going any further – this isn’t a put-down of raw or ProRes raw. It’s really great to be able to take raw sensor data and record that with only minimal processing. There are a lot of benefits to shooting with raw (see my earlier post showing all the extra data that 12 bit raw can give). But a magic ability to let you over expose by seemingly crazy amounts isn’t something raw does any better than log.

Currently to work with ProRes Raw you have to go through FCP-X. FCP-X applies a default sequence of transforms to the Raw footage to get it from raw data to a viewable image. These all expect the footage to be exposed exactly as per the camera manufacturers recommendations, with no leeway. Inside FCP-X it’s either exposed exactly right, or it isn’t.

The default decode settings include a heavy highlight roll-off. Apple call it “Tone Mapping”. Fancy words used to make it sound special but it’s really no different to a LUT or the transforms and processes that take place in other raw decoders. Like a LUT it maps very specific values in the raw data  to very specific output brightness values. So if you shoot just a bit bright – as you would often do with log to improve the signal to noise ratio – The ProRes raw appears to be heavily over exposed. This is because anything bright ends up crushed into nothing but flat white by the default highlight roll off that is applied by default.

In reality the material is probably only marginally over exposed, maybe just one to 2 stops which is something we have become used to doing with log. When you view brightly exposed log, the log itself doesn’t look over exposed, but if you apply a narrow high contrast 709 LUT to it, it then the footage looks over exposed until you grade it or add an exposure compensated LUT.  This is what is happening by default inside FCP-X, a transform is being applied that makes brightly exposed footage look very bright and possibly over exposed – because thats the way it was shot!

This is why in FCP-X  it is typical to change the color library to WCG (Wide Color Gamut) as this changes the way FCP-X processes the raw, changing the Tone Mapping and most importantly getting rid of the highlight roll off. With no roll-off, highlights and any even slight over exposure will still blow out as you can’t show 14 stops on a conventional 6 stop TV or monitor. Anything beyond the first 6 stops will be lost, the image will look over exposed until you grade or adjust the material to control the brighter parts of the image and bring them back into a viewable range. When you are in WCG mode in FCP-X the there is no longer a highlight roll off crushing the highlights and now because they are not crushed they can be recovered, but there isn’t any more highlight range than you would have if you shot with log on the same camera!

None of this is some kind of Raw over exposure magic trick as is often portrayed. It’s simply not really understanding how the workflow works and appreciating that if you shoot bright – well it’s going to look bright – until you normalise it in post. We do this all the time with log via LUT’s and grading too! It can be a little more straight forward to recover highlights from Linear Raw footage as comes form an FS5 or FS7 compared to log. That’s because of the way log maintains a constant data level in each highlight stop and often normal grading and colour correction tools don’t deal with this correctly. The highlight range is there, but it can be tricky to normalise the log without log grading tools such as the log controls in DaVinci Resolve.

Another problem is the common use of LUT’s on log footage. The vast majority of LUT’s add a highlight roll off, if you try to grade the highlights after adding a LUT with a highlight roll off it’s going to be next to impossible to recover the highlights. You must do the highlight recovery before the LUT is added or use a LUT that has compensation for any over exposure. All of these things can give the impression that log has less highlight range than the raw from the same camera. This is not normally the case, both will be the same as it’s the sensor that limits the range.

The difference in the highlight behaviour is in the workflows and very often both log and raw workflows are miss-understood. This can lead to owners and users of these cameras thinking that one process has more than the other, when in reality there is no difference, it’s appears to be different because the workflow works in a different way.

Why I Choose To Shoot ProRes Raw with the FS5

This is a much discussed topic right now, so as I promised in my last article about this, I have put together a video. Unfortunately YouTube’s compression masks many of the differences between the UHD XAVC and the ProRes Raw, but you can still see them, especially on the waveform scopes.

To really appreciate the difference you should watch the video on a large screen at at high quality, preferably 4K.

ProRes Raw and Atomos Inferno and Sumo – BIG deal for the FS5 and FS7!!

proresraw-logo ProRes Raw and Atomos Inferno and Sumo - BIG deal for the FS5 and FS7!!Over the last few days there have been various rumours and posts coming from Apple about how they intend to get back to providing decent support for professional users of their computers. Apple have openly admitted that the Trash Can Mac Pro has thermal problems and as a result has become a dead end design, which is why there haven’t been any big updates to the flagship workstation from Apple. Apple have hinted that new workstations are on the way, although it would seem that we won’t see these until next year perhaps.
Another announcement came out today, a new version of FCP-X is to be released which includes support for a new ProRes codec called ProRes Raw. This is BIG!

PRORES RAW.

Raw recordings can be made from certain cameras that have bayer sensors such as the Sony FS5 and FS7. Recording the raw data from the sensor maximises your post production flexibility and normally offers the best possible image quality from the camera. Currently if you record 4K raw with these cameras using an Atomos Shogun or similar the bit rate will be close to 3Gb/s at 24p. These are huge files and the cDNG format used to record them is difficult and clunky to work with.  As a result most users take the raw output from the camera and transform it to S-Log2 or S-Log3 and record it as 10 bit ProRes on the external recorder. This is a bit of a shame as going from 12 bit linear raw to 10 bit S-log means you are not getting the full benefit of the raw output.

Enter ProRes Raw:  ProRes Raw will allow users to record the cameras raw output at a much reduced bit rate with no significant of quality. There are two versions, ProRes Raw and ProRes Raw HQ. The HQ bit rate is around 1Gb/s at 24fps. This is not significantly bigger than the ProRes HQ (880Mb/s) that most users are using now to record the raw, yet the full benefit of 12 bit linear will be retained. A 1TB SSD will hold around an hour of ProRes Raw, compare that to uncompressed raw where you only get around 20 mins and you can see that this is a big step forwards for users of the FS5 in particular.

ProRes Raw (the non HQ version) is even smaller! The files are smaller than typical ProRes HQ files. This is possible because recording raw is inherently more efficient than recording component video.

It is claimed by Apple that ProRes Raw will play back in real time on MacBook Pro’s and iMacs without any additional rendering or external graphics cards, so it obviously isn’t terribly processor intensive. This is excellent news! Within FCP-X the playback resolution can be decreased to bring improved playback performance in less powerful systems or mutistream playback.

It looks like you will be able to record from a 4K DCI  from an FS5 or FS7 at up to 60fps continuously. This breaks through the previous limits for the Shogun of 30fps. The FS7 will be able to record 2K raw at up to 240fps and the FS5 will be able to record 4K raw at 100 and 120fps for 4 seconds. Other raw cameras are also supported by the Atomos recorders at differing frame sizes and frame rates.

At the moment the only recorders listed as supporting ProRes Raw are the Atomos Shogun Inferno and the Sumo19 and it looks like it will be a free update. In addition the DJI Inspire 2 drone and Zenmuse X7 Super 35mm camera will also support ProRes Raw.

Whether you will be able to use ProRes Raw in other applications such as Resolve or Premiere is unclear at this time. I hope that you can (or at least will be able to in the near future).

SEE: Apple Press Release.

SEE: Apple ProRes Raw White Paper

SEE: ATOMOS ProRes Raw INFO PAGE.


What’s the difference between raw and S-Log ProRes – Re: FS5 raw output.

This is a question that comes up a lot.

Raw is the unprocessed (or minimally processed) data direct from the sensor. It is just the brightness value for each of the pixels, it is not a color image, but we know which color filter is above each pixel, so we are able to work out the color later. In the computer you take that raw data and convert it into a conventional color video signal defining the gamma curve and colorspace in the computer.  This gives you the freedom to choose the gamma and colorspace after the shoot and retains as much of the original sensor information as possible.Of course the captured dynamic and color range is determined by the capabilities of the sensor and we can’t magically get more than the sensor can “see”. The quality of the final image is also dependant on the quality of the debayer process in the computer, but as you have the raw data you can always go back and re-encode the footage with a better quality encoder at a later date. Raw can be compressed or uncompressed. Sony’s 12 bit FS-raw when recorded on an Odyssey or Atomos recorder is normally uncompressed so there are no additional artefacts from compression, but the files are large. The 16 bit raw from a Sony F5 or F55 when recorded on an R5 or R7 is made about 3x smaller through a proprietary algorithm.

ProRes is a conventional compressed color video format. So a ProRes file will already have a pre-determined gamma curve and color space, this is set in the camera through a picture profile, scene file or other similar settings at the time of shooting. The quality of the ProRes file is dependant on the quality of the encoder in the camera or recorder at the time of recording, so there is no way to go back and improve on this or change the gamma/colorspace later. In addition ProRes, like most commonly used codecs is a lossy compressed format, so some (minimal) picture information may be lost in the encoding process and artefacts (again minimal) are added to the image. These cannot easily be removed later, however they should not normally present any serious problems.

It’s important to understand that there are many different types of raw and many different types of ProRes and not all are equal. The FS-raw from the FS5/FS7 is 12 bit linear and 12 bit’s are not really enough for the best possible quality from a 14 stop camera (there are not enough code values so floating point math and/or data rounding has to take place and this effects the shadows and low key areas of the image). You really need 16 bit data for 14 stops of dynamic range with linear raw, so if you are really serious about raw you may want to consider a Sony F5 or F55. ProRes is a pretty decent codec, especially if you use ProResHQ and 10 bit log approaches the quality of 12 bit linear raw but without the huge file sizes.  Incidentally there is very little to be gained by going to ProRes 444 when recording the 12 bit raw from an FS5/FS7, you’ll just have bigger files and less record time.

Taking the 12 bit raw from an FS5 and converting it to ProRes in an external recorder has potential problems of it’s own. The quality of the final file will be dependant on the quality of the debayer and encoding process in the recorder, so there may be differences in the end result from different recorders. In addition you have to add a gamma curve at this point so you must be careful to choose the correct gamma curve to minimise concatenation where you add the imperfections of 12 bit linear to the imperfections of the 10 bit encoded file (S-Log2 appears to be the best fit to Sony’s 12 bit linear raw).

Despite the limitations of 12 bit linear, it is normally a noticeable improvement over the FS5’s 8 bit internal UHD recordings, but less of a step up from the 10 bit XAVC that an FS7 can record internally. What it won’t do is allow you to capture anything extra. It won’t improve the dynamic range, won’t give you more color and won’t enhance the low light performance (if anything there will be a slight increase in shadow noise and it may be slightly inferior in under exposed shots). You will have the same dynamic and color range, but recorded with more “bits” (code values to be precise). Linear raw excels at capturing highlight information and what you will find is that compared to log there will be more textures in highlights and brighter parts of your captured scenes. This will become more and more important as HDR screens are better able to show highlights correctly. Current standard dynamic range displays don’t show highlights well, so often the extra highlight data in raw is of little benefit over log. But that’s going to change in the next few years so linear recording with it’s extra highlight information will become more and more important.

Convergent Design Gemini throws up a ProRes Issue. NOT THE PROBLEM I THOUGHT IT IS

OK, I wrote about this without digging deep enough. If you read the original article I claimed that ProRes was clipping my files at 104%. Well it’s NOT. The ProRes files are just fine, BUT some Quick Time applications are clipping the files at playback. In FCP the files are OK. Premiere appears to be reducing the level of the files a little and Quick Time player is clipping the files at approx 104. So this isn’t as big an issue as I thought, but you do need to keep an eye out as to what is happening with highlights and super whites depending on what software you are using. I was wondering why I hadn’t seen this before. In part it because I am no longer using FCP.