Tag Archives: grading

Why Doesn’t My Footage Grade Well?

So this came up on social media. Someone had been playing with some sample raw footage provided by a camera manufacturer and he/she was concerned because he felt that this manufacturer supplied footage graded much better than his/her own Sony XAVC-I footage.

There is a lot to a situation like this, but very often the issue isn’t that the other footage was raw while his/her own footage was XAVC-I S-Log. Raw doesn’t normally have more colour or more DR than log. The colour range and the shadow range won’t be significantly different as that tends to be limited by the cameras sensor rather than the recording codec. But what you might have if the raw is 12 bit or greater is a larger bit depth or less compression. Perhaps a bit of both and that can sometimes give some extra precision or finer gradations as well as a bit less noise (although compression can reduce noise). This may come into play when you really start to push and pull the footage very hard in the grade, but generally, if you can’t get the image you want out of 10 bit XAVC-I, 12 bit raw isn’t going to help you. Raw might make it a bit quicker to get to where you want to be and I do love working with the 16 bit X-OCN (raw) from Venice and Burano, but I have never really felt that XAVC S-Log3 is lacking. Even a deeper bit depth might not be all it seems. The sensors in most video cameras under $20K only have 12 bit analog to digital converters and that tends to be the main image quality bottleneck (and this where Venice really shines with its 14 bit A2D).

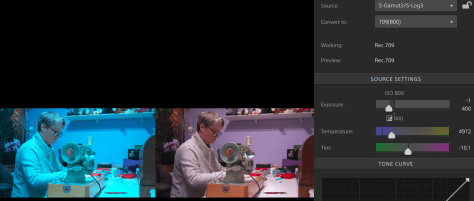
Sony’s XAVC-I S-log3 grades really well, really, really well. A big issue however is the reliance on LUTs. 3D LUTs divide the image up into 33x or 65x adjustment bands and then it is down to the grading software to interpolate between each band. This can introduce artefacts into the image.

Some people simply skip doing a proper colourspace transform altogether and this may introduce twists into the gamma and colourspace which then makes it hard to get the colours or contrast they really want as it can be hard to bend the colours in a pleasing way without them going “weird”.

Colour managed workflows help to maintain the full range of the original content within the correct output colourspace without any unwanted twists and are often the best way to full realise the potential of the content you have shot.

Plus not all grading software is created equal. I was an Adobe Premiere user for years until I needed to do a lot more grading. When DaVinci Resolve became affordable I switched to Resolve for grading and have never looked back – after all it is a proper grading tool, not edit software with a bunch of plugins bolted on.

But as always the real key is how it was shot. Manufacturer supplied sample content is likely to have been shot very well and highly optimised, after all they want it to make their camera look as good as possible. When comparing footage from different sources you really do need to consider whether just how well it was shot. Was the most appropriate exposure index used for the type of scene. Was it shot at the best possible time of day for the best sun positioning. How much attention went in to things like the careful choice of the colours in the scene to provide pleasing colour contrast. How much time was spent with negative fill to bring down the shadow areas etc, what filtration was used to bleed off highlights or polarise the sky or windows. What lenses were used. All these things will have a massive impact on how gradeable the footage will be.

HELP! There is banding in my footage – or is there?

I’ve written about this before, but it’s worth bringing up again as I keep coming across people that are convinced there is a banding issue with their camera or their footage. Most commonly they have shot a clear blue sky or a plain wall and when they start to edit or grade their content they see banding in the footage.

Most of the cameras on the market today have good quality 10 bit codecs and there is no reason why you should ever see banding in a 10 bit recording, it’s actually fairly uncommon in 8 bit recordings unless they are very compressed or a lot of noise reduction has been used.

So – why are these people seeing banding in their footage? 

99% of the time it is because of their monitoring. 

Don’t be at all surprised if you see banding in footage if you view the content on a computer monitor or other monitor connected via a computers own HDMI port or a graphics card HDMI port. When monitoring this way it is very, very common to see banding that isn’t really there. If this is what you are using there will be no way to be sure whether any banding you see is real or not (about the only exception to this is the screen of the new M1 laptops). There are so many level translations between the colourspace and bit depth of the source video files, the computer desktop, the HDMI output and the monitors setup that banding is often introduced somewhere in the chain. Very often the source clips will be 10 bit YCbCr, the computer might be using a 16 bit or 24 bit colour mode and then the  HDMI might only be 8 bit RGB. Plus the gamma of the monitor may be badly matched and the monitor itself of unknown quality.

For a true assessment of whether footage has banding or not you want a proper, good quality video monitor connected via a proper video card such as a Blackmagic Decklink card or a device such as a BlackMagic UltraStudio product. When using a proper video card (not a graphics card) you bypass all the computer processing and go straight from the source content to the correct output. This way you will go from the 10 bit YCbCr direct to a 10 bit YCbCr output so there won’t be extra conversion and translation stages adding phantom artefacts to your footage.

If you are seeing banding, to try to understand whether the banding you are seeing is in the original footage or not try this: Take the footage into your grading software, using a paused (still) frame enlarge the clip so that the area with banding fills the monitor and note exactly where the edges of the bands are. Then slowly change the contrast of the clip. If the position of the edges of the bands moves, they are not in the original footage and something else is causing them. If they do not move, then they are baked in to the original material.

FREE LUT DOWNLOADS.

CLICK HERE TO GO TO THE MAIN FREE LUT DOWNLOAD PAGE.

Over the years I have created quite a few different LUTs and made them available here for free download. But they are spread all over the website, so sometimes they can be hard to find.  

You can see all the LUT’s that I have included here on XDCAM-USER, whether for S-Log2 or for S-Log3 as well as any articles about LUTs and how to use them by following this link. https://www.xdcam-user.com/?s=luts

But I thought it would also be a big help to have a single page with all of the more popular S-Log3 LUT’s in one place along with samples of how each LUT looks. So, I have created a new fixed page for my S-Log3 LUTs which you can find via the menu bar under the Picture Settings and LUT’s category or by clicking here https://www.xdcam-user.com/picture-settings-and-luts/alisters-free-luts/

Regular readers of the site may have notice that I currently have a couple of new advertisers on board and their financial support should allow me to generate more LUTs going forwards. Any new LUTs will be added to this new LUT page so do keep it book marked in your browser and check back for updates.

Adobe to drop colour managament by default.

I had an interesting chat with Adobe about how they implemented the colour management of footage in Adobe Premiere at IBC. They seem to realise that the way it is implemented by default isn’t very popular, that it isn’t  well documented and not particularly well implemented.  So things will revert back to everything being handled as Rec-709 in a Rec-709 project by default in the near future. This will come very soon (it may already be in the public Beta but I haven’t checked). This does of course mean that once again your Log footage will look flat, which is actually incorrect, Log is not flat, you are just viewing it incorrectly. Those delivering in HDR will have to figure out how to best manage their footage so it isn’t unnecssarily restricted by passing through a Rec-709 project/timeline and most will end up using LUTs with all the restrictions that they impose once again. Perhaps Adobe will return to colour management in the future once they have figured out how to implement it in a more user friendly way.

More on Adobe’s new color managed workflow.

I’ve written about this before, but the way Adobe have changed the way they manage colourspaces has changed, it hasn’t been well documented, and it’s causing a lot of confusion.

When importing Log footage into the latest versions of Adobe Premiere instead of the log footage looking flat and washed out as it used to, now it looks contrasty and well saturated. If it has been exposed correctly (according to the manufacturers specifications) then it will look like normal Rec-709 footage rather than the flat look that most people associate with log. This is confusing people, many assume Adbe is now adding a LUT to the footage by default, it isn’t. What is happening isd a fundamental change to the way Premiere handles different colorspaces.

NOT ADDING A LUT.

Premiere is NOT adding a LUT. It is transforming between the captured colorspace and the display colorspace so that the footage looks correct with the right contrast, colour and brightness on your display. Your footage remains in its native colorspace at all times (unless you force it into an alternate and possibly wrong colorspace by using the interpret footage function).

Your display could be 709, HDR10, HLG, SGamut3/S-log3 and in each case the footage would, within the limitations of the displays format have the same basic contrast and colour etc, the footage would look the same whether viewing in SDR, HDR or Log because Premiere maps it to the correct levels for the output colorspace you are using to view your content.

OLD BROKEN WORKFLOWS.

The issue is that previously we have been using very broken workflows  that are normally incapable of showing capture colorspaces other than Rec-709 correctly. This has made people believe that log formats are supposed to look flat – They are not! When viewed correctly they should  have the same contrast as 709 etc. Log is not flat, but we have been viewing it incorrectly because most workflows have been incapable of mapping different source colorspaces to our chosen working/viewing colorspace.

LUTs ARE A QUICK FIX – WITH LIMITATIONS.

Up to now to fix these broken workflows we have added LUT’s to convert our beautiful, high dynamic range, vast colorspace source formats into restricted, reduced dynamic range display formats. Once you add that 709 LUT to you S-Log3 footage it is no longer SGamut3/Slog3 it is now Rec-709 with all the restrictions that 709 has such as limited dynamic range, limited colorspace etc and that may limit what you can do with it in the grade. Plus it limits you to only ever outputting in SDR 709.

But what we have now in a colour managed workflow is our big range log being displayed correctly on a 709 display or any other type of display, including HDR or DCI-P3 etc. Because the footage is still in its native colorspace you will have much greater grading latitude, there’s no knee added to the highlights, no shadow roll off, no artificial restriction to the source colorspace. So you can more easily push and pull the material far further during adjustment and grading (raw workflows have always been color managed out of necessity as the raw footage can’t be viewed correctly without first being converted into a viewable colorspace).

HERE’s THE RUB!

But the rub is – you are not now adding someone else’s carefully crafted LUT, which is a combination of creative and artistic corrections that give a pleasing look combined with the Log to Rec 709 conversion.

So – you’re going to have to learn how to grade for yourself – but you will have a much bigger colour and contrast range to work with as your footage will remain in it’s full native capture range.

And – if you need to deliver in multiple formats, which you will need to start doing very soon if you are not already, it is all so much easier as in a colour managed workflow all you do is switch the output format to change from 709 to HDR10 or HLG or DCI-P3 to get whatever format you want without having to re-grade everything or use different LUT’s for each format.

HOW LONG CAN YOU STAY JUST IN REC-709?

And when you consider that almost all new TV’s, the majority of new Phones and Tablets all have HDR screens and this is all now supported on YouTube and Vimeo etc how much longer do you think you will be able to cling on to only delivering in SDR Rec-709 using off-the-shelf SDR LUTs? If you ever want to do stuff for Netflix, Amazon etc you will need to figure out how to work in both SDR and HDR.

IT’S HERE TO STAY

Adobe have done a shockingly bad job of documenting and explaining this new workflow, but it is the future and once you learn how to use it properly it should improve the quality of what you deliver and at the same time expand the range of what you can deliver.

I have to deliver both SDR and HDR for most of my clients and I’ve been using colour managed workflows for around 6 years now (mostly ACES in Resolve). I could not go back to the restrictions of a workflow that doesn’t allow you to output in multiple colorspaces or requires you to perform completely separate grades for SDR and HDR. The great thing about ACES is that it is a standardised and well documented workflow so you can use ACES LUT’s designed for the ACES workflow if you wish. But until Adobe better document their own colour managed workflow it is difficult to design LUT’s for use in the Adobe workflow. Plus LUT’s that work with the Adobe workflow, probably won’t work elsewhere. So – it’s never been a better time to learn how to grade properly or think about what workflow you will use to do your grading.

The bottom line is the days of using LUT’s that add both an artistic look and convert your footage from its source colorspace to a single delivery colorspace are numbered.  Color managed offer far greater flexibility for multi format delivery. Plus they retain the full range and quality of your source material, no matter what colorspace you shot it in or work in.

DaVinci resolve Frame Rendering Issue and XAVC

There is a bug in some versions of DaVinci Resolve 17 that can cause frames in some XAVC files to be rendered in the wrong order. This results in renders where the resulting video appears to stutter or the motion may jump backwards for a frame or two. This has now been fixed in version 17.3.2 so all user of XAVC and DaVinci Resolve are urged to upgrade to at least version 17.3.2.

https://www.blackmagicdesign.com/uk/support/family/davinci-resolve-and-fusion

Raw Isn’t Magic. With the right tools Log does it too.

Raw can be a brilliant tool, I use it a lot. High quality raw is my preferred way of shooting. But it isn’t magic, it’s just a different type of recording codec.
 
All too often – and I’m as guilty as anyone – people talk about raw as “raw sensor data” a term that implies that raw really is something very different to a normal recording. In reality it’s really not that different. When shooting raw all that happens is that the video frames from the sensor are recorded before they are converted to a colour image. A raw frame is still a picture, it’s just that it’s a bitmap image made up of brightness values, each pixel represented by a single brightness code value rather than a colour image where each location in the image is represented by 3 values one for each of Red, Green and Blue or Luma, Cb and Cr.

As that raw frame is still nothing more than a normal bitmap all the cameras settings such as white balance, ISO etc are in fact baked in to the recording. Each pixel only has one single value and that value will have been determined by the way the camera is setup. Nothing you do in post production can change what was actually recorded. Most CMOS sensors are daylight balanced, so unless the camera adjusts the white balance prior to recording – which is what Sony normally do – your raw recording will be daylight balanced.

Modern cameras when shooting log or raw also record metadata that describes how the camera was set when the image was captured. 

So the recorded raw file already has a particular white balance and ISO. I know lots of people will be disappointed to hear this or simply refuse to believe this but that’s the truth about a raw bitmap image with a single code value for each pixel and that value is determined by the camera settings.

This can be adjusted later in post production, but the adjustment range is not unlimited and it is not the same as making an adjustment in the camera. Plus there can be consequences to the image quality if you make large adjustments. 

Log can be also adjusted extensively in post too. For decades feature films shot on film were scanned using 10 bit Cineon log (which is the log gamma curve S-Log3 is based on) and 10 bit log used for post production until 12 bit and then 16 bit linear intermediates came along like OpenEXR. So this should tell you that actually log can be graded very well and very extensively.

But then many people will tell you that you can’t grade log as well as raw. Often they will give photographers as an example where there is a huge difference between what you can do with a raw photo and a normal image. But we also have to remember this is typically comparing what you can do with a highly compressed 8 bit jpeg file and an often uncompressed 12 or 14 bit raw file. It’s not a fair comparison, of course you would expect the 14 bit file to be better.

The other argument often given is that it’s very hard to change the white balance of log in post, it doesn’t look right or it falls apart. Often these issues are nothing to do with the log recording but more to do with the tools being used.

When you work with raw in your editing or grading software you will almost always be using a dedicated raw tool or raw plugin designed for the flavour of raw you are using. As a result everything you do to the file is optimised for the exact flavour of raw you are dealing with. It shouldn’t come as a surprise to find that to get the best from log you should be using tools specifically designed for the type of log you are using. In the example below you can see how Sony’s Catalyst Browse can perfectly correctly change the white balance and exposure of S-log material with simple sliders just as effectively as most raw formats.
 
Screenshot-2020-11-27-at-17.14.07 Raw Isn't Magic. With the right tools Log does it too.
On the left is the original S-Log3 clip with the wrong white balance (3200K) and on the left is the corrected image. The only corrections made are via the Temperature slider and exposure slider.
 
Applying the normal linear or power law (709 is power law) corrections found in most edit software to Log won’t have the desired effect and basic edit software rarely has proper log controls. You need to use a proper grading package like Resolve and it’s dedicated log controls. Better still some form of colour managed workflow like ACES where your specific type of log is precisely converted on the fly to a special digital intermediate and the corrections are made to the intermediate file. There is no transcoding, you just tell ACES what the footage was was shot on and magic happens under the hood. Once you have done that you can change the white balance or ISO of log material in exactly the same way as raw. There is very, very little difference.
 
Screenshot-2020-11-27-at-17.29.27 Raw Isn't Magic. With the right tools Log does it too.
The same S-Log3 clip as in the above example, this time in DaVinci Resolve using ACES. The only corrections being made are via the Temp slider for the white balance change and the Log-Offset wheel which in ACES provides a precise exposure adjustment.
 
When people say you can’t push log, more often than not it isn’t a matter of can’t, it’s a case of can – but you need to use the right tools.
 
After-correction-450x253 Raw Isn't Magic. With the right tools Log does it too.
This is what log shot with completely the wrong white balance and slightly over exposed looks like after using nothing but the WB and ISO sliders in Catalyst Browse. I don’t believe raw would have looked any different.
 
Less compression or a greater bit depth are where the biggest differences between a log or raw recording come from, not so much from whether the data is log or raw.  Don’t forget raw is often recorded using log, which kind of makes the “you can’t grade log” argument a bit daft.
 
Camera manufactures and raw recorder manufacturers are perfectly happy to allow everyone to believe raw is magic and worse still, let people believe that ANY type of raw must be better than all other types of recordings. Read though any camera forum and you will see plenty of examples of “it’s raw so it must be better” or “I need raw because log isn’t as good” without any comprehension of what raw is and how in reality it’s the way the raw is compressed and the bit depth that really matters.

If we take ProRes Raw as an example: For a 4K 24/25fps file the bit rate is around 900Mb/s. For a conventional ProRes HQ file the bit rate is around 800Mb/s. So the file size difference between the two is not at all big.
 
But the ProRes Raw file only has to store around 1/3 as many data points as the component ProResHQ file. As a result, even though the ProRes Raw file often has a higher bit depth, which in itself usually means better a better quality recording, it is also much, much less compressed and as a result will have fewer artefacts. 

It’s the reduced compression and deeper bit depth possible with raw that can lead to higher quality recordings and as a result may bring some grading advantages compared to a normal ProRes or other compressed file. The best bit is there is no significant file size penalty. So you have the same amount of data, but you data should be of higher quality. So given that you won’t need more storage, which should you use? The higher bit depth less compressed file or the more compressed file?

But, not all raw files are the same. Some cameras feature highly compressed 10 bit raw, which frankly won’t be any better than most other 10 bit recordings as you are having to do all the complex math to create a colour image starting with just 10 bit. Most cameras do this internally at at least 12 bit. I believe raw needs to be at least 12 bit to be worth having.

If you could record uncompressed 12 bit RGB or 12 bit component log from these cameras that would likely be just as good and just as flexible as any raw recordings. But the files would be huge. It’s not that raw is magic, it’s just that raw is generally much less compressed and  depending on the camera may also have a greater bit depth. That’s where the benefits come from.

Raw Myths. You Can’t Change The white Balance Of the Camera Or ISO in Post.

It’s amazing how often people will tell you how easy it is to change the white balance or adjust the ISO of raw footage in post. But can you, is it really true and is it somehow different to changing the ISO or white balance of Log footage?

Let’s start with ISO. If ISO is sensitivity, or the equivalent of sensitivity how on earth can you change the sensitivity of the camera once you get into post production. The answer is you can’t.

But then we have to consider how ISO works on an electronic camera. You can’t change the sensor in a video camera so in reality you can’t change how sensitive an electronic camera is (I’m ignoring cameras with dual ISO for a moment). All you can do is adjust the gain or amplification applied to the signal from the sensor.  You can add gain in post production too. So, when you adjust the exposure or using the ISO slider for your raw footage in post all you are doing is adjusting how much gain you are adding. But you can do the same with log or any other gamma. 

One thing that makes a difference with raw is that the gain is applied in such a way that what you see looks like an actual sensitivity change no matter what gamma  you are transforming the raw to. This makes it a little easier to make changes to the final brightness in a pleasing way. But you can do exactly the same thing with log footage.  Anything you do in post must be altering the recorded file, it can never actually change what you captured.

Changing the white balance in post: White Balance is no different to ISO, you can’t change in post what the camera captured. All you can do is modify it through the addition or subtraction of gain.

Think about it. A sensor must have a certain response to light and the colours it sees depending on the material it’s made from and the colour filters used. There has to be a natural fixed white balance or a colour temperature that it works best at.

The Silicon that video sensors are made from is almost always more sensitive at the red end of the spectrum than the blue end. So as a result almost all sensors tend to produce the best results with light that has a lot of blue (to make up for the lack of blue sensitivity) and not too much red. So most cameras naturally perform best with daylight and as a result most sensors are considered daylight balanced.

If a camera produces a great image under daylight how can you possibly get a great image under tungsten light without adjusting something? Somehow you need to adjust the gain of the red and blue channels.

Do it in camera and what you record is optimised for your choice of colour temperature at the time of shooting. But you can always undo or change this in post by subtracting or adding to whatever was added in the camera.

If the camera does not move away from its native response then if you want anything other than the native response you will have to do it in post and you will be recording at the cameras native white balance. If you want a different colour temp then you need to add or subtract gain to the R & B channels in post to alter it.

Either way what you record has a nominal white balance and anything you do in post is skewing what you have recorded using gain. There is no such thing as a camera with no native white balance, all cameras will favour one particular colour temperature. So even if a manufacturer claims that the white balance isn’t baked in what they mean is they don’t offer the ability to make any adjustments to the recorded signal. If you want the very best image quality, the best method is to adjust at the time of recording. So, as a result a lot of camera manufacturers will skew the gain of the red and blue channels of the sensor in the camera when shooting raw as this optimises what you are recording. You can then skew it again in post should you want a different balance. 

With either method if you want to change the white balance from what was captured you are altering the gain of the red and blue channels. Raw doesn’t magically not have a white balance, so shooting with the wrong white balance and correcting it in post is not something you want to do. Often you can’t correct badly balanced raw any better than you can correct  incorrectly balanced log.

How far you can adjust or correct raw depends on how it’s been compressed (or not), the bit depth, whether it’s log or linear and how noisy it is. Just like a log recording really, it all depends on the quality of the recording. 

The big benefit raw can have is that the amount of data that needs to be recorded is considerably reduced compared conventional component or RGB video recordings.  As a result it’s often possible to record using a greater bit depth or with much less compression. It is the greater bit depth or reduced compression that really makes a difference. 16 bit data can have up to 65,536 luma gradations, compare that to the 4096 of 12 bit or 1024 of 10 bit and you can see how a 16 bit recording can have so much more information than a 10 bit one. And that makes a difference. But 10 bit log v 10 bit raw, well it depends on the compression, but well compressed 10 bit log will likely outperform 10 bit raw as the all important colour processing will have been done in the camera at a much higher bit depth than 10 bit.

Are LUT’s Killing Creativity And Eroding Skills?

I see this all the time “which LUT should I use to get this look” or “I like that, which LUT did you use”. Don’t get me wrong, I use LUT’s and they are a very useful tool, but the now almost default reversion to adding a LUT to log and raw material is killing creativity.

In my distant past I worked in and helped run  a very well known post production facilities company. There were two high end editing and grading suites and many of the clients came to us because we could work to the highest standards of the day and from the clients description create the look they wanted with  the controls on the equipment we had. This was a digibeta tape to tape facility that also had a Matrox Digisuite and some other tools, but nothing like what can be done with the free version of DaVinci Resolve today.

But the thing is we didn’t have LUT’s. We had knobs, dials and switches. We had to understand how to use the tools that we had to get to where the client wanted to be. As a result every project would have a unique look.

Today the software available to us is incredibly powerful and a tiny fraction of the cost of the gear we had back then. What you can do in post today is almost limitless. Cameras are better than ever, so there is no excuse for not being able to create all kinds of different looks across your projects or even within a single project to create different moods for different scenes. But sadly that’s not what is happening.

You have to ask why? Why does every YouTube short look like every other one? A big part is automated workflows, for example FCPX that automatically applies a default LUT to log footage. Another is the belief that LUT’s are how you grade, and then everyone using the same few LUT’s on everything they shoot.

This creates two issues.

1: Everything looks the same – BORING!!!!

2: People are not learning how to grade and don’t understand how to work with colour and contrast – because it’s easier to “slap on a LUT”.

How many of the “slap on a LUT’ clan realise that LUT’s are camera and exposure specific, how many realise that LUT’s can introduce banding and other image artefacts into footage that might otherwise be pristine?

If LUT’s didn’t exist people would have to learn how to grade. And when I say “grade” I don’t mean a few tweaks to the contrast, brightness and colour wheels. I mean taking individual hues and tones and changing them in isolation. For example separating skin tones from the rest of the scene so they can be made to look one way while the rest of the scene is treated differently. People would need to learn how to create colour contrast as well as brightness contrast. How to make highlights roll off in a pleasing way, all those things that go into creating great looking images from log or raw footage.

Then, perhaps, because people are doing their own grading they would start to better understand colour, gamma, contrast etc, etc. Most importantly because the look created will be their look, from scratch, it would be unique. Different projects from different people would actually look different again instead of each being a clone of someone else’s work.

LUT’s are a useful tool, especially on set for an approximation of how something could look. But in post production they restrict creativity and many people have no idea of how to grade and how they can manipulate their material.

DaVinci Resolve 16.1.2 Released.

Blackmagic Design have just released the latest update to DaVinci Resolve. If you have been experiencing crashes when using XAVC material from the PXW-FX9 I recommend you download and install this update.

If you are not a Resolve user and are struggling with grading or getting the very best from any log or raw camera, then I highly recommend you take a look at DaVinci Resolve. It’s also a very powerful edit package. The best bit is the free version supports most cameras. If you need full MXF support you will need to buy the studio version, but with a one off cost of only $299 USD it really is a bargain and gets you away from any horrid subscription services.

https://www.blackmagicdesign.com/support/family/davinci-resolve-and-fusion