Probably a bit late now for many of my UK friends, but in case you haven’t seen it before here is a guide I prepared for shooting in the snow, https://www.xdcam-user.com/2016/12/shooting-in-cold-weather-and-shooting-snow-scenes-updated/
How can 16 bit X-OCN deliver smaller files than 10 bit XAVC-I?
Sony’s X-OCN (X–Original Camera Negative) is a new type of codec from Sony. Currently it is only available via the R7 recorder which can be attached to a Sony PMW-F5, F55 or the new Venice cinema camera.
It is a truly remarkable codec that brings the kind of flexibility normally only available with 16 bit linear raw files but with a files size that is smaller than many conventional high end video formats.
Currently there are two variations of X-OCN.
X-OCN ST is the standard version and then X-OCN LT is the “light” version. Both are 16 bit and both contain 16 bit data based directly on what comes off the cameras sensor. The LT version is barely distinguishable for a 16 bit linear raw recording and the ST version “visually lossless”. Having that sensor data in post production allows you to manipulate the footage over a far greater range than is possible with tradition video files. Traditional video files will already have some form of gamma curve as well as a colour space and white balance baked in. This limits the scope of how far the material can be adjusted and reduces the amount of picture information you have (relative to what comes directly off the sensor) .
Furthermore most traditional video files are 10 bit with a maximum of 1024 code values or levels within the recording. There are some 12 bit codecs but these are still quite rare in video cameras. X-OCN is 16 bit which means that you can have up to 65,536 code values or levels within the recording. That’s a colossal increase in tonal values over traditional recording codecs.
But the thing is that X-OCN LT files are a similar size to Sony’s own XAVC-I (class 480) codec, which is already highly efficient. X-OCN LT is around half the size of the popular 10 bit Apple ProRes HQ codec but offers comparable quality. Even the high quality ST version of X-OCN is smaller than ProRes HQ. So you can have image quality and data levels comparable to Sony’s 16 bit linear raw but in a lightweight, easy to handle 16 bit file that’s smaller than the most commonly used 10 bit version of ProRes.
But how is this even possible? Surely such an amazing 16 bit file should be bigger!
The key to all of this is that the data contained within an X-OCN file is based on the sensors output rather than traditional video. The cameras that produce the X-OCN material all use bayer sensors. In a traditional video workflow the data from a bayer sensor is first converted from the luminance values that the sensor produces into a YCbCr or RGB signal.
So if the camera has a 4096×2160 bayer sensor in a traditional workflow this pixel level data gets converted to 4096×2160 of Green plus 4096×2160 of Red, plus 4096×2160 of Green (or the same of Y, Cb and Cr). In total you end up with 26 million data points which then need to be compressed using a video codec.
 However if we bypass the conversion to a video signal and just store the data that comes directly from the sensor we only need to record a single set of 4096×2160 data points – 8.8 million. This means we only need to store 1/3rd as much data as in a traditional video workflow and it is this huge data saving that is the main reason why it is possible for X-OCN to be smaller than traditional video files while retaining amazing image quality. It’s simply a far more efficient way of recording the data from a bayer camera.
Of course this does mean that the edit or playback computer has to do some extra work because as well as decoding the X-OCN file it has to be converted to a video file, but Sony developed X-OCN to be easy to work with – which it is. Even a modest modern workstation will have no problem working with X-OCN. But the fact that you have that sensor data in the grading suite means you have an amazing degree of flexibility. You can even adjust the way the file is decoded to tailor whether you want more highlight or shadow information in the video file that will created after the X-OCN is decoded.
Why isn’t 16 bit much bigger than 10 bit? Normally a 16 bit file will be bigger than a 10 bit file. But with a video image there are often areas of information that are very similar. Video compression algorithms take advantage of this and instead of recording a value for every pixel will record a single value that represents all of the similar pixels. When you go from 10 bit to 16 bit, while yes, you do have more bits of data to record a greater percentage of the code values will be the same or similar and as a result the codec becomes more efficient. So the files size does increase a bit, but not as much as you might expect.
So, X-OCN, out of the gate, only needs to store 1/3rd of the data points of a similar traditional RGB or YCbCr codec. Increasing the bit depth from the typical 10 bit bit depth of a regular codec to the 16 bits of X-OCN does then increase the amount of data needed to record it. But the use of a clever algorithm to minimise the data needed for those 16 bits means that the end result is a 16 bit file only a bit bigger than XAVC-I but still smaller than ProRes HQ even at it’s highest quality level.
Sony Pro Tour – Oslo, Helsinki and Copenhagen.
 I’ll be giving a seminar on HDR at each of the Sony Pro Tour events in Oslo, Helsinki and Copenhagen.
These are free to attend events where Sony will showcase some of their latest video production products across 4 areas:
Large Format Sensor
Showing PXW-FS7 II, FS7 & FS5
4K HDR Production
Showing PXW-Z90, PXW-Z150 & HXR-NX80 (TBC)
HD Production
Showing PXW-X70, PXW-X200, HXR-NX100
Live Event Production
Showing MCX-500, RM-30BP, HXR-NX5R, SRG-360, RM-IP10 and an RX0.
The Oslo event is on the 8th of March 2018 and the registration link is here.
The Helsinki event is on the 28th of March and the registration link is here.
The Copenhagen event is on the 26th of April and the registration link is here.
Sony Venice. Dual ISO’s, 1 stop ND’s and Grading via Metadata.
With the first of the production Venice cameras now starting to find their way to some very lucky owners it’s time to take a look at some features that are not always well understood, or that perhaps no one has told you about yet.
Dual Native ISO’s: What does this mean?
An electronic camera uses a piece of silicon to convert photons of light into electrons of electricity. The efficiency at doing this is determined by the material used. Then the amount of light that can be captured and thus the sensitivity is determined by the size of the pixels. So, unless you physically change the sensor for one with different sized pixels (which will in the future be possible with Venice) you can’t change the true sensitivity of the camera. All you can do is adjust the electronic parameters.
With most video cameras the ISO is changed by increasing the amount of amplification applied to the signal coming off the sensor. Adding more gain or increasing the amplification will result in a brighter picture. But if you add more amplification/gain then the noise from the sensor is also amplified by the same amount. Make the picture twice as bright and normally the noise doubles.
In addition there is normally an optimum amount of gain where the full range of the signal coming from the sensor will be matched perfectly with the full recording range of the chosen gamma curve. This optimum gain level is what we normally call the “Native ISO”. If you add too much gain the brightest signal from the sensor would be amplified too much and exceed the recording range of the gamma curve. Apply too little gain and your recordings will never reach the optimum level and darker parts of the image may be too dark to be seen.
As a result the Native ISO is where you have the best match of sensor output to gain. Not too much, not too little and hopefully low noise. This is typically also referred to as 0dB gain in an electronic camera and normally there is only 1 gain level where this perfect harmony between sensor, gain and recording range is achieved, this becoming the native ISO.
Side Note: On an electronic camera ISO is an exposure rating, not a sensitivity measurement. Enter the cameras ISO rating into a light meter and you will get the correct exposure. But it doesn’t really tell you how sensitive the camera is as ISO has no allowance for increasing noise levels which will limit the darkest thing a camera can see.
Tweaking the sensor.
However, there are some things we can tweak on the sensor that effect how big the signal coming from the sensor is. The sensors pixels are analog devices. A photon of electricity hits the silicone photo receptor (pixel) and it gets converted into an electron of electricity which is then stored within the structure of the pixel as an analog signal until the pixel is read out by a circuit that converts the analog signal to a digital one, at the same time adding a degree of noise reduction. It’s possible to shift the range that the A to D converter operates over and the amount of noise reduction applied to obtain a different readout range from the sensor. By doing this (and/or other similar techniques, Venice may use some other method) it’s possible to produce a single sensor with more than one native ISO.
A camera with dual ISO’s will have two different operating ranges. One tuned for higher light levels and one tuned for lower light levels. Venice will have two exposure ratings: 500 ISO for brighter scenes and 2500 ISO for shooting when you have less light. With a conventional camera, to go from 500 ISO to 2500 ISO you would need to add just over 12dB of gain and this would increase the noise by a factor of more than 4. However with Venice and it’s dual ISO’s, as we are not adding gain but instead altering the way the sensor is operating the noise difference between 500 ISO and 2500 ISO will be very small.
You will have the same dynamic range at both ISO’s. But you can choose whether to shoot at 500 ISO for super clean images at a sensitivity not that dissimilar to traditional film stocks. This low ISO makes it easy to run lenses at wide apertures for the greatest control over the depth of field. Or you can choose to shoot at the equivalent of 2500 ISO without incurring a big noise penalty.
One of Venice’s key features is that it’s designed to work with Anamorphic lenses. Often Anamorphic lenses are typically not as fast as their spherical counterparts. Furthermore some Anamorphic lenses (particularly vintage lenses) need to be stopped down a little to prevent excessive softness at the edges. So having a second higher ISO rating will make it easier to work with slower lenses or in lower light ranges.
COMBINING DUAL ISO WITH 1 STOP ND’s.
Next it’s worth thinking about how you might want to use the cameras ND filters. Film cameras don’t have built in ND filters. An Arri Alexa does not have built in ND’s. So most cinematographers will work on the basis of a cinema camera having a single recording sensitivity.
The ND filters in Venice provide uniform, full spectrum light attenuation. Sony are incredibly fussy over the materials they use for their ND filters and you can be sure that the filters in Venice do not degrade the image. I was present for the pre-shoot tests for the European demo film and a lot of time was spent testing them. We couldn’t find any issues. If you introduce 1 stop of ND, the camera becomes 1 stop less sensitive to light. In practice this is no different to having a camera with a sensor 1 stop less sensitive. So the built in ND filters, can if you choose, be used to modify the base sensitivity of the camera in 1 stop increments, up to 8 stops lower.
So with the dual ISO’s and the ND’s combined you have a camera that you can setup to operate at the equivalent of 2 ISO all the way up to 2500 ISO in 1 stop steps (by using 2500 ISO and 500 together you can have approximately half stops steps between 10 ISO and 650 ISO). That’s an impressive range and at no stage are you adding extra gain. There is no other camera on the market that can do this.
On top of all this we do of course still have the ability to alter the Exposure Index of the cameras LUT’s to offset the exposure to move the exposure mid point up and down within the dynamic range. Talking of LUT’s I hope to have some very interesting news about the LUT’s for Venice. I’ve seen a glimpse of the future and I have to say it looks really good!
METADATA GRADING.
The raw and X-OCN material from a Venice camera (and from a PMW-F55 or F5 with the R7 recorder) contains a lot of dynamic metadata. This metadata tells the decoder in your grading software exactly how to handle the linear sensor data stored in the files. It tells your software where in the recorded data range the shadows start and finish, where the mid range sits and where the highlights start and finish. It also informs the software how to decode the colors you have recorded.
I recently spent some time with Sony Europe’s color grading guru Pablo Garcia at the Digital Motion Picture Center in Pinewood. He showed me how you can manipulate this metadata to alter the way the X-OCN is decoded to change the look of the images you bring into the grading suite. Using a beta version of Black Magic’s DaVinci Resolve software, Pablo was able to go into the clips metadata in real time and simply by scrubbing over the metadata settings adjust the shadows, mids and highlights BEFORE the X-OCN was decoded. It was really incredible to see the amount of data that Venice captures in the highlights and shadows. By adjusting the metadata you are tailoring the the way the file is being decoded to suit your own needs and getting the very best video information for the grade. Need more highlight data – you got it. Want to boost the shadows, you can, at the file data level before it’s converted to a traditional video signal.
It’s impressive stuff as you are manipulating the way the 16 bit linear sensor data is decoded rather than a traditional workflow which is to decode the footage to a generic intermediate file and then adjust that. This is just one of the many features that X-OCN from the Sony Venice offers. It’s even more incredible when you consider that a 16 bit linear X-OCN LT file is similar in size to 10 bit XAVC-I(class 480) and around half the size of Apples 10 bit ProRes HQ. X-OCN LT looks fantastic and in my opinion grades better than XAVC S-Log. Of course for a high end production you will probably use the regular X-OCN ST codec rather than the LT version, but ST is still smaller than ProRes HQ. What’s more X-OCN is not particularly processor intensive, it’s certainly much easier to work with X-OCN than cDNG. It’s a truly remarkable technology from Sony.
Next week I will be shooting some more test with a Venice camera as we explore the limits of what it can do. I’ll try and get some files for you to play with.
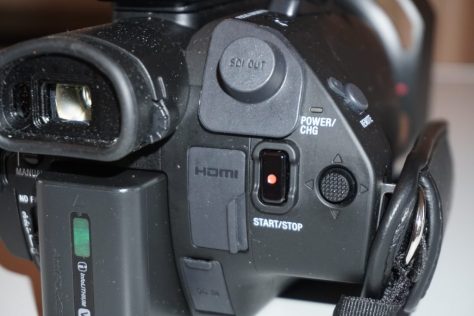
Scene files for the Sony PXW-FS7M2.
Here are some scene files for the PXW-FS7-II and original PXW-FS7. The first 5 scene files I published a couple of years ago but never got around to converting them over to the PXW-FS7-II. You can download the files in their correct folder structure to put on to an SD card so you can load them directly in to an FS7 or FS7-II. Or you can manually copy the settings from here. If copying the settings in manually I recommend you start by going to the “Files” section of the cameras menu and “Scene File” and import a “standard” default scene file from the cameras internal memory first to ensure you paint settings are at the original factory defaults prior to entering the settings by hand. The easiest way is to load the files linked at the bottom of the page onto an SD card and then go to the files section of the menu to load the scene files into the camera from the SD card.
If you find this LUT useful please consider buying me a cocktail or other beverage. Thank you! It does take a while to develop these LUT’s and contributions are a good incentive for me to create more!
Sony Pro Tour Oslo Feb 8th March 2018
Sony’s Pro Tour is visiting Oslo, Norway on the 8th of March 2018. At this event there will be the opportunity to see some of Sony latest video production kit including cameras from the handheld range like the PXW-FS7M2, PXW-FS5, PXW-Z90 as well as a large range of monitors, vision mixers and related video production technology.
There will be 4 different product areas as follows:
Large Format Sensor
Showing PXW-FS7 II, FS7 & FS5
4K HDR Production
Showing PXW-Z90, PXW-Z150 & HXR-NX80 (TBC)
HD Production
Showing PXW-X70, PXW-X200, HXR-NX100
Live Event Production
Showing MCX-500, RM-30BP, HXR-NX5R, SRG-360, RM-IP10 and an RX0
As well as the exhibits there will be a seminar “HDR for all” from Alister Chapman with some great information on what HDR is, what you can expect from it and how you can use Sony’s cameras to create instant HDR content.
Admission is free. For more information and to register please CLICK HERE.
Aurora Tours winter 2018/2019 – Now better value than ever!
Bookings are now open for my winter 2018/2019 Aurora hunting adventure tours. Click here for the full details.
I’ve been running my Aurora adventure tours for 11 years and so far every trip has seen the Northern Lights. This year I had a couple of guests that had already travelled to Iceland and Finland in search of the Aurora, but had not seen it. So it was wonderful to see their faces when the Northern Lights came out to play for us most nights.

For the last couple of years I have been basing the tours out of Alta in Northern Norway, travelling from Alta to some cabins far off the beaten track at very special place just outside of the very small town of Karasjok. We stay at the cabins for several reasons.
1: It’s very different – only accessible by snow scooter.
2: It’s truly beautiful – a chance to get back to a slower way of life for a few days.
3: Clear skies – this location seems to deliver clear skies when many other areas are cloud covered.
4: Adventure – where else can you stand on the top of a hill and not see anything else man made from horizon to horizon.


So why not come and join me for an adventure you’ll remember forever? I’ll help you take your own photos or video of the Aurora if that’s what you want to do. Or just come and enjoy a bit of Sami culture as our host Oskar cooks traditional meals of reindeer, elk and salmon before we enjoy a traditional Sauna. During the day we go ice fishing, head out up on to the arctic plateaux by snow scooter or go dog sledding through the snow covered trees of the forest.
I’ve worked hard this winter to get the very best deals on the hotel and cabins that we stay at. As a result the cost of the tours is now lower than the past couple of years and I am even able to offer a really amazing early bird deal for those that book and pay 6 months before the tour. Full details here.
The Sony PXW-Z90 – a compact 4K camcorder with auto focus at it’s best!
Normally when I travel up to arctic Norway for my annual Northern Lights expeditions I take a large sensor video camera. Last year it was the Sony FS5, which performed very well and gave me some great results. But this year I decided to down size and instead of taking a bulky camera I chose to take a pre-production sample of Sony’s diminutive new PXW-Z90 camcorder.

On the outside the Z90 looks almost exactly the same as the older PXW-X70 camcorder. I’ve shot several videos with the X70 and it’s a great little camcorder that produces a very good image considering it’s small size. Being a new model I expected the Z90 to offer some small improvements over the X70, but what I didn’t expect was the very big improvements that the Z90 brings.
The Z90 is the first camcorder from Sony to incorporate a new design of sensor. It’s a 1″ type sensor, so like the X70, bigger than you used to find on small handycams, but not as big as the super 35mm sensor found in the FS5, FS7 etc. This is a nice size for this type of camera as it makes it possible to obtain a shallow depth of field by using the cameras built in ND filters (yes- it really does have ND filters built in) and a large aperture. Or if you need a deeper depth of field for easier focussing or run and gun then you can use a smaller aperture by switching out the ND filters. The maximum aperture of the zoom lens is f2.8 but it does stop down to f4 towards the telephoto end.

This new sensor uses a new construction method that allows it to have several layers of electronics immediately below the imager pixels. The “stacked” sensor can as a result incorporate more image processing and a large memory area right under the pixels. This means that the sensor can be read out much more quickly than is normal for this type of camera and as a result rolling shutter is hugely reduced (I didn’t notice any in any of my footage).
As well as a reduction in rolling shutter compared to other similar sensors, the ability to do more on chip image processing appears to bring other advantages as the noise levels from this camera are very low indeed.

The low noise levels mean that this camera performs surprisingly well in low light. Adding in +6dB was not a problem if needed. Even with +15dB of gin the images hold together very well. Clearly the camera is doing a fair bit of electronic noise reduction at higher gain levels and there is a slight increase in image smear as a result. Plus in certain circumstances the noise levels do rise, especially if you have large dark areas amongst in an otherwise brighter scene. In my sample footage during the night time snow scooter ride, which was shot at +15dB gain, you don’t see and noise over the snow, but you can see some grainy noise over the dark jacket of the snow scooter driver (see the frame grab above). The fact that you can push the camera up to +15dB and in most cases get a pretty good image is very nice.

On top of good sensitivity you also have great dynamic range, more than the X70 and enough to make direct HDR shooting and log shooting possible with this tiny hand held camcorder. It doesn’t quite have the dynamic range of an FS5 or FS7, but there is still plenty of range to help deal with challenging lighting situations.
As well as bringing a nice improvement in image quality over the X70 (which is pretty good already) the new sensor brings a vastly improved autofocus system. There are 273 focus detection points which are combined with faster readout, faster on sensor processing and the same AF processing technology as used in the flagship Sony A9 stills camera. This brings a really remarkable autofocus system to this camera. The AF system is a newly developed hybrid system that combines phase detection AF with new algorithms created specifically for video rather than stills photography. At last this is an autofocus system that really works for a video camera. It is intelligent and responsive. There is no hunting for focus, it just seems to get on with the job.

Just about every aspect of the autofocus system can be customised in the camera menu. You can choose between using focus zones, the full image width or selectable focus spot areas. The cameras LCD screen is a touch screen so you tap the screen where you want to focus.
You can also tailor the AF’s response speed, you can adjust the size of the tracking range, using a wide range for occasions when you want the AF to follow an object through the shot, or use a narrow range to restrict the focus depth range.

You can customise how quickly the AF will move from one object to another, from staying locked on to a faster more responsive setting.
In addition it has that wonderful Sony face detection system that allows you to choose one face out of a crowd of people using the thumb stick on the hand grip or the touch screen. Once selected the camera will stay locked to that face.

While I was up in Norway it was between -24c and -30c. In those temperatures you really don’t want to take your mittens off for more than a minute or so. Being able to rely on the cameras autofocus allowed me to keep my fingers warm. Not one shot out of all my rushes from the trip has incorrect focus. That is truly remarkable and made shooting with this camera a real pleasure. I’m not saying that you should always use autofocus. When possible I love to be able to pick and choose how I focus. But in many situations or for less experienced shooters this autofocus system will be a game changer.
For my test shoot in Norway I mostly used Picture Profile number 10 which gives an instant HDR workflow thanks to the use of Hybrid Log Gamma. Using HLG you can shoot as you would do with any other conventional camera. Then take the footage and play it back in HDR on an HDR TV without any grading or other post production work. I also shot at a couple of locations using S-Log2 to test how that worked (I was shooting in UHD and the camera is 8 bit in UHD. For 8 bit I prefer S-Log2 over S-Log3). The Z90 has 10 picture profiles that allow you to tailor how the image looks, including a crunchy DSLR type look. Some filmic looks using Sony’s cinegammas as well as profiles for shooting S-Log2, S-Log3 and Hybrid Log Gamma (HLG).

The Z90 has Sony’s XAVC-L codec. This high quality codec offers 10 bit 4:2:2 broadcast quality recordings in HD and 8 bit 4:2:0 recordings in UHD (3840 x 2160). The camera records to SDXC cards, so media costs are very low. There are two card slots and you can record to each slot singly, record to one card after the other or dual record on to both cards at the same time for redundancy and an instant back. You can even use each of the cameras two record buttons to control the records on each card independently should you wish.

The Z90 is a small camcorder and like all small camcorders this doesn’t leave much room for large buttons and switches. The menu system and many of the cameras functions can be controlled via the touch screen LCD or the small joystick/thumb stick on the hand grip. Iris, shutter speed and gain each have a dedicated access button that selects the function.

Then you use the thumb stick to select the value you want, or you can set each item to Auto. In addition there is a switch to put the camera into full auto on the rear of the camera. Just below the full auto switch is the control switch for the ND filters.

The lens is a Zeiss 12x optical zoom with built in optical image stabilisation. It is controlled by a single ring around the barrel of the lens which can be switched between focus control or zoom control. In addition there is the usual zoom rocker on the handgrip as well as a small zoom switch on the top handle. In addition to the optical stabilisation the camera also has Sony’s electronic “super steadyshot” stabilisation that can be used in addition to the optical stabilisation. Another very handy function is “Clear Image Zoom”. This is a form of electronic zoom function that makes use of a database of textures and object types. When using clear image zoom the camera uses this database to apply just the right amount of image processing during the electronic zoom process. In most cases you can’t see any degradation of the image when using clear image zoom. I left it on for all of the Norway shoot as it turns the 12x zoom into a very handy 18x zoom.


After doing so much shooting on large sensor cameras with restricted zoom ranges getting back to a small camera with a big zoom range was fun. For future Norway trips I am very tempted to switch to a camera like the Z90.

The Z90 body is almost exactly the same as the X70. The cameras top handle has 2x XLR connectors with the audio controls for the two channels on the opposite side of the handle.

If you want to make the camera more compact the handle can be removed, but when you do this you will no longer have any XLR connectors. Instead you will have an MI shoe on the top of the camera body that can be used to connect a Sony UWP-D radio mic or a n XLR adapter. There is also a stereo microphone built into the main body of the camera, so even with the hand grip removed there are plenty of audio options.

The flip out LCD panel acts as the cameras main viewfinder. Opening and closing the LCD screen turns the camera on and off. It starts up and shuts down very quickly. The resolution of the LCD is similar to most other modern camera LCD’s. It’s adequate for this type of camera, but it isn’t the highest resolution screen in the world. To check focus you have a button on the top of the hand grip to activate the image magnification function and the camera has a coloured peaking system to help pick out what is, and what is not in focus. I suspect that with this particular camera, many users will take advantage of the cameras excellent auto focus system and there is a lot of feedback to the user of how this is working including coloured boxes that indicate exactly what the camera is focussing on.

As well as the side LCD panel there is also a small OLED electronic viewfinder on the rear of the camera. This is very useful for use in very bright sunlight, but it is rather small.
The cameras gain, shutter and iris functions each have a dedicated button on the side of the camera. One push of the appropriate button enables that function to be controlled by a small dial wheel just under the front of the lens.

Press the shutter button and the wheel controls the shutter. Press the gain button and the wheel controls the gain. Overall this system works well, but I would still prefer a separate gain switch and a shutter speed up/down switch. On the rear of the hand grip there is a small joystick that sits under your thumb. You can use this thumb-stick to set many of the cameras settings and to navigate through the cameras menu system. In addition you can use the LCD touchscreen to navigate through the menu as well as select your autofocus points etc.
The PXW-Z90 is a small camera that packs a very big punch. It’s never going to give the fine degree of image control that you get with most large sensor cameras and it won’t quite deliver the same image quality either (although it’s really, really close). If you need a small, discrete camera, perhaps you travel a lot, or you just need a “B” camera, then the Z90 offers a possible solution. I haven’t even touched on all the streaming, ftp and wifi capabilities of this camera. The auto focus system is a delight to use and it’s the best AF system I’ve ever come across on a video camera. The new sensor in the Z90 is clearly a fairly large step forwards from the sensor in the previous similar model the X70, it has more dynamic range, a lot less rolling shutter (not that it’s a big problem on the X70) and the final images look better as a result. I might just have to add one to my camera collection.
If you would like to join me on one of my adventures to arctic Norway please see take a look at this page. I’ve been running these trips for 11 years and EVERY tour has seen the Northern Lights. This year was no exception and we got to see some really great Auroras and had a great time dog sledding, ice fishing and exploring the Finnmarksvidda.
- Film making workshops with London Film School, March 2025
- CVP Brussels Technology Showcase
- Burano – What’s it like to shoot with Livestream
- Film making workshop in Dubai, 25th May 2024
What shutter speed to use if shooting 50p or 60p for 50i/60i conversion.
An interesting question got raised on Facebook today.
What shutter speed should I use if I am shooting at 50p so that my client can later convert the 50p to 50i? Of course this would also apply to shooting at 60p for 60i conversion.
Lets first of all make sure that we all understand that what’s being asked for here is to shoot at 50(60) progressive frames per second so that the footage can later be converted to 25(30) frames per second interlace – which has 50(60) fields.
If we just consider normal 50p or 60p shooing the the shutter speed that you would chooses on many factors including what you are shooting and how much light you have and personal preference.
1/48 or 1/50th of a second is normally considered the slowest shutter speed at which motion blur in a typical frame no longer significantly softens the image. This is why old point and shoot film cameras almost always had a 1/50th shutter, it was the slowest you could get away with.
Shooting with a shutter speed that is half the duration of the cameras frame rate is also know as using a 180 degree shutter, a very necessary practice with a film movie camera due to the way the mechanical shutter must be closed while the film is physically advanced to the next frame. But it isn’t essential that you have the closed shutter period with an electronic camera as there is no film to move, so you don’t have to use a 180 degree shutter if you don’t want to.
There is no reason why you can’t use a 1/50th or 1/60th shutter when shooting at 50fps or 60fps, especially if you don’t have a lot of light to work with. 1/50(1/60) at 50fps(60fps) will give you the smoothest motion as there are no breaks in the motion between each frame. But many people like to sharpen up the image still further by using 1/100th(1/120th) to reduce motion blur. Or they prefer the slightly steppy cadence this brings as it introduces a small jump in motion between each frame. Of course 1/100th needs twice as much light. So there is no hard and fast rule and some shots will work better at 1/50th while others may work better at 1/100th.
However if you are shooting at 50fps or 60fps so that it can be converted to 50i or 60i, with each frame becoming a field, then the “normal” shutter speed you should use will be 1/50th or 1/60th to mimic a 25fps-50i camera or 30fps-60i camera which would typically have it’s shutter running at 1/50 or 1/60th. 1/100th(120th) at 50i(60i) can look a little over sharp due to an increase in aliasing due to the way a interlace video field only has half the resolution of the full frame. Particularly with 50p converted to 50i as there is no in-camera anti-aliasing and each frame will simply have it’s resolution divided by 2 to produce the equivalent of a single field. When you shoot with a “real” 50i camera line pairs on the sensor are combined and read out together as a single field line and this slightly softens and anti-aliases each of fields. 50i has lower vertical resolution than 25p. But with simple software conversions from 50p to 50i this anti-aliasing does not occur. If you combine that with a faster than typical shutter speed the interlaced image can start to look over sharp and may have jaggies or color moire not present in the original 50/60p footage.
How does the Panasonic EVA1 stack up against the Sony FS7 and FS5?
This is a question a lot of people are asking. As I’ve mentioned in other recent posts, sensors have reached a point where it’s very difficult to bring out a camera where the image quality will be significantly different from any other on the market for any given price point. Most differences will be in things like codec choices or trading off a bit of extra resolution for sensitivity etc. Other differences will be in the ergonomics, lens mounts and battery systems.
So it’s interesting to see what Keith Mullin over at Z-Systems thought of the EVA1. Keith knows his stuff and Z-Systems are not tied to any one particular brand.
Overall as expected there isn’t a huge difference in image quality between any of the 3 cameras. The EVA1 seems weaker in low light which is something I would have predicted given the higher pixel count. The dual ISO mode seems not to be anywhere near the same as the really very good dual ISO mode in the Varicam LT.
Why not take a look at the full article and video for yourself. http://zsyst.com/2017/12/panasonic-eva1-first-look/