 With the new FX6 making use of SD cards to record higher bit rate codecs the number of gigabytes of SD card media that many user will will be getting through is going to be pretty high. The more gigabytes of memory that you use, the more the chance of coming across a duff memory cell somewhere on your media.
Normally solid state media will avoid using any defective memory areas. As a card ages and is used more, more cells will become defective and the card will identify these and it should avoid them next time. This is all normal, until eventually the memory cell failure rate gets too high and the card becomes unusable – typically after hundreds or even thousands of cycles.
However – the card needs to discover where any less than perfect memory cells are and there is a chance that some of the these duff cells could remain undiscovered in a card that’s never been completely filled before. I very much doubt that every SD card sold is tested to its full capacity, the vast volume of cards made and time involved makes this unlikely.
For this reason I recommend that you consider testing any new SD cards using software such as H2Testw for windows machines or SDSpeed for Mac’s. However be warned to fully test a large card can take a very, very long time.
As an alternative you could simply place the card in the camera and record on it until its full. Use the highest frame rate and largest codec the card will support to fill the card as quickly as possible. I would break the recording up into a few chunks. Once the recording has finished check for corruption by playing the clips back using Catalyst Browse or your chosen edit software.
This may seem like a lot of extra work, but I think it’s worth it for piece of mind before you use your new media on an important job.
Tag Archives: recording
XAVC-I v ProResHQ, multi-generation test.
I often hear people saying that XAVC-I isn’t good enough or that you MUST use ProRes or some other codec. My own experience is that XAVC-I is actually a really good codec and recording to ProRes only ever makes the very tiniest (if any) difference to the finished production.
I’ve been using XAVC-I for over 8 years and it really worked very well for me. I’ve also tested and compared it against ProRes many times and I know the differences are very small, so I am always confident that when using XAVC-I that I will get a great result. But I decided to make this video to show just how close they are.
It was shot with a Sony FX6 using internal XAVC-I (class 300) on an SD card alongside an external recording using ProResHQ on a Shogun 7. I deliberately chose to use Cine EI and S-Log3 at the cameras high base ISO of 12,800 as noise will stress any codec that little bit harder and adding a LUT adds another layer of complexity that might show up any issues all just to make the test that little bit tougher. The slightly higher noise level of the high base ISO also allows you to see how each codec handles noise more easily.
A sample clip of each codec was place in the timeline (DaVinci Resolve) and a caption added. This was then rendered out, ProRes HQ rendered using ProRes HQ and the XAVC-I files rendered to XAVC-I. So for most of the examples seen the XAVC-I files have been copied and re-encoded 5 times plus the encoding to the file uploaded to YouTube, plus YouTubes own encoding, a pretty tough test.
Because in most workflows I don’t believe many people will use XAVC-I in post production as an intermediate codec I also repeated the tests with the XAVC-I rendered to ProResHQ 5 times over as this is probably more representative of a typical real world workflow. These examples are shown at the end of the video. Of course the YouTube compression will restrict your ability to see some of the differences between the two codecs. But, this is how many people will be distributing their content. Even if not via YouTube, via other highly compressed means, so it’s not an unfair test and reflects many real world applications.
Where the s709 LUT has been added it was added AFTER each further copy of the clip, so this is really a “worst case scenario”. Overall in the end the ProRes HQ and XAVC-I are remarkably similar in performance. In the 300% blow up you can see differences between the XAVC-I that is 6 generations old compared to the 6th generation ProRes HQ if you look very carefully at the noise. But the differences are very, very hard to spot and going 6 generations of XAVC-I is not realistic. It was designed a s a camera codec. In the same test where the XAVC was rendered to ProRes HQ for each post production generation any difference is incredibly hard to find even when magnified 300%. I am not claiming that XAVC-I Class 300 is as good as ProRes HQ. But I think it is worth considering what you need when shooting. Do you really want to have to use an external recorder, do you really want to have to deal with files that are 3 to 4 times larger. Do you want to have to remember to switch recording methods between slow motion and normal speeds? For most productions I very much doubt that the end viewer would ever be able to tell the difference between material shot using XAVC-I class 300 and ProResHQ. And that audience certainly isn’t going to feel they are watching a substandard image, and that’s what counts.
There is so much emphasis placed on using “better” codecs that I think some people are starting to believe that XAVC-I is unusable or going to limit what they can do. This isn’t the case. It is a pretty good codec and frankly if you can’t get a great looking image when using XAVC then a better codec is unlikely to change that.
FX6-FX9 XAVC Card Recording Times
How much can I fit on a SD card, CFExpress card, SxS or XQD card is a question that comes up regularly. So I have prepared a table of the typical record times for most of the different XAVC-I and XAVC-L codecs and frame rates . Originally drawn up for the FX6 this table applies equally to any other Sony camcorder that uses the same codecs, including the PXW-FX9, PMW-F5 and F55 as well as the FS7 and many others.
Do note that the times given are approximate and do not include proxies. Not every frame rate and codec is included but you should be able to figure out the approximate record time for most cards, codecs and frame rates using this table.
| CODEC/FRAME RATE | 32GB | 64GB | 80GB | 128GB | 256GB |
| UHD/4K XAVC-I 24/25p | 16 | 32 | 40 | 64 | 128 |
| UHD/4K XAVC-I 30p | 13 | 26 | 33 | 53 | 106 |
| UHD/4K XAVC-I 50p | 8 | 15 | 19 | 31 | 62 |
|
UHD/4K XAVC-I 60p |
6 | 13 | 15 | 26 | 52 |
| UHD XAVC-I 100fps | 4 | 7 | 10 | 15 | 30 |
| UHD XAVC-I 120fps | 3 | 6 | 8 | 12 | 24 |
| UHD XAVC-L 24/25/30p | 39 | 79 | 96 | 158 | 315 |
| UHD XAVC-L 50/60p 8bit | 26 | 51 | 63 | 103 | 206 |
| UHD XAVC-L 24/25/30p 100fps S&Q 8 bit | 10 | 19 | 24 | 39 | 78 |
| UHD XAVC-L 50/60p 120fps S&Q 8 bit | 8 | 16 | 20 | 32 | 64 |
| UHD XAVC-L 50/60p 100fps S&Q 8 bit | 15 | 30 | 37 | 61 | 122 |
| UHD XAVC-L 50/60p S&Q 120fps 8 bit | 13 | 25 | 31 | 51 | 102 |
| HD CODEC/FRAME RATE | 32GB | 64GB | 80GB | 128GB | 256GB |
| HD XAVC-I 24/25/30p | 34 | 67 | 83 | 135 | 270 |
| HD XAVC-I 50/60p | 17 | 35 | 43 | 70 | 140 |
| HD XAVC-I 100fps | 10 | 21 | 26 | 42 | 84 |
| HD XAVC-I 120fps | 8 | 17 | 21 | 35 | 70 |
| HD XAVC-I 240fps (lower quality) | 4 | 8 | 10 | 17 | 35 |
| HD XAVC-L50 24/25/30p | 75 | 150 | 180 | 300 | 600 |
| HD XAVC-L50 50/60p | 72 | 144 | 175 | 288 | 576 |
| HD XAVC-L50 24/25/30p S&Q 120fps | 36 | 72 | 88 | 144 | 288 |
| HD XAVC-L50 50/60p S&Q 240fps | 18 | 36 | 44 | 72 | 124 |
| HD XAVC-L30 24/25/30p | 101 | 201 | 250 | 405 | 810 |
| HD XAVC-L30 50/60p | 96 | 193 | 237 | 387 | 774 |
| HD XAVC-L30 120fps | 48 | 96 | 118 | 193 | 387 |
| HD XAVC-L30 240fps | 24 | 48 | 59 | 96 | 193 |

Raw Isn’t Magic. With the right tools Log does it too.
Raw can be a brilliant tool, I use it a lot. High quality raw is my preferred way of shooting. But it isn’t magic, it’s just a different type of recording codec.
All too often – and I’m as guilty as anyone – people talk about raw as “raw sensor data” a term that implies that raw really is something very different to a normal recording. In reality it’s really not that different. When shooting raw all that happens is that the video frames from the sensor are recorded before they are converted to a colour image. A raw frame is still a picture, it’s just that it’s a bitmap image made up of brightness values, each pixel represented by a single brightness code value rather than a colour image where each location in the image is represented by 3 values one for each of Red, Green and Blue or Luma, Cb and Cr.
As that raw frame is still nothing more than a normal bitmap all the cameras settings such as white balance, ISO etc are in fact baked in to the recording. Each pixel only has one single value and that value will have been determined by the way the camera is setup. Nothing you do in post production can change what was actually recorded. Most CMOS sensors are daylight balanced, so unless the camera adjusts the white balance prior to recording – which is what Sony normally do – your raw recording will be daylight balanced.
Modern cameras when shooting log or raw also record metadata that describes how the camera was set when the image was captured.
So the recorded raw file already has a particular white balance and ISO. I know lots of people will be disappointed to hear this or simply refuse to believe this but that’s the truth about a raw bitmap image with a single code value for each pixel and that value is determined by the camera settings.
This can be adjusted later in post production, but the adjustment range is not unlimited and it is not the same as making an adjustment in the camera. Plus there can be consequences to the image quality if you make large adjustments.
Log can be also adjusted extensively in post too. For decades feature films shot on film were scanned using 10 bit Cineon log (which is the log gamma curve S-Log3 is based on) and 10 bit log used for post production until 12 bit and then 16 bit linear intermediates came along like OpenEXR. So this should tell you that actually log can be graded very well and very extensively.
But then many people will tell you that you can’t grade log as well as raw. Often they will give photographers as an example where there is a huge difference between what you can do with a raw photo and a normal image. But we also have to remember this is typically comparing what you can do with a highly compressed 8 bit jpeg file and an often uncompressed 12 or 14 bit raw file. It’s not a fair comparison, of course you would expect the 14 bit file to be better.
The other argument often given is that it’s very hard to change the white balance of log in post, it doesn’t look right or it falls apart. Often these issues are nothing to do with the log recording but more to do with the tools being used.
When you work with raw in your editing or grading software you will almost always be using a dedicated raw tool or raw plugin designed for the flavour of raw you are using. As a result everything you do to the file is optimised for the exact flavour of raw you are dealing with. It shouldn’t come as a surprise to find that to get the best from log you should be using tools specifically designed for the type of log you are using. In the example below you can see how Sony’s Catalyst Browse can perfectly correctly change the white balance and exposure of S-log material with simple sliders just as effectively as most raw formats.
Applying the normal linear or power law (709 is power law) corrections found in most edit software to Log won’t have the desired effect and basic edit software rarely has proper log controls. You need to use a proper grading package like Resolve and it’s dedicated log controls. Better still some form of colour managed workflow like ACES where your specific type of log is precisely converted on the fly to a special digital intermediate and the corrections are made to the intermediate file. There is no transcoding, you just tell ACES what the footage was was shot on and magic happens under the hood. Once you have done that you can change the white balance or ISO of log material in exactly the same way as raw. There is very, very little difference.

When people say you can’t push log, more often than not it isn’t a matter of can’t, it’s a case of can – but you need to use the right tools.

Less compression or a greater bit depth are where the biggest differences between a log or raw recording come from, not so much from whether the data is log or raw. Don’t forget raw is often recorded using log, which kind of makes the “you can’t grade log” argument a bit daft.
Camera manufactures and raw recorder manufacturers are perfectly happy to allow everyone to believe raw is magic and worse still, let people believe that ANY type of raw must be better than all other types of recordings. Read though any camera forum and you will see plenty of examples of “it’s raw so it must be better” or “I need raw because log isn’t as good” without any comprehension of what raw is and how in reality it’s the way the raw is compressed and the bit depth that really matters.
If we take ProRes Raw as an example: For a 4K 24/25fps file the bit rate is around 900Mb/s. For a conventional ProRes HQ file the bit rate is around 800Mb/s. So the file size difference between the two is not at all big.
But the ProRes Raw file only has to store around 1/3 as many data points as the component ProResHQ file. As a result, even though the ProRes Raw file often has a higher bit depth, which in itself usually means better a better quality recording, it is also much, much less compressed and as a result will have fewer artefacts.
It’s the reduced compression and deeper bit depth possible with raw that can lead to higher quality recordings and as a result may bring some grading advantages compared to a normal ProRes or other compressed file. The best bit is there is no significant file size penalty. So you have the same amount of data, but you data should be of higher quality. So given that you won’t need more storage, which should you use? The higher bit depth less compressed file or the more compressed file?
But, not all raw files are the same. Some cameras feature highly compressed 10 bit raw, which frankly won’t be any better than most other 10 bit recordings as you are having to do all the complex math to create a colour image starting with just 10 bit. Most cameras do this internally at at least 12 bit. I believe raw needs to be at least 12 bit to be worth having.
If you could record uncompressed 12 bit RGB or 12 bit component log from these cameras that would likely be just as good and just as flexible as any raw recordings. But the files would be huge. It’s not that raw is magic, it’s just that raw is generally much less compressed and depending on the camera may also have a greater bit depth. That’s where the benefits come from.
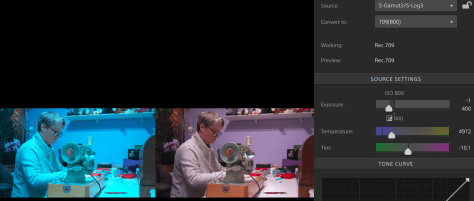
Why Does S-Log Recorded Internally Look Different To S-Log Recorded On An External Recorder?
I have written about this many times before, but I’ll try to be a bit more concise here.
So – You have recorded S-Log2 or S-Log3 on your Sony camera and at the same time recorded on an external ProRes Recorder such as an Atomos, Blackmagic or other ProRes recorder. But the pictures look different and they don’t grade in the same way. It’s a common problem. Often the external recording will look more contrasty and when you add a LUT the blacks and shadow areas come out very differently.
Video signals can be recorded using a several different data ranges. S-Log2 and S-Log3 signals are always Data Range. When you record in the camera the cameras adds information to the recording called metadata that tells your editing or grading software that the material is Data Range. This way the edit and grading software knows how to correctly handle the footage and how to apply any LUT’s.
However when you record to an external recorder the external recorder doesn’t have this extra metadata. So the recorder will record the Data Range signal that comes from the camera but it doesn’t add the metadata. The ProRes codec is normally used for Legal Range video and by default, unless there is metadata that says otherwise, edit and grading software will assume any ProRes recordings to be Legal Range.
So what happens is that your edit software takes the file, assumes it’s Legal Range and handles it as a Legal Range file when in fact the data in the file is Data Range. This results in the recording levels being transposed into incorrect levels for processing. So when you add a LUT it will look wrong, perhaps with very dark shadows or very bright over exposed looking highlights. It can also limit how much you can grade the footage.
What Can We Do About It?
Premiere CC.
You don’t need to do anything in Premiere for the internal .mp4 or MXF recordings. They are handled correctly but Premiere isn’t handling the ProRes files correctly.
My approach for this has always been to use the legacy fast color corrector filter to transform the input range to the required output range. If you apply the fast color corrector filter to a clip you can use the input and output level sliders to set the input and output range. In this case we need to set the output black level to CV16 (as that is legal range black) and we need to set output white to CV235 to match legal range white. If you do this you will then see that the external recording appears to have almost exactly the same values as the internal recording. However there is some non-linearity in the transform, it’s not quite perfect.

Now when you apply a LUT the picture and the levels are more or less what you would expect and almost identical to the internal recordings. I say almost because there is a slight hue shift. I don’t know where the hue shift comes from. In Resolve the internal and external recordings look pretty much identical and there is no hue shift. In Premiere they are not quite the same. The hue is slightly different and I don’t know why. My recommendation – use Resolve, it’s so much better for anything that needs any form of grading or color correction. DaVinci Resolve: It’s very easy to tell Resolve to treat the clips as Data Range recordings. In the media bin, right click on the clip and under “clip attributes” change the input range from “auto” to “full”. If you don’t do this DaVinci Resolve will assume the ProRes file to be legal range and it will scale the clip incorrectly in the same way as Premiere does. But if you tell Resolve the clip is full range then it is handled correctly.
Why I Choose To Shoot ProRes Raw with the FS5
This is a much discussed topic right now, so as I promised in my last article about this, I have put together a video. Unfortunately YouTube’s compression masks many of the differences between the UHD XAVC and the ProRes Raw, but you can still see them, especially on the waveform scopes.
To really appreciate the difference you should watch the video on a large screen at at high quality, preferably 4K.
Banding in your footage. What Causes It, is it even there?
Once again it’s time to put pen to paper or fingers to keyboard as this is a subject that just keeps coming up again and again.
People really seem to have a lot of problems with banding in footage and I don’t really fully understand why as it’s something I only ever really encounter if I’m pushing a piece of material really, really hard in post production. General the vast majority of the content I shoot does not exhibit problematic banding, even the footage I shoot with 8 bit cameras.
First things first – Don’t blame it on the bits. Even an 8 bit recording (from a good quality camera) shouldn’t exhibit noticeable banding. An 8 bit recording can contain up to 13 million tonal values. It’s extremely rare for us to shoot luma only, but even if you do it will still have 235 shades and these steps in standard dynamic range are too small for most people to discern so you shouldn’t ever be able to see them. I think that when most people see banding they are not seeing teeny, tiny almost invisible steps what most people see is something much more noticeable – so where is it coming from?
It’s worth considering at this stage that most TV’s, monitors and computer screens are only 8 bit, sometimes less! So if you are looking at one camera and it’s banding free and then you look at another and you see banding, in both cases you are probably looking at an 8 bit image, so it can’t just be the capture bit depth that causing the problem as you cant see 10 bit steps on an 8 bit monitor.
So what could it be?
A very common cause of banding is compression. DCT based codecs such as Jpeg, MJPEG, H264 etc break the image up into small blocks of pixels called macro blocks. Then all the pixels in each block is processed in a similar manner and as a result sometimes there may be a small step between each block or between groups of blocks across a gradient. This can show up as banding. Often we see this with 8 bit codecs because typically 8 bit codecs use older technology or are more highly compressed. It’s not because there are not enough code values. Decreasing the compression ratio will normally eliminate the stepping.
Scaling between bit depths or frame sizes is another very common cause of banding. It’s absolutely vital that you ensure that your monitoring system is up to scratch. It’s very common to see banding in video footage on a computer screen as the video data levels are different to computer data levels and in addition there may also be some small gamma differences so the image has to be scaled on the fly. In addition computer desktops runs at one bit range, the HDMI output another, so all kinds of conversions are taking place that can lead to all kinds of problems when you go from a video clip, to computer levels, to HDMI levels. See this article to fully understand how important it is to get your monitoring pipeline properly sorted. https://www.xdcam-user.com/2017/06/why-you-need-to-sort-out-your-post-production-monitoring/
Look Up Tables (LUT’s) can also introduce banding. LUT’s were never really intended to be used as a quick fix grade, the intention was to use them as an on-set reference or guide, not the final output. The 3D LUT’s that we typically use for grading break the full video range into bands and each band will apply a slightly different correction to the footage than the band above or below. These bands can show up as steps in the LUT’s output, especially with the most common 17x17x17 3D LUT’s. This problem gets even worse if you apply a LUT and then grade on top – a really bad practice.
Noise reduction – In camera or postproduction noise reduction will also often introduce banding. Very often pixel averaging is used to reduce noise. If you have a bunch of pixels that are jittering up and down taking an average value for all those pixels will reduce the noise, but then you can end up with steps across a gradient as you jump from one average value to the next. If you shoot log it’s really important that you turn off any noise reduction (if you can) when you are shooting because when you grade the footage these steps will get exaggerated. Raising the ISO (gain) in a camera also makes this much worse as the cameras built in NR will be working harder, increasing the averaging to compensate the increased noise.
Coming back to 8 bit codecs again – Of course a similar quality 10 bit codec will normally give you more picture information than an 8 bit one. But we have been using 8 bits for decades, largely without any problems. So if you can shoot 10 bit you might get a better end result. But also consider all the other factors I’ve mentioned above.
SD Cards – how long do they last?
This came up on facebook the other day, how long do SD cards last?
First of all – I have found SD cards to be pretty reliable overall. Not as reliable as SxS cards or XQD cards, but pretty good generally. The physical construction of SD cards has let me down a few times, the little plastic fins between the contacts breaking off. I’ve had a couple of cards that have just died, but I didn’t loose any content as the camera wouldn’t let me record to them. Plus I have also had SD cards that have given me a lot of trouble getting content and files off them. But compared to tape, I’ve had far fewer problems with solid state media.
But something that I don’t think most people realise is that a lot of solid state media ages the more you use it. In effect it wears out.
There are a couple of different types of memory cell that can be used in solid state media. High end professional media will often use single level memory cells that are either on or off. These cells can only store a single value, but they tend to be fast and extremely reliable due to their simplicity. But you need a lot of them in a big memory card. The other type of cell found in most lower cost media is a multi-level cell. Each multi-level cell stores a voltage and the level of the voltage in that cell represents many different values. As a result each cell can store more than one single value. The memory cells are insulated to prevent the voltage charge leaking away. However each time you write to the cell the insulation can be eroded. Over time this can result in the cell becoming leaky and this allows the voltage in the cell to change slightly resulting in a change to the data that it holds. This can lead to data corruption.
So multi level cards that get used a lot, may develop leaky cells. But if the card is read reasonably soon after it was written to (days, weeks, a month perhaps) then it is unlikely that the user will experience any problems. The cards include circuitry designed to detect problem cells and then avoid them. But over time the card can reach a point where it no longer has enough memory to keep mapping out damaged cells, or the cells loose there charge quickly and as a result the data becomes corrupt.
Raspberry Pi computers that use SD cards as memory can kill SD cards in a matter of days because of the extremely high number of times that the card may be written to.
With a video camera it will depend on how often you use the cards. If you only have one or 2 cards and you shoot a lot I would recommend replacing the cards yearly. If you have lots of cards either use one or two and replace them regularly or try to cycle through all the cards you have to extend their life and avoid any one card from excessive use which might make it less reliable than the rest.
One thing regular SD cards are not good for is long term storage (more than a year and never more than 5 years) as the charge in the cells will leak away over time. There are special write once SD cards designed for archival purposes where each cell is permanently fused to either On or Off. Most standard SD cards, no matter how many times they have been used won’t hold data reliably beyond 5 years.
Raw and the PXW-FS5
This isn’t a “how to” guide. There are many different recorders that can be used to record raw from the FS5 and each would need it’s own user guide. This is an overview of what raw is and how raw recording works to help those that are a bit confused, or not getting the best results.
First of all – you need to have the raw upgrade installed on the FS5 and it must be set to output raw. Then you need a suitable raw recorder. Just taking the regular SDI or HDMI output and recording it on an external recorder is not raw.
Raw is raw data direct from the cameras sensor with very little image processing. It isn’t even a color image, it won’t become color until some external processing, often called “De-Bayer” is done to convert the raw data to a color image.
For raw to work correctly the camera has to be set up just right. On the FS5 you should use Picture Profile 7. Don’t try and use any other profile, don’t try and shoot without a profile. You must use Picture Profile 7 at it’s factory default settings. In addition don’t add any gain or change the ISO from 3200 (2000 ISO from version 4.02 firmware). Even if the scene is a dark one, adding gain will not help and it may in fact degrade the recorded image.
White balance is set using the appropriate SGamut + color temperature preset chosen from within Picture Profile 7, there are only 3 to choose from for S-Gamut, but with a raw workflow you will normally fine tune the white balance in post. No other color matrix or white balance method should be used. Trying to white balance any other way may result in the sensor data being skewed or shifted in a way that makes it hard to deal with later on.
All of the above is done to get the best possible, full dynamic range data off the sensor and out of the camera.
If you are viewing the S-Log2 (ie don’t have viewfinder gamma assist enabled) then the exposure level that Sony recommend is to have a white card at 60%. So consider setting the zebras to 60%. Don’t worry that this may look a bit dark or appear to be a low level, but that’s the level you should start with… More about exposure later on.
This raw data is then passed down the SDI cable to the external recorder. The external recorder will then process it, turn it into a color signal (de-bayer) and add a gamma curve so that it can be viewed on the recorders screen. Exactly what it will look like on the monitor screen will depend on how the recorder is set up. IF the recorder is set to show S-Log2, then the recorders screen and the FS5’s LCD should look similar. However you might find that it looks very different to what you are seeing on the FS5’s LCD screen. This is not unexpected. If the recorder is setup to convert the raw to Rec-709 for display then the image on the recorder will be brighter and show more contrast, in fact it should look “normal”.
Under the surface however, the external raw recorder is going to be doing one of two things (normally at least). It’s either going to be recording the raw data coming from the camera as it is, in other words as raw. Or it will be converting the raw data to S-Log2 and recording it as a conventional ProRes or DNxHR video file. Either way when you bring this footage in to post production it will normally appear as a flat, low contrast S-Log2 image rather than a bright, contrasty rec-709 image. So understand that the footage will normally need to be graded or have some other changes made to it to look nice.
Recording the actual raw data will give you the best possible information that you can get from the FS5 to work with in post production. The downside is that the files will be huge and will take a fair amount of processing power to work with. Recording a ProRes or DNxHR video file with S-Log2 gamma is second best. You are throwing away a bit of image quality (going from 12 bit linear down to 10 bit log) but the files should still be superior to the 8 bit UHD internal recordings or even an external recording done via the HDMI which is also limited to 8 bit in UHD.
Most raw recorders have the ability to add a LUT – Look Up Table – to the image viewed on the screen. The purpose of the LUT is to convert the S-Log2/raw to a conventional gamma such as Rec-709 so that the picture looks normal. If you are using a LUT then the normal way to do things is to view the normal looking picture on the recorders screen while the recorder continues to record S-Log2 or raw. This is useful as the image on the screen looks normal so it is easier to judge exposure. With a 709 LUT you would expose the picture so that the image on the recorders screen looks as bright as normal, skin tones would be the usual 70% (ish) and white would be 90%.
There is a further option and that is to “bake in the LUT”. This means that instead of just using the LUT to help with monitoring and exposure you actually record the image that you see on the recorders screen. This might be useful if you don’t have any time for grading, but… and it’s a big BUT…. you are now no longer recording S-log2 or raw. You will no longer have the post production grading flexibility that raw or S-Log2 provide and for me at least this really does defeat the whole point of recording raw.
Exposure: Raw will not help you in low light. Raw needs to be exposed brightly (there are some data limitations in the shadows with 12 bit linear raw compared to 16 bit raw and possibly even 10 bit log). If viewing S-Log2 then Sony’s recommendation is to have a white card or white piece of paper at 60%. I consider that to be the absolute minimum level you can get away with. The best results will normally be achieved if you can expose that white card or piece of paper at around 70% to 75% (when looking at an S-Log2 image). Skin tones would be around 55%. If you expose like this you may need to use a different LUT on the recorder to ensure the picture doesn’t look over exposed on the recorders monitor screen. Most of the recorders include LUT’s that have offsets for brighter exposures to allow for this. Then in post production you will also want a LUT with an exposure offset to apply to the S-Log2 recordings. You can use the search function (top right) to find my free LUT sets and download them. Exposing that bit brighter helps get around the shadow data limitations of 12 bit linear raw and pushes the image up into the highlights where there is more data.
SEE ALSO: https://www.sony.co.uk/pro/article/broadcast-products-FS5-raw-shooting-tips
Can I use 8 bit to record S-Log?
My opinion is that while 8 bit, 422 can be used for S-Log, it is not something I would recommend. I’d rather use a cinegamma with 8 bit recording where possible. 10 bit 422 S-log is another matter altogether, this is well worth using and works very well indeed. It’s not so much whether you use 444, 422 or maybe even 420, but the number of bits that you use to record your output.
What you have to consider is this. With 8 bit, you have 240 shades of grey from black to super white. Of the 256 bits available, 16 are used for sync, white is at 235 and super white 256 so black to 100% white is only 219. With Rec-709, standard gamma, on an F3 and most other cameras you get about an 8 stop range, so each stop of exposure has about 30 shades of grey. The stops above middle grey where faces and skin tones are have the most shades, often around 50 or more. Then you hit the knee at 90% and each stop only has a handful of shades (why over exposure looks bad).
When you go to S-Log, you now have around 13 stops of DR (14 with S-log2 and S-Log3), so now each stop above middle grey only has approx 18 shades. Potentially using 8 bit for S-Log, before you even start to grade, your image will be seriously degraded if you have any flat or near flat surfaces like walls or the sky in your scene.
Now think about how you expose S-Log. Mid grey sits at 38% when you shoot. If you then grade this to Rec-709 for display on a normal TV then you are going to stretch the lower end of your image by approx 30%, so when you stretch you 18 steps of S-Log grey to get to Rec-709 you then end up with the equivalent of only around 12 shades of grey for each stop, that’s less than half of what you would have if you had originally shot using Rec-709. I’m sure most of us have at some point seen banding on walls or the sky with standard gammas and 8 bit, just imagine what might happen if you effectively halve the number of grey shades you have.
By way of a contrast, just consider that 10 bit has 956 grey shades from black to super white. the first 64 bits are used for sync and other data, 100% white is bit 940 and super white 1019. So when shooting S-Log using 10 bit you have about 73 grey shades per stop, a four fold improvement over 8 bit S-Log so even after shooting S-Log and grading to Rec-709 there are still almost twice as many grey shades than if you had originally shot at 8 bit Rec-709.
This is a bit of an over simplification as during the grading process, if your workflow is fully optimised you would be grading from 8 bit to 10 bit and there are ways of taking your original 8 bit master and extrapolating additional grey shades from that signal through smoothing or other calculations. But the reality is that 8 bits for a 13 stop dynamic range is really not enough.
The whole reason for S-Log is to give us a way to take the 14 stop range of a high end camera sensor and squeeze as much of that signal as possible into a signal that remains useable and will pass through existing editing and post production workflows without the need for extensive processing such as de-bayering or RAW conversion. This isn’t to much of a problem if you have a 10 bit recording, but with an 8 bit recording making it work well is challenging. It can be done, but it is not ideal.