Sony Alpha A1 and the 24mm f1.4 GM lens.

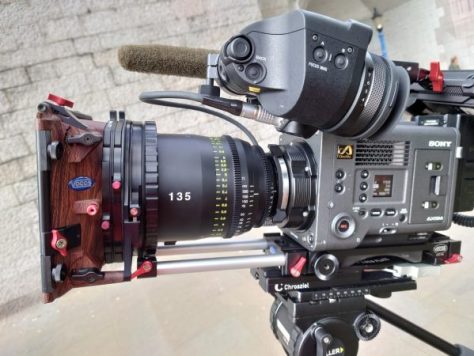
Every January I run tours to northern Norway in the hope of seeing the Northern Lights. Over the years I have been incredibly lucky and to date, every single tour I have run has seen the Northern lights. I’ve taken all sorts of cameras on these tours, everything from optical disc camcorders (PDW-700), solid state camcorders including the original Sony EX1 and most of Sony’s large sensor video cameras from FS100 to the FX9.

All of these cameras are fairly bulky and require larger tripods and battery systems. In addition, I have always taken a stills camera to shoot timelapse of the Aurora. This year I decided to downsize the equipment I was taking, so instead of taking a full-size video camera I decided to take 2 small cameras.

I already have an FX3, which is a great camera and extremely good in low light. Being part of the Sony Cinema line, it has Sony’s very nice looking Venice based colour science as well, can shoot using S-Log3 as well as the handy what you see is what you get S-Cinetone gamma curve. I know this camera well and I knew it would be a good choice for the challenges I would encounter in Norway. To compliment the FX3 I also decided to take a Sony A1. The A1 (or Alpha 1) is Sony’s flagship compact mirrorless stills camera. As well as amazing photo performance the A1 also promises much as a video camera. It’s 50.1 megapixel sensor allows it to shoot high quality video at 8K. Like the FX3 the A1 can record using S-Log3 and offers similar dynamic range to the FX3.

Sony Alpha A1

Need for Speed – fast lenses.

For many years my main lens for shooting the Northern Lights has been the Sigma 20mm f1.4. This is a great lens, but it is quite heavy and I’ve never found the autofocus on this lens to be all that good. I already have Sony’s 20mm f1.8 and this is a great lens for the money. But for the Northern Lights you really want your lenses to be as fast as possible.So for this trip I decided to take Sony’s 24mm f1.4 GM lens to see how that performed.

Sony 24mm f1.4 G Master lens – I really like this lens.

The other lens that I use extensively on trips like this is the much-underrated Sony 24-240mm zoom lens. This is a 10x zoom giving a huge range of focal lengths from pretty wide to nice and long. The aperture does ramp, going from f3.5 to f6.3 as you zoom in. But for the kinds of shoots I use this lens on this is rarely an issue. Todays cameras are so sensitive that f6.3 is plenty fast enough for all daytime applications. In northern Norway in the winter the temperature is typically -20c, often getting down as low an -35c. Changing lenses is not something you want to do unless you really must when it’s this cold, so a zoom lens is what I like to use when I’m out and about on the show scooters.

Shooting 8K with the A1.

Wherever I could I shot with the A1 in 8K. I recorded internally to CFExpress type A cards using the XAVC-HS codec. When shooting 8K at 24fps the file size is 7860×4320. It is 10 bit 4:2:0 and the bit rate is 400Mb/s. When you shoot 24p at 4K using the XAVC-SI codec the bit rate is 240MB/s, so you might wonder how it’s possible to record frames that in 8K are 4 times larger than 4K with a codec only half the size. The XAVC-HS codec is based on the latest H265 codec. H265 is an ultra efficient long GoP codec. Long GoP codecs can be very efficient as they record a master frame called an “I” frame and then for the next group of frames they only record the differences between the first “I” frame and the next “I” frame. The GoP (group of pictures) can be anywhere up to 180 frames long (but is typically 24 to 60 frames long). This method of compressing moving images is very effective and very efficient. But it can sometimes struggle with very complex images where there is a lot of random motion. Random motion cause issues for the motion prediction algorithms in the codec. In my own footage from Norway, I did notice some minor artefacts in the rippling water within shots across the Fjords.

Filming water can be a real challenge for long GoP codecs, but the A1 did very well.

Moving water is always going to be tough for a Long GoP codec, But I suspect that unless you were actually looking for the artefacts most people wouldn’t notice them. When I graded the A1 footage I also found other very minor artefacts if I pushed the footage hard during the grade. But having said all of that, overall, I think the footage from the A1 looks pretty amazing.

One thing you really do need to consider if you are thinking of using the A1 to shoot 8K is that the XAVC-HS HEVC codec requires a lot of extra processing power to decode. So, your computer needs to be a fast one. Preferably one made in the last couple of years as the most recent processors and graphics cards now include special optimisations for the HEVC codec that will really help.

The sensor in the A1 uses Sony’s latest multi-layer stacked technologies. It is surprisingly sensitive and very low noise. It has excellent dynamic range, around 14 stops which is typical of most current large sensor cameras and very pleasing colour response.

Frame grab from the Alpha A1.


The camera performed better than I expected in low light and while for me at least the A7SIII/FX3 and FX6 remain the kings of low light, the A1 isn’t actually all that far behind. This is particularly impressive when you consider that the pixels in the A1 are much smaller than the pixels in the A7SIII. Having said that, it does appear that the A7S3/FX3/FX6 sensor combines 4 photosites under a single colour filter to create a single “pixel”  – could they both be based on a very similar sensor? The A1 sensor is 8640 x 5760 while the A7S3 sensor is 4240 x 2832, the numbers are close enough to believe the underlying sensor could be the same.

For a camera with so many pixels the A1 has a very low level of rolling shutter, you are highly unlikely to encounter any significant rolling shutter issues thanks to the 16ms readout time at 8K. Again, it is interesting to note that the 8.7ms readout of A7S3/FX3/FX6 at 4K is almost exactly half that of the A1 – further pointing to sensor similarities.

Golden Hour = Golden Day.

One of the great things about Norway in the winter is that when the skies are clear the very low sun means that you get golden hour light almost all day. The A1 did an excellent job of capturing the rich colours and deep shadows, especially that deep orange light that seems to make objects glow. Rather than going for a film style grade I chose to use a high contrast and vibrant grade for the sample video. I edited the footage in DaVinci Resolve using ACES colour management. The initial grading was done in HDR and I have uploaded an 8K HDR version for those of you that have an HDR TV or monitor.

Beautiful golden hour colours captured by the Sony A1


The days in northern Norway in January are very short and brutally cold. You only have to look at the shots of the dog sled driver to see how well wrapped up he is. It got down to -34c the day we went dog sledding. Even without a cover the A1 performed very well in the cold. There was some loss of battery life but this is to be expected. If you do find yourself shooting somewhere very cold, try to keep your batteries in an inside pocket until you need them to keep them warm.

At night I decided to use the A1 to shoot time-lapse of the Aurora while using the FX3 to video the Aurora. The A1 has a built in intervalometer so it’s very easy to shoot timelapse with it.

The 24mm f1.4 GM lens.

A frame of the Aurora taken with the A1


Shooting stars at night with a wide angle lens is very challenging. You have to be very careful to ensure that your stars and in good focus. I use the cameras built in image magnification to check and double check my focus.  One thing that many wide lenses suffer from is an optical defect called “coma”. Often stars that should be a tiny round point of light will take on a slightly elongated appearance, looking like a comma sign or comet rather than a dot, especially towards the edges and corners of the frame. My Sigma 20mm has very little coma and it’s one of the reasons why I like it so much. But the Sony 24mm f1.4 has even less, in fact it is almost completely non-existent. The 24mm is also very, very sharp even wide open, there is no need to stop down to sharpen the image as with some other lenses. It is also a very compact lens and yet despite its small size and low weight it manages to fit in a proper iris ring as well as the large focus ring. Like most of Sony’s most recent lenses the 24mm GM has a linear focus ring. Linear focus means that the amount you turn the focus ring for any given focus change remains completely constant. As a result, you can manually pull focus from one object to another very easily as each time you shift the focus back to your starting point the focus ring will return to exactly the same position each time.

While not quite as wide as my 20mm the clarity and lack of distortions in the images from the 24mm GM means that this lens is now easily my favourite lens for shooting the Aurora or star fields. Of course, it is also very competent for shooting during the day as well. The autofocus is very fast and completely silent due to the use of linear focus motors. The extra assignable button on the lens body is also very handy.

Together the A1 and the 24mm GM were a delight to use. I have to admit that I am wondering whether an A1 could replace my FX3 or FX6. The richness of the 8K images from the A1 are impressive to say the least. I have done a few 8K projects for clients already, But I am not yet regularly delivering in 8K and I don’t think it will be something that I will be asked for regularly for a couple years yet. Besides, most of my clients that do want 8K are really going to want me to shoot on a Venice 2 rather than the A1. I also don’t think I can push the A1 8K images in post quite as much as I can the XAVC-S-I or XAVC-I from the FX3/FX6. Plus, when you do start to do any heavy image manipulation at 8K even my MacBook M1 Max starts to bog down (I actually find it easier to work with the 8K XOCN from Venice 2 than the 8K XAVC-HS from the A1). The FX3 will remain my main camera for my Aurora shoots for the next couple of year but perhaps I will need to start saving some pennies to add an A1 to my camera collection, it certainly impressed me and it would be nice to start shooting some of my stock footage in 8K.

NOTE: To watch the video in 8K you will need a monitor, TV or device capable of 8K playback. To view in HDR you will need to be using an HDR TV or HDR monitor. If you do not have an 8K or HDR TV/Monitor then YouTube will detect this and instead send you a standard dynamic range verison of the video at the highest resolution that your device can support. For the best viewing experience please watch using a HDR device that supports HDR10 ST2084/Rec2020.

Camgear Elite 8 Mini Tripod


Tripods are very important but often a secondary consideration when putting together a camera kit due to their relatively high cost. But a good quality stable tripod with a decent fluid head can make a world of difference. All too often I see people struggling with tripods with low quality fluid heads or wobbly legs.

Buy a good tripod and it will likely outlast any camera that you buy, so really it makes a lot of sense to get the best you can afford. Most of you are probably already familiar with premium brands such as Miller, Sachtler or Vinten etc and you will never go far wrong with a tripod from them, but they are not cheap. So what about something similar but a bit more affordable, without sacrificing performance,  features or quality? 

Let me introduce you to the Camgear Elite 8 Mini, which was launched at NAB 2022

This is a lower cost alternative to a Sachtler tripod. The design is in fact based on a Sachtler design and a lot of the parts such as the camera base plates are interchangable. It is made in China, but is well constructed.  In order to reduce costs Sachtler tripods are no longer made in Germany (I believe they are now made in Costa Rica). 

The kit features a nice counterbalanced fluid head that can take a camera up to 10Kg. The carbon fiber tripod legs have a 75mm bowl and feature a single high level locking lever for each leg, so there is no need to bend down to reach a low lever at the bottom of the legs. The kit comes with everything you need including rubber feet, mid level spreader and pan bar.  Weighing in at 5.7kg this tripod provides a very reasonable balance between stability and portability. Heavier tripods will always tend to be more stable, but no one really wants to carry more weight than necessary.  The fluid head is very nice, it has 4 stages of damping for pan and tilt (off plus 3 different damping levels) with a very smooth action and none sticking that is common with cheaper tripod. The head will counterbalance up to 10kg and the counterbalance adjustment is in 1kg steps.

There are some nice little touches beyond the original Sachtler design such as a revised and easier to use release lever for the quick release plate, a built in tool for undoing the base plate screws and it even comes with spare screws attached to the tripod head.

I feel this tripod is a great match for cameras such as the Sony FX6 or perhaps a lighter weight FX9 kit.  Take a look at the video for more details or check them out at your local dealer. 

www.camgear.tv/el8mini

Disclosure: I was assisting Aspectra, the European distributor for Camgear at the NAB2022 show.  But, I really do think this is a nice tripod for the money and the views above and in the video are my own honest opinion based on the time I spend testing the tripod in Las Vegas.

Sony FX9 DPR-394 Board Failures, my thoughts.

We all fear the failure of any expensive electronics, especially if it is out of warranty. So when a user reports that their FX9 has failed, seemingly for no reason and that it is the very expensive to replace DPR-394 board it causes a lot of concern for not only the unfortunate owner, now faced with a huge repair bill but also for other FX9 users.

Failures are not common.

The first thing I will say is that there are thousands and thousands of FX9’s out there being used every single day.  Over the last 2.5 years, across all of the user groups I monitor I have probably seen less than 20 instances of people reporting the unexplained failure of their FX9 ( I think I’ve seen about 15 that I can remember). But, it must be said that the most common unexplained failure does seem to involve the DRP-394 board. But, this isn’t really all that unexpected as the DPR-394 is the heart of the camera. It manages everything the camera does, performs all of the image processing, manages the power supply, provides the signals that go to the HDMI, SDI and VF.

A problem we have today with modern camera repairs is that repairs are normally done by swapping out faulty boards. Because the majority of service centers only ever go so far as to determine which board is faulty it is nearly impossible to understand what caused the problem.

Some things I have observed:

Amongst the reported failures some appear to be directly related to the use of D-Tap connectors to power monitors or other accessories. D-Tap connectors can very easily connected the live side of the connection before the negative side and this leads to power surges through the HDMI/SDI  that has quite likely taken out the DPR-394 board. There is also what appears to be a higher instance of cameras powered by V-Lock adapters that suffered DPR-394 failures. It might be that this is also related to D-Tap power issues as I think a big reason why many use V-lock batts is to power not only the camera but also accessories, most commonly via the dreaded D-Tap plugs, but it could be many things and unless you isolate exactly which bit of the board has failed it’s impossible to say why it has failed.

Because the DPR-394 board does virtually everything and represents most of the cameras electronics, it is not a surprise that it is also the most common point of failure. While any failure is unwelcome, the number of failures I have seen is not in my opinion an indication of a design issue. If there really was a design flaw I believe we would be seeing a lot more failures given the thousands of cameras in use. I suspect that in many cases some external factor may have led to the failure of the board.

My advice is to take great care when using D-Taps to power accessories off the cameras battery. Always do all your power connections first, then check any accessories power up correctly before finally connecting the SDI or HDMI cables. And then do the reverse when disconnecting, SDI/HDMI disconnected first, power down the camera and accessories properly, remove the power connections  last. It’s worth pointing out that many cameras from many manufacturers, including Arri, Canon etc have suffered damage due to power surge issues related to D-Tap connectors.

Additionally always power the camera up from the on/off switch and then switch it off and allow it to power down properly. Never remove or restore the power to a camera that is turned on. The cameras power switch does not connect/disconnect the power, it is a switch that instructs the camera to boot up or power down in a specific order and it needs the power to the camera to be correctly connected and stable to ensure this all happens in the right order. If using a V-Lock adapter you really need to avoid the camera suddenly losing power when the battery shuts off without warning.


EDIT: Quite a few people have been commenting about failures of boards in other cameras including Venice, failures that are often directly attributed to the use of D-Tap or other power cables powering externally attached devices off the same power source as the camera. This is not a camera design issue, it’s a connector design issue. It should be noted that Sony don’t make batteries with built in D-Tap sockets for this very reason and that Sony don’t include D-Tap sockets on their camera bodies. There is one on the XDCA-FX9 but this is a current and voltage limited, protected socket with current and voltage limiters and trips and many connected devices will cause this to trip.  The one common thread across a very large number of these failures is the use of D-Taps. The issue with D-Taps is that very often the positive power pin makes contact before the negative pin and this causes power to run the wrong way through various circuits trying to find a way back to the missing ground/negative causing havoc with the sensitive electronics inside the camera. 

This is an issue for Arri, Panasonic, Canon and just about every camera manufacturer.


More on Adobe’s new color managed workflow.

I’ve written about this before, but the way Adobe have changed the way they manage colourspaces has changed, it hasn’t been well documented, and it’s causing a lot of confusion.

When importing Log footage into the latest versions of Adobe Premiere instead of the log footage looking flat and washed out as it used to, now it looks contrasty and well saturated. If it has been exposed correctly (according to the manufacturers specifications) then it will look like normal Rec-709 footage rather than the flat look that most people associate with log. This is confusing people, many assume Adbe is now adding a LUT to the footage by default, it isn’t. What is happening isd a fundamental change to the way Premiere handles different colorspaces.

NOT ADDING A LUT.

Premiere is NOT adding a LUT. It is transforming between the captured colorspace and the display colorspace so that the footage looks correct with the right contrast, colour and brightness on your display. Your footage remains in its native colorspace at all times (unless you force it into an alternate and possibly wrong colorspace by using the interpret footage function).

Your display could be 709, HDR10, HLG, SGamut3/S-log3 and in each case the footage would, within the limitations of the displays format have the same basic contrast and colour etc, the footage would look the same whether viewing in SDR, HDR or Log because Premiere maps it to the correct levels for the output colorspace you are using to view your content.

OLD BROKEN WORKFLOWS.

The issue is that previously we have been using very broken workflows  that are normally incapable of showing capture colorspaces other than Rec-709 correctly. This has made people believe that log formats are supposed to look flat – They are not! When viewed correctly they should  have the same contrast as 709 etc. Log is not flat, but we have been viewing it incorrectly because most workflows have been incapable of mapping different source colorspaces to our chosen working/viewing colorspace.

LUTs ARE A QUICK FIX – WITH LIMITATIONS.

Up to now to fix these broken workflows we have added LUT’s to convert our beautiful, high dynamic range, vast colorspace source formats into restricted, reduced dynamic range display formats. Once you add that 709 LUT to you S-Log3 footage it is no longer SGamut3/Slog3 it is now Rec-709 with all the restrictions that 709 has such as limited dynamic range, limited colorspace etc and that may limit what you can do with it in the grade. Plus it limits you to only ever outputting in SDR 709.

But what we have now in a colour managed workflow is our big range log being displayed correctly on a 709 display or any other type of display, including HDR or DCI-P3 etc. Because the footage is still in its native colorspace you will have much greater grading latitude, there’s no knee added to the highlights, no shadow roll off, no artificial restriction to the source colorspace. So you can more easily push and pull the material far further during adjustment and grading (raw workflows have always been color managed out of necessity as the raw footage can’t be viewed correctly without first being converted into a viewable colorspace).

HERE’s THE RUB!

But the rub is – you are not now adding someone else’s carefully crafted LUT, which is a combination of creative and artistic corrections that give a pleasing look combined with the Log to Rec 709 conversion.

So – you’re going to have to learn how to grade for yourself – but you will have a much bigger colour and contrast range to work with as your footage will remain in it’s full native capture range.

And – if you need to deliver in multiple formats, which you will need to start doing very soon if you are not already, it is all so much easier as in a colour managed workflow all you do is switch the output format to change from 709 to HDR10 or HLG or DCI-P3 to get whatever format you want without having to re-grade everything or use different LUT’s for each format.

HOW LONG CAN YOU STAY JUST IN REC-709?

And when you consider that almost all new TV’s, the majority of new Phones and Tablets all have HDR screens and this is all now supported on YouTube and Vimeo etc how much longer do you think you will be able to cling on to only delivering in SDR Rec-709 using off-the-shelf SDR LUTs? If you ever want to do stuff for Netflix, Amazon etc you will need to figure out how to work in both SDR and HDR.

IT’S HERE TO STAY

Adobe have done a shockingly bad job of documenting and explaining this new workflow, but it is the future and once you learn how to use it properly it should improve the quality of what you deliver and at the same time expand the range of what you can deliver.

I have to deliver both SDR and HDR for most of my clients and I’ve been using colour managed workflows for around 6 years now (mostly ACES in Resolve). I could not go back to the restrictions of a workflow that doesn’t allow you to output in multiple colorspaces or requires you to perform completely separate grades for SDR and HDR. The great thing about ACES is that it is a standardised and well documented workflow so you can use ACES LUT’s designed for the ACES workflow if you wish. But until Adobe better document their own colour managed workflow it is difficult to design LUT’s for use in the Adobe workflow. Plus LUT’s that work with the Adobe workflow, probably won’t work elsewhere. So – it’s never been a better time to learn how to grade properly or think about what workflow you will use to do your grading.

The bottom line is the days of using LUT’s that add both an artistic look and convert your footage from its source colorspace to a single delivery colorspace are numbered.  Color managed offer far greater flexibility for multi format delivery. Plus they retain the full range and quality of your source material, no matter what colorspace you shot it in or work in.

Tokina 16-28mm t3.0 Cine Zoom Review.

After being lucky enough to have shot with the really rather beautiful looking Tokina Vista prime lenses with Sony’s Venice II (see here), I decided to take a look at the generation 2 Tokina 16-28mm wide angle cine zoom. This lens is available in a variety of mounts including PL, E-Mount and many others and is really very good value for the money.

The lens is parfocal, has minimal breathing and minimal chromatic aberration.  To try it out, I took a PL mount sample  to Windsor to test it out with my FX9 using a Vocas PL E-Mount to PL adapter. 

I often find it difficult to write about lenses because when a lens performs well, there is little to write about without being gushy. The 16-28mm from Tokina does what it should, and it does it well. I didn’t find any particular flaws in the images from the lens and overall, they look really good. At 16mm on a full frame camera the lens gives a very wide field of view with very minimal distortion. It remains sharp into the corners and there is no significant vignetting.

It is well constructed and the 300 (ish) degree of travel focus ring has a very nice weight and feel to it. The zoom ring is a bit heavier but this prevents the zoom moving when you don’t want it to.

A few people have commented about why use a larger bulkier lens like the Tokina over a more compact and lighter photo lens. I think a lot depends on the type of project you are working on. Being realistic, if you are running around on your own, trying to quickly grab footage on a lower budget production then a photo lens with auto focus might be the better option. But when you need maximum control over focus a proper mechanical long travel focus ring is what you want. If you want to zoom during the shot, the lens needs to be parfocal. So for a more controlled shoot, perhaps for drama or other scripted productions a true cine lens like this is often preferable.  so, it’s a case of picking the right lens for the type of production you are shooting. The Tokina 16-28mm t3.0 cine zoom is absolutely worth looking at for any movie style wide angle applications. 

See the video below for some example footage and a closer look at the lens.


New SxS/AXS drivers and New Raw Viewer

Over the last few days Sony have been busy releasing new drivers and new software to support not just Venice 2 but also the AXS-R7 and newer AXS-R1 SxS card readers on Apples M1 macs as well as Windows 11.

There is a new and updated version of Sony’s Raw Viewer software that includes support for the 8K Venice 2 files and which runs correctly on Apples newer M1 silicon. This can be downloaded from here: https://www.sonycreativesoftware.com/download/rawviewer

In addition Sony have released a new AXSM utility tool with new drivers for the AR1/AR3 to support the latest cards and formats as well as support for Apple M1 silicon and Windows 11. This is an essential update if you are using these new readers or Venice 2. This can be downloaded from here: https://www.sonycreativesoftware.com/axsmdrive#download

Cine2022 Dubai. A chance to play with a Sony VENICE 2 and the rest of Sony’s Cinema Line.

To celebrate their 20th anniversary Advanced Media of Dubai are holding a special event called Cine2022. This will be the first opportunity to get your hands on and see the beautiful images from Sony’s  Venice 2 in the Middle East. I will be there to talk about the camera and it’s workflow and we will have a Venice 2 for you to play with. So, if you are in Dubai between the 17th and 19th of March 2022, do please come and say hello and ask any questions you may have about any of Sony’s Cinema Line cameras. https://www.amt.tv/all-events/cine2022

A Review of the Tokina Vista Prime Lenses

I was recently given the opportunity shoot some test footage with a Sony Venice II.  A camera like Venice needs good glass, so I put out some feelers to see what lenses I could get for the shoot. I was offered the use of a set of the Tokina Vista primes, lenses I have been wanting to try for some time, so this was the perfect opportunity to try these interesting lenses on Sony’s newest cinema camera.

Shooting at Tower Bridge London with the Tokina Vista 135mm and Venice 2


Lets cut straight to the point: I love these lenses and I loved using them with the Venice 2.

I guess I had some concerns at first over choosing the Tokina Vista’s. Lets face it, Tokina are not the first brand that springs into most peoples minds when you are thinking about high quality PL cinema lenses. But I had been hearing nothing other than good things about them and when I had played with them at a couple of different trade shows, they did always look nice.

There are currently 8 lenses in the Vista range starting at the very wide 18mm and going up to 135mm. All are t1.5, are beautifully constructed with all metal bodies. The focus and aperture rings (with approx 300 degrees of travel) are in the same position on every lens in the set, so lens swaps are easy. The 9 bladed iris works well to give pleasing smooth bokeh.

The Tokina Vista 135mm t1.5 on a Venice 2


Many manufacturers claim that their lenses have minimal breathing and this is definitely true of the Tokina Vista. Focussing from near to far resulted in only a very small change of the image size on all the lenses I tried. The breathing is truly minimal.

As I was shooting using the Venice 2’s 8.2K 17:9 mode this was a good test of the lenses resolution and sharpness. In the video at the bottom of the page you will see a couple of shots where I added a slow post production zoom in to the image, reaching 2x magnification. If you watch the video in 4K you won’t see any appreciable drop in image quality during the zoom in where I am in effect expanding the original 8.2K pixel image by 200%. This to me is a clear indication that these lenses are plenty good enough for 8K capture.

Wide shot, taken at 8.2K with the 18mm Tokina Vista.
A crop from the frame above. Even in 4K this image looks great.


But, at the same time I also felt that the lenses were not excessively sharp. There is a “roundness” to the images from these lenses that I really like. The Vista’s are also very slightly warm looking and this combined with the roundness of the image and very slight propensity to flare a little gives them a very appealing look. I guess I could describe it as a vintage look, but that might make them sound old fashioned. These are not old fashioned lenses, these are clearly modern, high performance lenses. But the images they deliver has a beautiful, almost old school look that I found to be very appealing.

The Tokina Vistas and Venice 2 deliver great colours and skin tones.
This is a crop from the above image. When you have 8.2K of pixels and a high resolution lens its very easy to reframe in post production, even when delivering in 4K.


Faces and skin tones looked really nice, of course this is a combination of both a great camera and great lenses, but the colour reproduction from the combination of Venice 2 and the Tokina Vistas was very pleasing.

At t1.5 the Tokina Vista’s are great for low light and Venice at 3200 ISO looks great.


I did have a play with most of the lenses in the set and they all appeared to perform similarly. But for the video shoot in London I focussed on the 18mm, 40mm and 135mm lenses. 

The 18mm is very wide. It is not truly rectilinear, there is some barrel distortion, but nothing too severe. You do have to remember that this is a t1.5 lens and it’s not easy to produce very fast, very wide lenses for full frame. The 46.7mm image circle of all the Vista lenses means that they comfortably cover the full frame Venice sensor and even at 18mm there is barely any light fall off or vignetting at the edges of the frame.

One of the other things that really impressed me with all the Vista’s was the lack of chromatic aberration. Even when shooting very high contrast, backlit edges or specular reflections it was hard to spot any chromatic aberration. There is not a single shot amongst all of the material that I shot where I noticed anything nasty.

Trafalgar Square, shot with the 18mm Vista. You can see that there is some barrel distortion, but it’s pretty good for an 18mm t1.5 lens.


The only negative I can really find about the 18mm is the size and bulk. This is a big and heavy lens. All the Vista have the same external diameter of 114mm. The 18mm is no different in that regard. But the 18mm is one of the longest lenses in the set, it’s 180mm from front to back. And it weighs almost 2.7Kg. A big part of the weight probably comes from the bulbous front element of the lens – which you will be glad to know does not protrude beyond the end of the lens housing, giving it some protection from accidental damage.

When you have an 8K camera, wide angle lenses can be used to capture a very wide frame that can then be cropped into to re-frame in post, so having that maximum t1.5 aperture which helps maintain a shallow DoF is important. 

London’s China Town, shot with the 40mm Tokina Vista


The 40mm lens is also really nice. 40mm is an interesting focal length, a shade longer than 35mm and wider than 50mm. I found it to be a very nice focal length for a lot of different types of shots with the Venice Full Frame sensor.  At 2.24kg it is a much lighter lens than the 18mm and a fair bit shorter at 160mm. Once again extremely small amount of breathing and near total lack of chromatic aberrations makes this a lovely lens to shoot with. When shooting high contrast point light sources such as street lights at night there is a bit of circular flare around the light source, but I find this to be quite pleasing. Strong light sources just out of frame can lead to some minor veiling flare on all the lenses in the set, but this is no worse than seen with most other similar quality lenses and the lens coatings give the flare a slight warmth that again, I find very appealing.


The 135mm lens doesn’t disappoint either, shooting at 135mm and t1.5 delivers a very narrow depth of field.  As expected this is one of the larger lenses in the set. It’s 187mm long so a bit shorter than the 18mm but it is heavier with the PL mount version coming in very close to 3kg. There isn’t much more I can say about this lens that I haven’t covered with the other lenses, extremely minimal breathing, near zero chromatic aberration etc all make for a great image. The consistent look across all the lenses means this too shares that well rounded not too clinical and very slight warmth that makes these all of these lenses very appealing.

Tokina Vista 40mm on Venice 2 at 3200 ISO. I really like the way the Vistas flare.


The Tokina Vista’s are not re-housed photo lenses, they were designed specifically for digital cinematography. They are available in a range of mounts including PL, Canon EF, MFT, LPL and Sony E. I had heard good things about them from other users before I tried them and now I have had a chance to shoot with them I have to say that they are lenses that I will want to use again. Perhaps in particular when the project would benefit from a slight vintage or romantic look without being soft and without giving up any resolution. For the money they are great looking lenses and would recommend anyone that hasn’t tried them to give them a go.

PAG MPL Mini Pag Link Batteries

I’ve been using PAG batteries forever, well at least for as long as I have worked in film and TV and that’s a very, very long time now. Pag batteries have always been known for their robustness, reliability and performance, all things that are vitally important to me as often I find myself shooting in some very remote and very tough environments.

Shooting with Venice deep in the Slot Canyon powered by a Pag Link PL150 battery.


For around 7 years I have been using the Pag Link battery system. Pag link allows you to quickly link together multiple batteries. This has many benefits. For a start you can charge many batteries at once with a single channel battery charger. This is great for me when travelling as I can use the tiny Pag travel charger to charge several batteries overnight. Or back at base with my 2 channel Pag charger I will often put 3 or 4 linked batteries on each charger channel so that all my batteries will charge in one single session. And you are not limited to using a Pag charger, you can stack the Pag Link batteries on almost any charger.

A single Pag PagLink PL150 battery will run Venice for around 2 hours.


Another benefit is being able to link a couple of batteries together when you need a higher current output, perhaps to power a big video light or to run a higher powered digital cinema camera. If using more than one battery on a camera it is even possible to hotswap the rear most battery without needing to turn off the camera or stop recording.

The Pag Link batteries have served me extremely well and even after 6 or more years of use are only showing very minimal capacity loss. But as modern cameras are getting smaller and smaller and need less and less power, even the already relatively compact Pag Link batteries sometimes seemed like overkill.

Enter the MPL series.

The Pag Link MPL batteries have taken what was already a great concept and miniaturised it. Using the latest battery cell technologies Pag have managed to produce new smaller and lighter stackable batteries with the similar capacities to the original Pag Links. Pag have also listened to customer feedback adding D-Tap ports to the tops of the batteries as well as an additional USB output. The USB output module can be swapped to other outputs if you need them such as Hirose or Lemo. In addition, the MPL batteries are fitted with industry standard ¼” mounting points. These can be used to either mount accessories to the battery or to mount the battery on to something that doesn’t have a standard battery connection.

Pag Link Mini MPL99 powering my FX6 while shooting the Volcano in Iceland.


My first real test for the MPL batteries was a trip to Iceland to shoot the Fagradalsfjall Volcano. When travelling by air you must take your Lithium batteries as carry on luggage. The MPL’s are built to very high standards and UN tested, so you can be confident that they are as safe and as flight friendly as possible. The smaller size and light weight makes it nice and easy to travel with these batteries.


To get to the Volcano you have to hike up a small mountain using rocky, slippery and sometimes very steep routes. It’s around 2.5 miles from the nearest road to the closest places from where you can see the volcano crater, so a minimum of a 5 mile round trip.  I was working on my own, so had to carry camera, lenses, tripod and batteries in a backpack. Plus spare clothing, food and drinks as the weather in Iceland changes frequently and can often be quite nasty. So, every gram of weight counted. I was shooting with a Sony FX6 using an Atomos Ninja V raw recorder and needed enough power to run everything for a full day of on and off shooting. The Pag MPL’s had just become available and were perfect for the job. The built in D-Taps could be used to power the recorder. I used a V-Mount adapter plate for the camera and the USB port in the MPL batteries was perfect for topping up my phone for the live streams I was doing.

I spent several days up at the Volcano, often hiking even further from the road, seeking out different camera angles and different views. A single 100Wh MPL 99 ran the whole setup for most of the day. By adding an additional 50Wh MPL50 on to the back of the MPL99 I had power in reserve. The diminutive size and light weight of these batteries made a big difference for this shoot. Then back at the hotel I could use the Pag travel charger to charge all of my MPL batteries overnight by connecting them together on the charger, no need to get up in the middle of the night to swap batteries over.

Since then, I’ve used the MPL batteries for many different applications. Their small size is deceptive, they don’t look like they would be able to power anything for a long time, but they can. On a shoot using a Venice 2 I used a stacked MPL99 and an MP50 to power the camera while walking around London to save weight. The batteries ran the camera for close to 2 hours and the capacity display on the battery as well as the run time indicator in the cameras viewfinder was highly accurate.

Pag MPL99 and MPL50 being used to power a Sony Venice II


I can’t recommend the Pag Link system highly enough. The only negative is that the original larger V-Mount Pag Link batteries and the new compact V-Mount Pag Link ML batteries can’t be connected together. A new mating system for V-Mount was require for the new smaller batteries. The Gold mount versions both old and new can be stacked together. Stacked together, despite their diminutive size a pair of MPL99’s can deliver up to 12 amps of power, enough for most video lights. The intelligent linking system means there is no issue connecting a fully charged battery to a flat battery. These are very clever, small, light and compact batteries.

Timecode doesn’t synchronise anything!!!

There seems to be a huge misunderstanding about what timecode is and what timecode can do. I lay most of the blame for this on manufactures that make claims such as “Our Timecode Gadget Will Keep Your Cameras in Sync” or “by connecting our wireless time code device to both your audio recorder and camera everything will remain in perfect sync”. These claims are almost never actually true.

What is “Sync”.

First we have to consider what we mean when we talk about “sync” or synchronisation.  A dictionary definition would be something like “the operation or activity of two or more things at the same time or rate.” For film and video applications if we are talking about 2 cameras they would be said to be in sync when both start recording each frame that they record at exactly the same moment in time and then over any period of time they record exactly the same number of frames, each frame starting and ending at precisely the same moment.

What is “Timecode”.

Next we have to consider what time code is. Timecode is a numerical value that is attached to each frame of a video or an audio recording in an audio device to give it a time value in hours, minutes, seconds, frames. It is used to identify individual frames and each frame must have a unique numerical value. Each individual successive frames timecode value MUST be “1” greater than the frame before (I’m ignoring drop frame for the sake of clarity here). A normal timecode stream does not feature any form of sync pulse or sync control, it is just a number value.

Controlling the “Frame Rate”.


And now we have to consider what controls the frame rate that a camera or recorder records at. The frame rate the camera records at is governed by the cameras internal sync or frame clock. This is normally a  circuit controlled by a crystal oscillator. It’s worth noting that these circuits can be affected by heat and at different temperatures there may be very slight variations in the frequency of the sync clock. Also this clock starts when you turn the camera on, so the exact starting moment of the sync clock depends on the exact moment the camera is switched on. If you were to randomly turn on a bunch of cameras their sync clocks would all be running out of sync. Even if you could press the record button on each camera at exactly the same moment, each would start recording the first frame at a very slightly different moment in time depending on where in the frame rate cycle the sync clock of each camera is. In higher end cameras there is often a way to externally control the sync clock via an input called “Genlock”.  Applying a synchronisation signal to the cameras Genlock input will pull the cameras sync clock into precise sync with the sync signal and then hold it in sync. 

And the issue is………..

Timecode doesn’t perform a sync function. To SYNCHRONISE two cameras or a camera and audio recorder you need a genlock sync signal and timecode isn’t a sync signal, timecode is just a frame count  number. So timecode cannot synchronise 2 devices. The camera’s sync/frame clock might be running at a very slightly different frame rate to the clock of the source of the time code. When feeding timecode to a camera the camera might already be part way through a frame when the timecode value for that frame arrives, making it too late to be added, so there will be an unavoidable offset. Across multiple cameras this offset will vary, so it is completely normal to have a +/- 2 frame (sometimes more) offset amongst several cameras at the start of each recording.

And once you start to record the problems can get even worse…

If the camera’s frame clock is running slightly faster than the clock of the TC source then perhaps the camera might record 500 frames but only receive 498 timecode values – So what happens for the 2 extra frames the camera records in this time? The answer is the camera will give each frame in the sequence a unique numerical value that increments by 1, so the extra frames will have the necessary 2 additional TC values. And as a result the TC in the camera at the end of the clip will be an additional 2 frames different to that of the TC source. The TC from the source and the TC from the camera won’t exactly match, they won’t be in sync or “two or more things at the same time or rate”, they will be different.

The longer the clip that you record, the greater these errors become as the camera and TC source drift further apart.

Before you press record on the camera, the cameras TC clock will follow the external TC input. But as soon as you press record, every recorded  frame MUST have a unique new numerical value 1 greater than the previous frame, regardless of what value is on the external TC input. So the cameras TC clock will count the frames recorded. And the number of frames recorded is governed by the camera sync/frame clock, NOT the external TC.  

So in reality the ONLY way to truly synchronise the timecode across multiple cameras or audio devices is to use a sync clock connected to the  GENLOCK input of each device.

Connecting an external TC source to a cameras TC input is likely to  result in much closer TC values for both the audio recorder and camera(s) than no connection at all. But don’t be surprised if you see small 1 or 2 frame errors at the start of clips due to the exact timing of when the TC number arrives at the camera relative to when the camera starts to record the first frame and then possibly much larger errors at the ends of clips, these errors are expected and normal. If you can’t genlock everything with a proper sync signal, a better way to do it is to use the camera as the TC source and feed the TC from the camera to the audio recorder. Audio recorders don’t record in frames, they just lay the TC values alongside the audio. As an audio recorder doesn’t need to count frames the TC values will always be in the right place in the audio file to match the cameras TC frame count.