
When Sony launched the FS7 II they also launched a new lens to go along with it. The previous zoom lens that was bundled with the FS7 was the SELP28135G, a 28-135mm f4 zoom lens that would work with Super 35mm, APS-C and full frame cameras. While generally well received this lens is not without it’s problems. For a start it’s not really wide enough for use as a general purpose lens on an APS-C or Super 35mm sensor. The other problem is that the zoom is very slow. Even when set to manual zooming in and out takes a long time. You turn the zoom ring and then have to wait for the lens to catch up.
The new lens is a wider 18mm to 110mm f4 lens. This is a really useful zoom range for a Super 35mm camera. But the new lens can only be used on S35mm and APS-C cameras. It can’t be used with full frame cameras like the A7s in full frame mode.

But what about the zoom speed? Well this has been addressed too. On the 28-135mm lens the zoom function is electronic. There is no mechanical connection between the zoom ring and the optics of the lens. The 18-110 has a proper mechanical connection between the zoom ring and the internal lenses, so now you can crash zoom in and out as fast as you want. In addition the zoom servo motor is much faster and motorised zooms take place much more rapidly. One downside to this is that it’s a bit harder to control the zoom speed. You can do slow creeping zooms if you are very careful with the cameras zoom rocker, but it’s hard to do. The difference in pressure on the zoom rocker between creeping zoom and medium speed is tiny. The lens tended to change zoom speed quite quickly. While it is indeed very nice to have a variable speed motorised zoom, don’t expect the fine degree of control that you get from admittedly more expensive traditional ENG lenses. Lets face it this lens is only around £3K/$5K which is remarkable cheap for a parfocal s35mm zoom. Take a look at the video below for an idea of the zoom speeds etc.
Is it really parfocal? Well yes, it does seem to be parfocal. I only had the lens for a morning to play with, but in all my tests the focus remained constant throughout the zoom range.
So, what about focus? Like the 28-135mm lens there is a nice big focus ring that slides fore and aft.

In the rear position the focus is manual and there are calibrated focus markings and end stops. You get about 180 degrees of focus travel from 0.95m (3.1ft) to infinity (in autofocus you can focus slightly closer when the lens is at the wide end). The focus ring has 0.8mm pitch teeth for use with most standard follow focus units, although this gear ring is very close to the end of the lens, so it may be tricky to use if you have a matte box in place. Breathing is very well controlled and barely noticeable unless going through very large focus throws. Out of focus Bokeh isn’t bad either, I didn’t observe any nasty surprises in the limited time I had to play with the lens.

Sharpness and flare. The lens appears to be nice and sharp at the wide end but just a touch soft at the long end. It’s not bad overall but when shooting at 4K I could just about detect the lens becoming marginally softer as I zoomed in. The sample I had was a well used pre-production prototype, but I’m going to guess that the production lenses won’t be hugely different. Shooting the roof of a house against a bright sky revealed only a small amount of flare, certainly nothing out of the unusual for a zoom lens.


Overall I really like this lens. It even has a support point at the front of the lens body for additional stability. While f4 isn’t the largest of apertures it is quite usable and even wide open the lens performs well. For the money it is a lot of lens. I think we need to be realistic with our expectations for zoom lenses and large sensors. Bigger zoom ratios require bigger lens elements if we want to maintain a constant aperture. Bigger lens elements cost more to produce.

One advantage Sony have over the competition is that it’s easier to make zoom lenses for the very short flange back distance of the E-Mount cameras compared to the deeper flange back of PL or Canon mounts. The closest competition to this lens is the Canon 18-80mm T4.4 (f4 ish) which is a fair bit more expensive (£4K/$6K). If you want a similar zoom range then you’re looking at the beautiful Fujinon 20-120 T3.4 at around £14K/$19K.
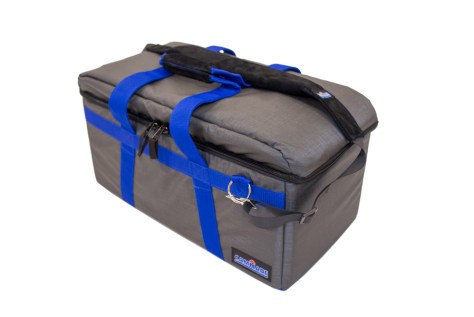 I’ve been using Camrade bags for years. They are tough, protect my gear well without being heavy and clunky like pelicases and other hard shell cases. In addition they don’t scream “expensive equipment here”. They just look like large holdalls. One of the best features is the use of dividers, pads and inserts that are attached with velcro that allow you to reconfigure the bags for different applications.
